In this article, you will discover how to construct 24 different types of owl houses with minimal expenses and little time.
Each of the DIY owl house designs is hand-picked to provide you with the ideal owl house. Browse through the plans and begin attracting
Nest Box For Little Owl
A DIY nest box designed for little owls can be occupied year-round, allowing you to observe a bird family’s growth. Its front opening permits easy access for refreshing food or water.
The small entrance helps prevent larger animals from intruding. This nest box offers safety and convenience, making it an ideal addition for any bird enthusiast.
Build A Barn Owl Nest Box
Creating a barn owl nest box is a straightforward and enjoyable project for bird enthusiasts. Materials needed include lightweight wood, nails, and paint for decoration.
Note that this box is best suited for indoor use due to its delicate design. Ideal settings are residential barns or campers seeking a solution to mice problems. This project is cost-effective, easy to construct, and allows for personal customization.
DIY Barn Owl Nesting Box
To build your barn owl nesting box, gather ½” plywood, 2×2 lumber for framing, and various hardware. You will need deck screws, scrap hinges, buck hinges, screw eyes, carriage bolts, nuts, and washers. Begin by organizing these materials and start framing the box assembly.
How To Build And Install An Owl Nesting Box
First, analyze the dimensions of the nesting box. Measure and cut your lumber into the required pieces. Prepare the pieces by sanding those that need it and drilling the necessary holes on the sides and front pieces. Assemble these pieces using screws or nails. Ensure all parts fit tightly before mounting the nesting box on a suitable tree.
How To Make A Screech Owl Box

Building a screech owl box is a fantastic way to welcome wildlife to your backyard. Start by gathering materials like wood, screws, and a saw. Assemble the box according to dimensions that are suitable for screech owls.
Mount the box high on a tree or pole, ensuring it faces away from prevailing winds. Enjoy the sight of these beautiful birds in your garden.
Building a Screech Owl Nesting Box
To build a screech owl nesting box, start by cutting the opposing panels and the back panel. Next, cut the front panel to a length of 16 inches. Lastly, prepare the roof. You can use either power tools or hand tools to complete these steps.
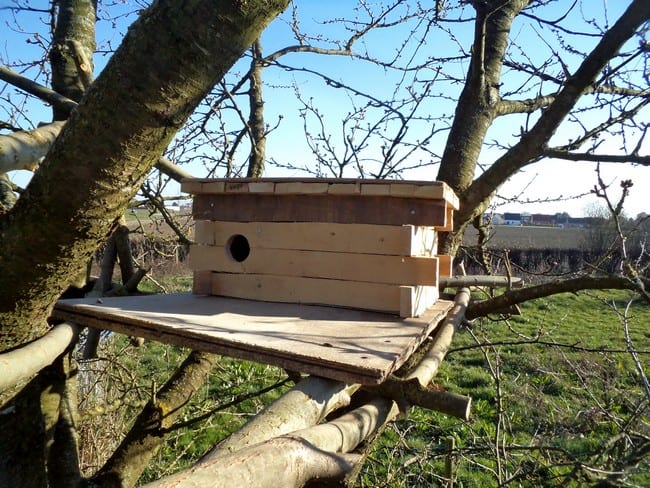
How to Build a Barn Owl Nestbox for a Tree
To make an effective barn owl nest box for a tree, design it with an entrance hole set back and the sides and roof set forward. This setup provides added protection for the owls.
Include a drainage hole in the front to keep the box’s interior dry. Ensure there is sufficient depth between the entrance hole and the bottom of the box for safety and comfort.
How To Make A Barn Owl House
To create a barn owl house, measurement plays an essential role. Begin by collecting all necessary materials, tools, and safety equipment. It is helpful to have a cutting list for precision.
Next, measure and cut the wood into the required pieces. Once all the pieces are prepared, start assembling them carefully. Use screws and wood glue to ensure the structure’s stability and durability.
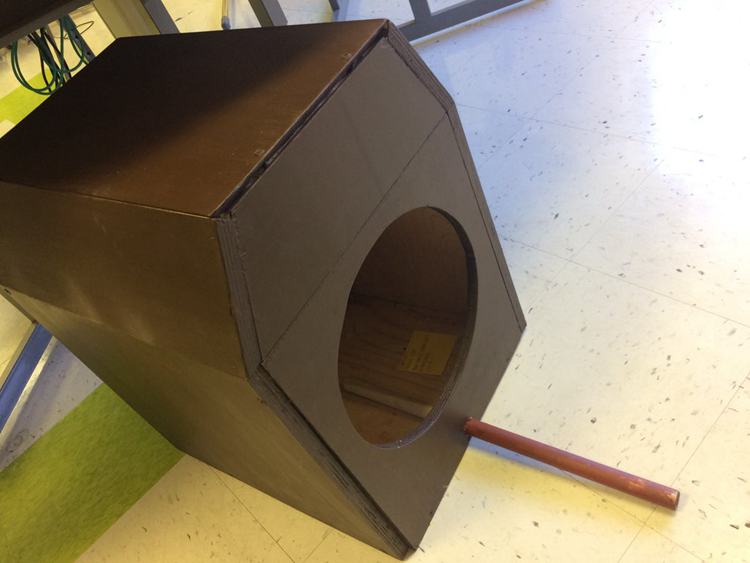
DIY Screeching Owl House
Gather the necessary materials: wood, miter saw, drill, nail gun, wood primer, wood glue, and tape measure.
- Step 1: Cut the wood into 15 slabs.
- Step 2: Assemble the 15 slabs into 4 pallets.
How To Build an Owl House That Attracts Them
Create a box measuring 30cm deep, 30cm wide, and 60cm long. Once assembled, attach the box to a tree at a height of 5 meters.
Ensure the entrance hole is properly sized to accommodate owls and provide a safe, inviting environment.
How To Build An Owl Box
To construct an owl box, you need to create a cutting list to size all parts accurately. After cutting the pieces, assemble the box by connecting the parts with screws and brackets. Essential tools include a drill, drill bits, a table saw, and a circular saw.
DIY Barred Owl Nest Box With Plans
This barred owl nest box features shingles attached to each section, made from cedar shims. Aligning the shingles isn’t too challenging, except at the locking mechanism where it gets tricky.
DIY Owl House Plans

Ensure you have the precise measurements. Begin by cutting an angled front piece. Next, measure from the center of the back, and create a square for the roof. Following these steps carefully will help you build a safe and sturdy owl house.
DIY Screech Owl Nest Box Build

Create a screech owl nest box using these steps. Gather materials like wood, screws, and a saw. Follow measurements and assembly instructions carefully. Ensure proper ventilation and drainage holes. Once built, place it 10-30 feet high on a tree, facing away from prevailing winds.
DIY Owl House Build

To create a screech owl house, start by gathering your materials and tools. Cut the wood into the necessary pieces. Next, proceed with the box assembly, a straightforward process.
DIY Owl House With Cedar Board

Create a screech owl nest house using cedar boards. Essential items include wood screws, ½” screws, a straight edge, measuring tape, framing square, cordless drill, spiral bits set, driving bits set, sandpaper, safety glasses, and gloves. These materials and tools help ensure a safe and sturdy home for owls.
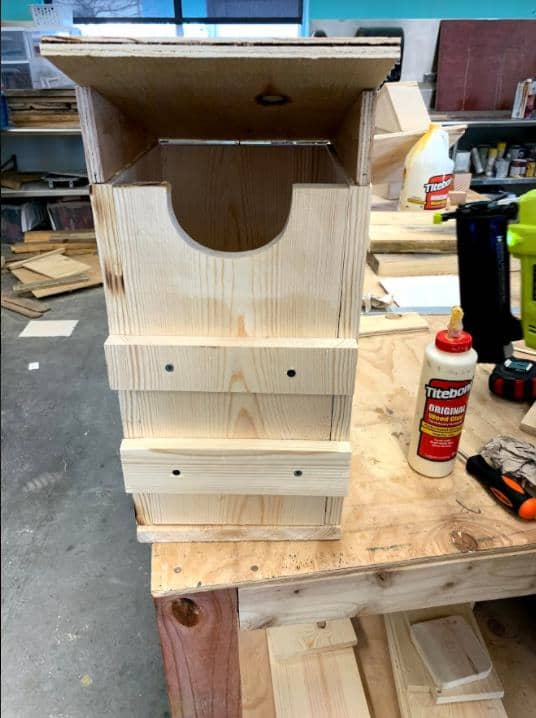
Barred Owl Nestbox Build DIY
To create a barred owl nest box, use plywood given its appropriate weight and size. Start by cutting the plywood into pieces for the various parts of the box. Prepare each section carefully. Drill ventilation holes on the side panels and entrance holes on the front panel. Ensure all pieces are accurately cut and aligned for easy assembly.
How To Build A Screech Owl House
Before you begin, ensure you have all your safety equipment and materials. Essential items include a speed square, a chisel, wood pieces, a jig, a drill, drill bits, and screws. Use screws to assemble the parts, and make sure to pre-drill the holes for easier assembly. This preparation will enhance the durability and stability of the Screech Owl house you’re building.
DIY Owl House Plan
You will need the following materials: wood pieces, galvanized screws, a chisel, brass hinges, brass wood screws, a screwdriver, a hole saw, and a drill. Steps:
- Drill 2 ½” ventilation holes on both sides.
- Make ½” drainage holes in the center and each corner of the bottom piece.
- On the front piece, drill a drainage hole 4″ from the top, centered between the sides.
Ensure all pieces fit snugly before assembly.
DIY Owl House
Start by cutting the sides of the box. Proceed to cut the front and back pieces. Once these parts are ready, begin assembling the box. Use drills and screws to secure the parts together. Follow these steps precisely to complete your owl house. The process is straightforward and quick.
DIY Owl House

To begin, cut your wood into the required pieces. Next, apply a strong adhesive to attach the sides to the top and bottom parts of the box. Once these are secured, assemble the remaining sections. Ensure you make a hole on top of the box for inserting a wooden cylinder.
DIY Recycled Owl House
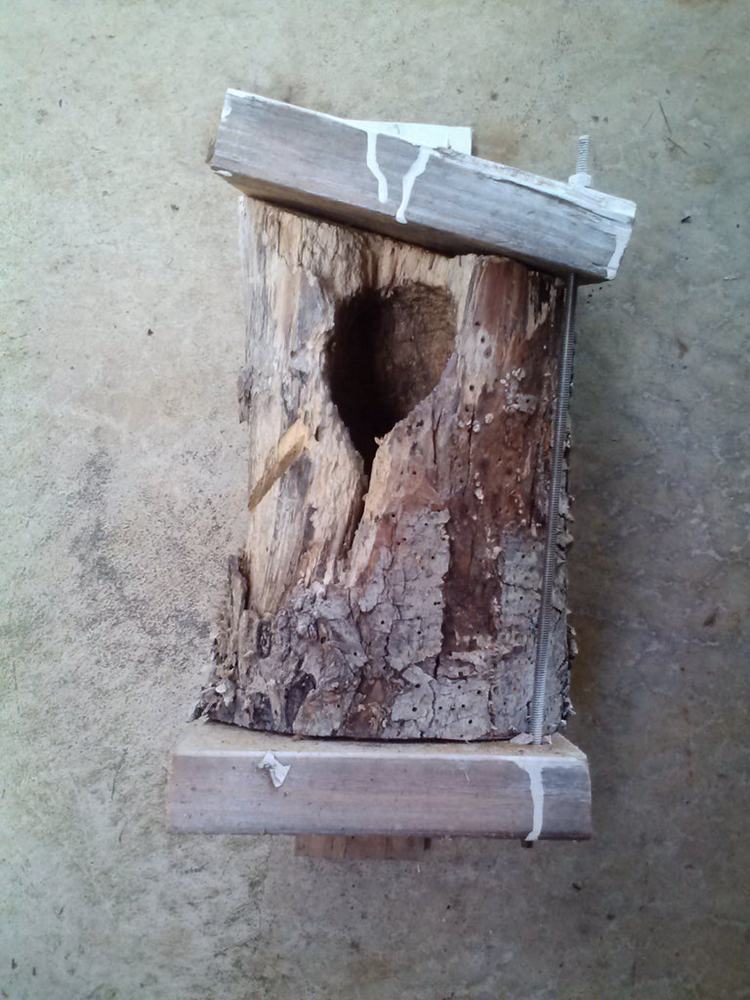
Creating a recycled owl house can be both rewarding and environmentally friendly. If you have a tree with a natural hollow, it can serve as a perfect owl house. Cut the top at a slight angle to direct rainwater away from the nesting area. Use two pieces of 2×8″ wood for the top and bottom to enhance the structure.
By reusing natural resources and minimal materials, you can provide a cozy home for owls.
Miniature Owl House
Creating a miniature owl house is an exciting project that brings nature closer to your garden. You can use basic materials for this DIY task, making it ideal for those interested in simple woodworking. Kids will enjoy this craft, as it encourages learning about wildlife.
You can find detailed instructions in tutorial videos that guide you through each step comprehensively. Making an owl house by hand is rewarding and enhances your outdoor space.
Easy DIY Owl House

To begin building your owl house, gather materials such as wood, screws, and waterproof paint. Cut the wood into panels, ensuring they fit snugly together. Assemble the panels using screws. Add a hinged door for easy cleaning. Seal the house with waterproof paint. Finally, mount it safely in your garden or yard.
Summary
If you’re looking to build an owl house on your property, there are a few things to consider. First, make sure you choose the right location, preferably near a wooded area or open field. Second, use the right materials, such as untreated wood and galvanized screws. Third, follow a proven design that includes a large entrance hole and enough space for nesting and roosting. With a little planning and effort, you can create a safe and comfortable home for these majestic birds.