Transform your cherished photos and artwork into personalized home decor with these 30 easy DIY picture frame ideas. Whether you’re a seasoned DIY-er or just starting out, this collection offers a broad spectrum of styles and materials to suit your aesthetic preferences and interior style. From playful Scrabble tile frames to unique concrete frames, each idea comes with clear, step-by-step instructions to ensure a rewarding and enjoyable project. Add a touch of your own creativity to your home decor and start making your own photo frames today.
Simple DIY Digital Photo Frame

Create your own sleek and modern digital photo frame in less than 20 minutes with the DIY kit that includes a Raspberry Pi 4, a 7″ touch display, an SD card, and the Neego frame. With the easy-to-follow setup instructions and Pyxian OS, you can quickly assemble and run your digital frame without the need for complex wiring. Simply plug and play to display all your favorite photos and brighten up any room or occasion. The minimalist design of the frame adds a stylish touch to your decor. Get started on your DIY project today!
Making a Spring Button Picture Frame
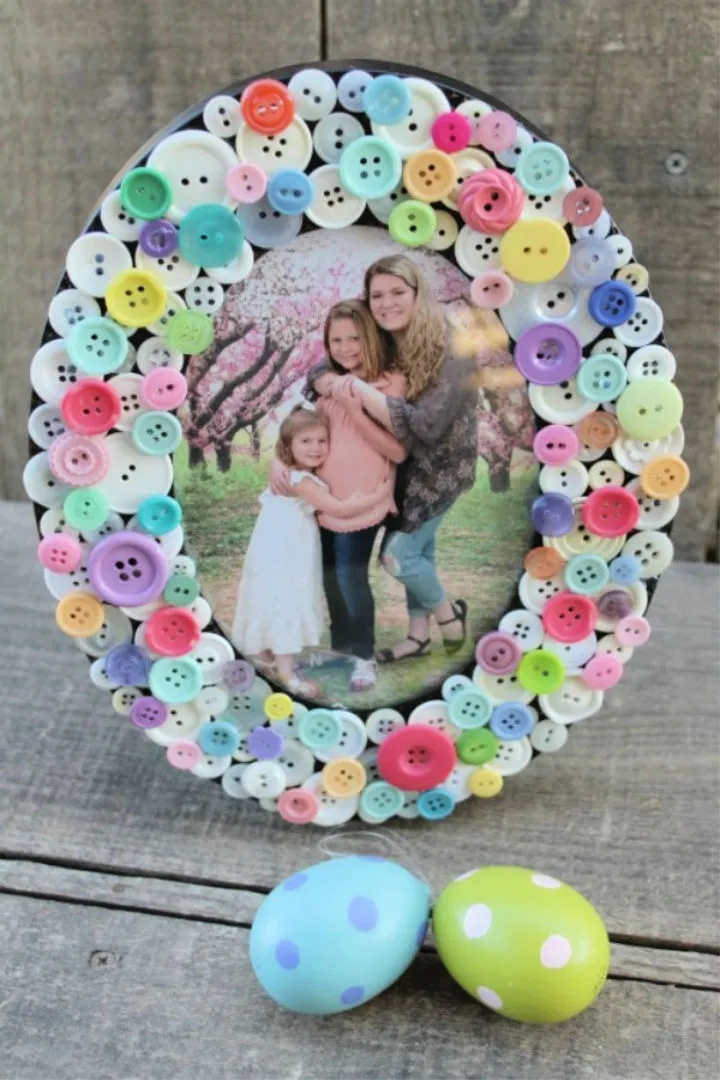
Looking for a simple and fun DIY project to add a personal touch to your home decor? Why not try making a spring button picture frame! This delightful project is perfect for welcoming the joys of spring into your home. All you need is an old picture frame and colorful buttons in various sizes. Let your creativity run wild and customize your frame to match your decor tastes.
Here are the steps to make your own spring button picture frame:
- Gather your supplies: an old picture frame, colorful buttons in various sizes, glue, and scissors.
- Remove the backing and glass from your picture frame.
- Arrange your buttons on the frame until you find a design you like.
- Glue the buttons onto the frame and let it dry completely.
- Once the glue is dry, trim any excess thread or glue from the buttons.
- Reassemble the frame with your photo or artwork and enjoy your new spring-inspired decor!
This project is perfect for Easter celebrations or just adding a pop of color to your walls. Get creative and have fun making your own unique spring button picture frame today!
Making Your Own Seashell Picture Frame
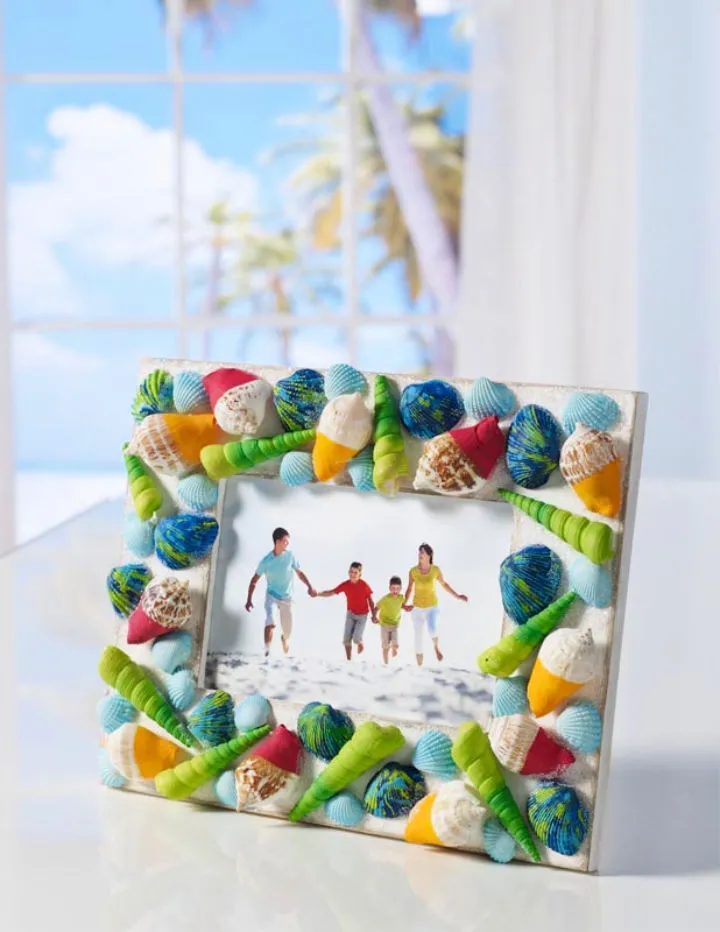
Transform your beach finds into a captivating focal point with a one-of-a-kind seashell picture frame. This DIY project allows for personalization and resourcefulness, making it the perfect addition to any room.
To get started, gather the following materials: wood frames, mixed seashells, apple barrel paint, glitter crystals, a hot glue gun, drinking straws, and sandpaper.
Begin by painting the seashells in vibrant colors to make your family keepsake even more special. Next, sand down the edges of the frame for a smooth finish and use mod podge to attach the shells. Add extra fine glitter crystal to give it a sparkle! Finish off by gluing together with hot glue and adding a drinking straw as an anchor on the backside.
With just a few simple steps, you can create a beautiful home décor with this fun project. Let your creativity run wild and cherish your memories with a unique seashell picture frame.
Making a Wooden Picture Frame Under $5

Create a unique and stylish home decor item with this simple DIY wooden picture frame tutorial. With just pine boards, wood stain, and wall-hanging hardware, you can craft a beautiful frame for under $5. This project offers endless possibilities, allowing you to create frames of any size or even an entire gallery wall. Displaying a handmade wooden frame adds a personal touch to your home while also being budget-friendly. Follow these easy steps to create your own wooden picture frame and enjoy the satisfaction of crafting something beautiful from scrap materials.
Materials needed:
- Pine boards
- Wood stain
- Wall-hanging hardware
Instructions:
- Cut your pine boards to size
- Sand the edges and corners of the boards
- Stain the boards with your desired color
- Once the stain is dry, attach the wall-hanging hardware to the back of the boards
- Hang your new wooden picture frame on the wall and enjoy!
This project is perfect for those who want to add a personal touch to their home decor without breaking the bank. With just a few simple materials, you can create a beautiful and unique wooden picture frame that will add style to any room. Get creative and have fun crafting your own wooden picture frame today!
Cheap DIY Denim Photo Frame

Transform your old jeans into a stylish and unique photo frame with this easy and affordable DIY project. Using fabric glue, a seam ripper, paper and old photo frames, you can create a trendy denim photo frame that will add character to any room. Use the seams and belt loops of the jeans to create interesting patterns on the frame. This no-sew project is perfect for a teen bedroom or den and can be completed in just a few minutes. Update your home decor in a fun and sustainable way with this upcycled craft.
Unique DIY Concrete Picture Frame
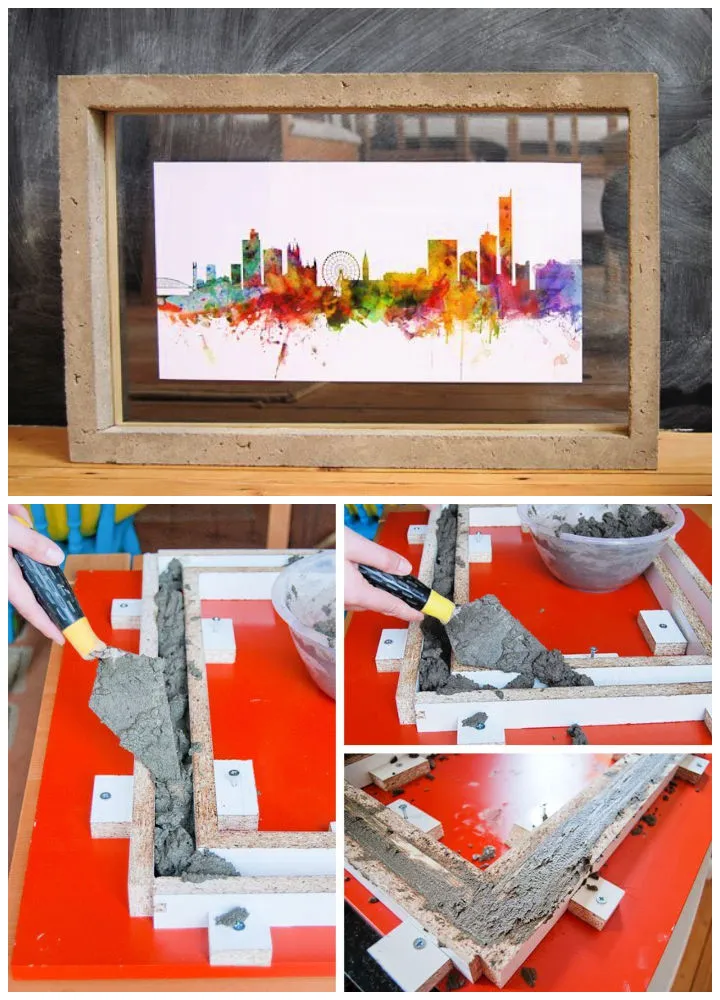
Creating a unique DIY concrete picture frame is easier than you might think! To get started, gather the following materials: concrete mixture, strip wood, old dry cleaning coat hangers, two sheets of picture frame glass, tape, and picture hangers. With these materials, you can create a one-of-a-kind concrete picture frame that will impress your guests.
To begin, mix the concrete mixture according to the instructions on the package. Then, cut the strip wood to the desired size of your frame and attach the coat hangers to the back. Once the concrete mixture is ready, pour it into the wooden frame and smooth it out with a trowel. Let it dry for at least 24 hours.
Once the concrete has dried, remove the wooden frame and sand the edges of the concrete to create a smooth finish. Then, attach the picture frame glass to the concrete with tape and add your favorite photo. Finally, attach the picture hangers to the back of the frame and hang it on your wall.
This unique DIY concrete picture frame is a great way to showcase your favorite memories. Plus, it adds a modern touch to any room. Give it a try and impress your friends and family with your creativity!
DIY Picture Frame With Scraps Ribbon
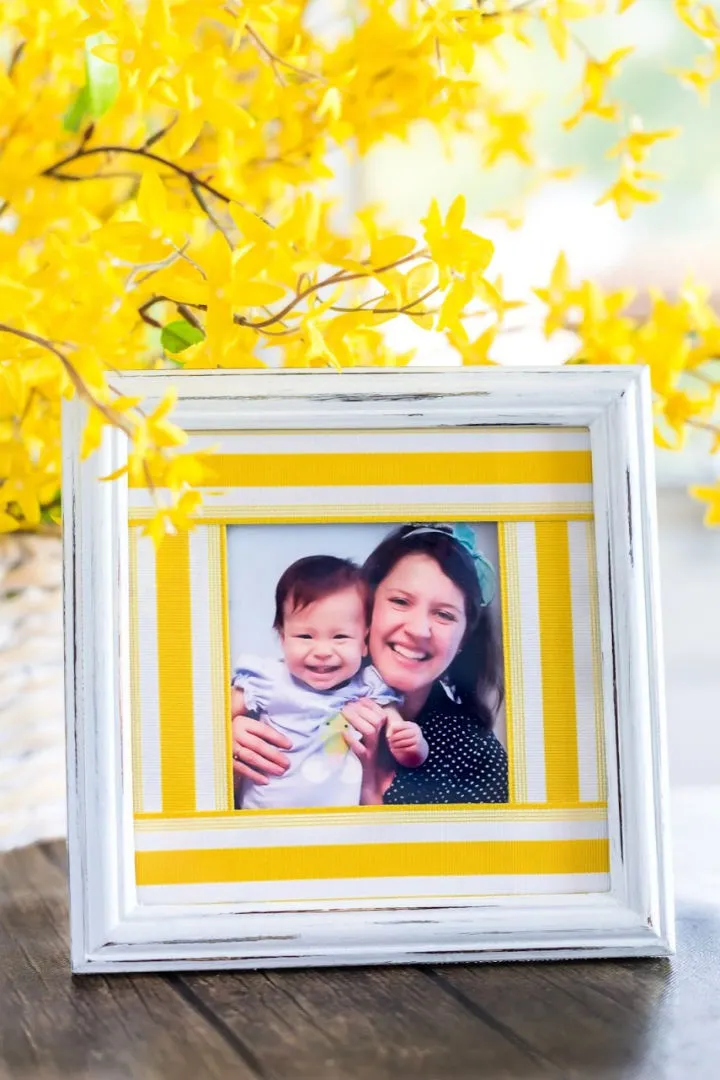
Transform your old picture frames into unique and personalized pieces with this simple DIY picture frame project. With just a few materials such as ribbon scraps, cardboard, and rickrack or other flat embellishments, you can create vibrant and colorful displays of your favorite phone photos. Choose whether to include a mat for an extra pop of color and let your creativity shine. This project is not only easy to do, but it also makes a thoughtful and personalized gift for loved ones. Bring back memories and give old frames new purpose with this fun and simple craft.
Make a Clothespin Picture Frame
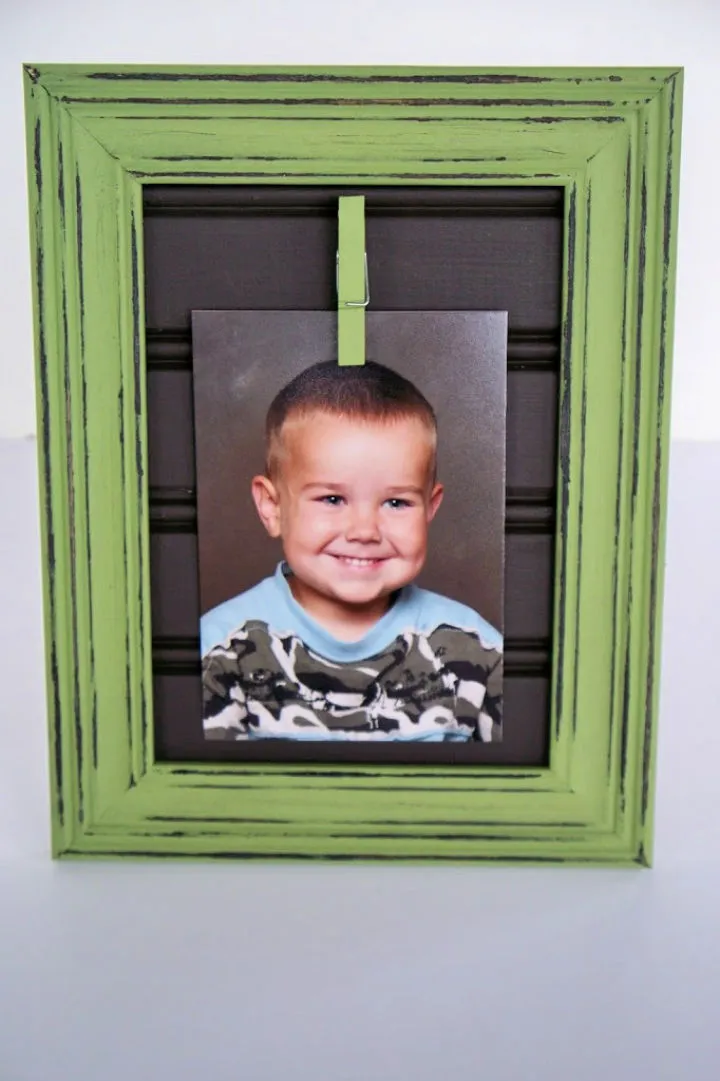
Looking for a functional and stylish way to display your favorite photos or recipe cards? Look no further than the DIY clothespin picture frame! This frame is made with bead board, clothespins, sandpaper, a large paint stick, a small hinge, and twine, and can hold a 5 x 7 photo or card. Not only is it easy to assemble with wood glue and paint, but it can also be used in a variety of settings, from the kitchen to the living room to the office. Get creative with this versatile frame and showcase your favorite memories today!
DIY Large-Scale Picture Frame
Looking for a creative and affordable way to showcase your favorite large-scale photos? Try making your own DIY cardboard photo frames! With just a few simple steps, you can create a stunning and personalized frame that perfectly complements your photo. Here’s what you’ll need:
- Large pieces of cardboard
- Scissors or a box cutter
- Ruler
- Glue or double-sided tape
- Decorative materials (e.g. paint, markers, stickers)
Follow these steps to make your own large-scale cardboard photo frame:
- Cut two identical pieces of cardboard to the desired size of your frame.
- Cut out a rectangular window in the center of one of the cardboard pieces.
- Decorate the cardboard pieces as desired.
- Glue or tape the two cardboard pieces together, with the decorated piece on top and the window piece on the bottom.
- Insert your photo into the window and secure it in place with glue or tape.
With this simple tutorial, you’ll be able to create a beautiful and unique photo frame that perfectly showcases your cherished memories.
Building a Reclaimed Wooden Picture Frame
Create a unique and personalized pet picture frame with this simple DIY tutorial. By using reclaimed wood, you can save money and have a one-of-a-kind frame. Follow these easy steps to build an oversized frame for your furry friend:
- Cut the reclaimed wood to the desired size and sand it to a smooth finish.
- Assemble the frame using wood glue and clamps.
- Cut a piece of plexiglass to fit the frame and secure it with glazier points.
- Cut a mat board to fit the plexiglass and secure it with acid-free tape.
- Attach a sawtooth hanger to the back of the frame for easy hanging.
By following these steps, you can create a professional-looking pet picture frame that showcases your beloved furry friend. Get creative and start building your own custom pet picture frames today!
DIY Picture Frame for Your Art

If you’re looking for an affordable and unique way to frame your large art prints or posters, this DIY project is perfect for you. Using only 1×2 boards, wood stain, a rag, and a sawtooth hanger, you can create a rustic picture frame that adds farmhouse or cottage-style charm to your home décor.
To make your artwork stand out even more, get creative with different stains and finishes. This easy DIY project is a great way to add a personal touch to your home, without breaking the bank. Try it today and showcase your art in a one-of-a-kind frame.
How to Build a Wooden Picture Frame
Building a wooden picture frame is a simple and fun DIY project that can add a personal touch to your home decor. Here are the steps to follow:
- Gather materials: lattice molding, corner molding, construction glue, sandpaper, wood filler, paint, or stain.
- Cut the lattice molding and corner molding to the desired size of your picture frame.
- Apply construction glue to the corners of the lattice molding and attach the corner molding to create the frame.
- Allow the glue to dry completely.
- Sand the frame to smooth out any rough edges.
- Apply wood filler to any gaps or holes in the frame and let it dry.
- Sand the frame again to ensure a smooth surface.
- Apply paint or stain to the frame and let it dry completely.
- Insert your artwork into the frame and display it on your wall.
Building a wooden picture frame is an affordable and creative way to display your artwork or photos. With a little effort and the right materials, you can create a unique and personalized addition to your home decor.
DIY Picture Frame: A Simple Guide
Creating a personalized picture frame is an easy and fun project that can add a unique touch to your home decor. Follow these simple steps to make your own DIY picture frame:
- Gather your supplies: wood pieces, stain, foam brush or cotton cloth for staining, sandpaper to smooth edges, and jute to hang it up.
- Cut your wood pieces to the desired size and shape.
- Sand the edges of your wood pieces to create a smooth finish.
- Stain your wood pieces using a foam brush or cotton cloth. Allow the stain to dry completely.
- Assemble your frame by attaching the wood pieces together using wood glue.
- Attach jute to the back of your frame to create a hanger.
- Insert your favorite family photo and enjoy your unique and personalized picture frame!
By following these easy steps, you can create a beautiful and meaningful picture frame that will showcase your cherished family memories.
How to Build a Wooden Picture Frame

Looking for a fun and affordable weekend project? You can easily create a beautiful wooden picture frame for under $10 using 1×12 wood. The assembly process is simple, making it a great option for beginners. With just a few basic tools and supplies, you can make a unique piece of art or gift that will last a lifetime. Personalize your frame by customizing it or painting it in any color you like. Here are the steps to follow:
- Cut the 1×12 wood to the desired length for each side of the frame.
- Use a miter saw to cut each end of the wood at a 45-degree angle to create a miter joint.
- Sand the edges of the wood to smooth any rough spots.
- Apply wood glue to the miter joints and press the pieces together to form the frame.
- Use clamps to hold the frame together while the glue dries.
- Once the glue is dry, remove the clamps and sand any excess glue.
- Finish the frame with a stain or paint of your choice.
- Attach a picture hanger to the back of the frame using screws or nails.
There you have it! With just a few simple steps, you can create a beautiful wooden picture frame that will add a personal touch to any room.
Homemade Instagram Picture Frame
Create a personalized and sentimental gift for your loved ones with a homemade Instagram picture frame. This DIY project requires only a few materials, including 1×2 pine board, thin project board, wood stain, black acrylic paint, photos, and sandpaper. The frame can be easily assembled in no time, and you may already have the materials on hand. This thoughtful gift is perfect for any occasion, such as Father’s Day or Christmas. It’s a unique and lasting alternative to traditional gifts like flowers or cards. Give the gift of cherished memories with this easy and affordable DIY photo project.
Make Your Own Scrabble Tile Picture Frame
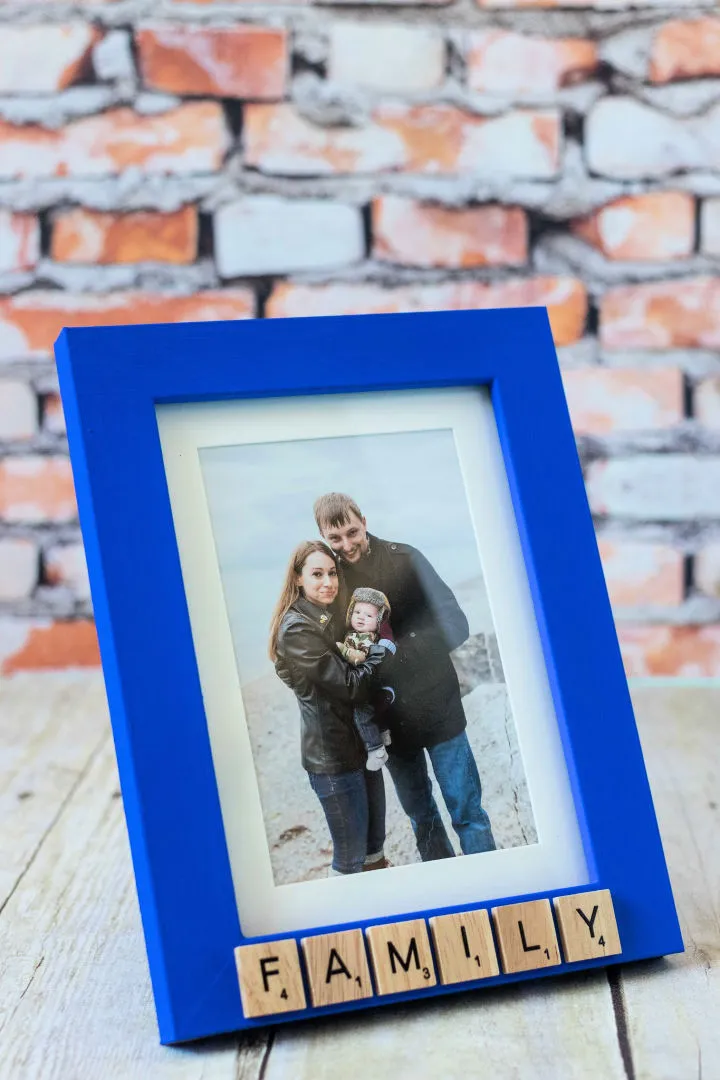
If you’re looking for a unique way to show off your favorite photos, try making your own DIY scrabble tile picture frame! This easy-to-make craft is perfect for those who love displaying multiple photos around their homes. Here’s what you’ll need:
- Plain wood picture frame
- Mini wood scrabble tiles
- Acrylic paint
- Tacky glue
To customize the tiles, simply paint them with your desired color, then glue them onto the frame in whatever design you’d like. The possibilities are limitless! With this fun DIY project, you can add personal flair to your home decor and create a one-of-a-kind picture frame that will impress all your guests.
Amazing DIY Family Picture Frame
If you want to create a beautiful and unique picture frame for your family photos, look no further than this DIY tutorial. With just a scrap piece of walnut and following the ten rules of artist Corita Kent, you can make a stylish frame that perfectly fits your artwork. The step-by-step instructions and helpful video make the process easy and accessible, without the need for complex measurements. Complete with glass, backing, and finishing touches, your family photos will look stunning in this handmade frame. Get creative and showcase your memories with this fun and simple project.
DIY Popsicle Stick Picture Frame

Looking for a fun and easy craft project for your kids during spring break or summer vacation? Look no further than this cool DIY popsicle stick picture frame! With just a few materials, including popsicle sticks, construction paper, buttons or gems, a hinge clip, and magnets, your kids can create a unique and personalized picture frame to display their favorite photos on the fridge. This project is a great way to encourage creativity and keep kids entertained during their free time.
DIY Picture Frame Plans

Create custom picture frames that showcase your favorite memories with these free and easy-to-follow DIY plans. These frames can be assembled in just an afternoon with basic woodworking skills and simple materials like wood, glass, glue, and push pins. No complicated cuts required! These frames are perfect for adding a personal touch to any room in your home or for last-minute gift ideas. Craft timeless pieces of art with a personalized touch today!
Gorgeous DIY Decoupage Picture Frame

Transforming a plain picture frame into a unique work of art is simple with decoupage. With the help of Mod Podge Matte, you can add a glossy finish that preserves any paper or fabric you love to an unfinished wood frame. To create your personalized gift or add some DIY flair to your home, all you need is an unfinished wood frame, Mod Podge Matte, any paper or fabric of your choice, and felt for the backing. This craft project is an excellent way to unleash your inner artist and create a one-of-a-kind item.
Make a Large Picture Frame With a Mat

Creating a large picture frame with a mat can be an easy and affordable DIY project. To get started, gather your materials which include wood, foam board, corner brace brackets, caulk, and paint. Cut the wood to the desired size and attach the corner brace brackets to hold it together. Cut the foam board to fit the frame and attach it using caulk. Finally, paint the frame to match your decor. This DIY project is a great way to add a personal touch to your home decor for less than $25.
Making a 2×4 Picture Frame

Looking for a unique way to display your cherished memories? Look no further than making your own custom picture frames out of 2x4s! These rustic frames are perfect for creating a stunning gallery wall for one large photo or a few in a row.
To make your own 2×4 picture frame, you will need a few materials, including chicken wire, sandpaper, plywood, chalk paint, and chalkboard paint. Additionally, you will need tiny clothespins and burlap ribbon to add a special touch.
Here are the steps to create your own 2×4 picture frame:
- Cut your 2x4s to the desired length and sand them down until smooth.
- Use a saw to cut a groove in the back of each piece of wood to hold the plywood backing.
- Cut the plywood to the size of your frame and attach it to the back of the 2x4s using wood glue and nails.
- Cut a piece of chicken wire to fit the back of the frame and staple it in place.
- Paint the frame with your desired color of chalk paint and let it dry.
- Use chalkboard paint to create a small chalkboard section on the front of the frame.
- Attach tiny clothespins to the chicken wire and use burlap ribbon to hang your favorite photos.
With these simple steps, you can create a beautiful and unique 2×4 picture frame to showcase your favorite memories.
Rustic Photo Frame With Twigs

Looking for a unique and rustic way to display your favorite photos or artwork? Why not try making your own natural photo frame using twigs and other affordable supplies? This easy DIY project is a great way to add warmth and style to any space, whether you prefer a modern or more traditional décor.
To create your own rustic photo frame, you will need twigs, twine, transparent baking paper, reed tip, glitter paint spray, and your favorite photos or collage pieces. Simply twist the twigs together to create a frame, securing them with twine and adding a layer of transparent baking paper to protect your photos. Then, add a touch of sparkle with glitter paint spray and attach your photos or artwork using reed tip.
Not only is this project quick and easy to make, but it’s also a sustainable way to repurpose natural materials and create a one-of-a-kind piece of art for your home. So why wait? Grab your supplies and start crafting your own rustic photo frame today!
Make an Embroidered Photo Frame

Looking for a creative way to customize your plain photo frame? Why not try adding some embroidery to it? Here’s how you can make an embroidered photo frame:
Materials:
- Plain photo frame
- Embroidery thread
- Embroidery needle
- Scissors
- Pencil
- Embroidery hoop
- Fabric
Instructions:
- Remove the back of your photo frame and set it aside.
- Cut a piece of fabric to fit the size of your frame backing.
- Place the fabric into the embroidery hoop and tighten the hoop.
- Using a pencil, lightly sketch out your desired design onto the fabric.
- Thread your embroidery needle with your desired color of embroidery thread.
- Begin embroidering your design onto the fabric, following your sketched outline.
- Once you have finished embroidering, trim any excess fabric from around the edges of the hoop.
- Remove the fabric from the hoop and place it onto the backing of your photo frame.
- Replace the back of your frame and your embroidered photo frame is complete!
This DIY project is a great way to add a personal touch to your home decor or to create a thoughtful gift for someone special. With just a few materials and some creativity, you can make a beautiful and unique embroidered photo frame that will last for years to come.
Inexpensive DIY Yarn Wrapped Picture Frame
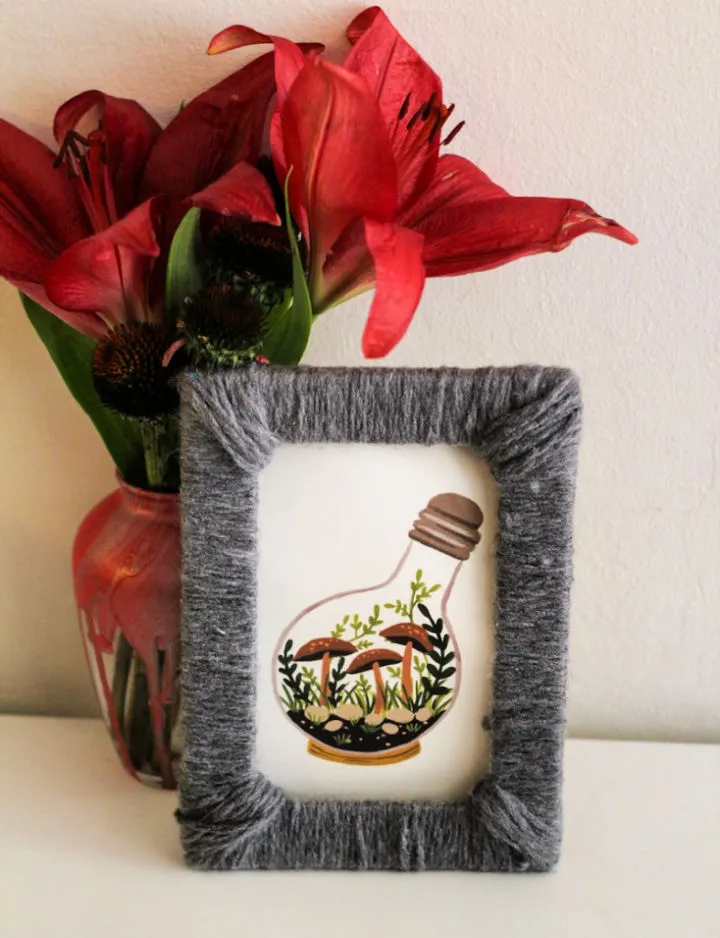
Looking for a quick and easy way to add a touch of elegance to your home décor? Look no further than the DIY yarn-wrapped picture frame! With just a few simple steps, you can transform an ordinary frame into a unique and eye-catching piece of art.
To create your own yarn-wrapped picture frame, all you need is a frame, some yarn, and a hot glue gun. Simply wrap the yarn around the frame, securing it in place with hot glue as you go. You can experiment with different colors and textures of yarn to create a truly personalized look.
Not only is this DIY project a fun and creative way to add some personality to your home, it’s also incredibly affordable. With just a few dollars worth of supplies, you can create a beautiful and unique piece of art that will impress your friends and family.
So why wait? Grab your supplies and get started on your own DIY yarn-wrapped picture frame today!
DIY Farmhouse-Style Sliding Picture Frame

Elevate your home decor with this charming and easy-to-make sliding picture frame. Crafted from 1″ x 4″ and 1″ x 3″ boards, this frame can be customized to achieve the reclaimed wood look of your choice. It’s perfect for displaying your favorite photos or artwork, and can be easily assembled with wood glue and sandpaper. The top and bottom boards feature slots for effortless picture swapping, and a picture hanger can be added to complete the look. With no tools required, this DIY project is a simple and unique addition to any home.
How to Make Baby Bird’s Nest Frames

Making a DIY baby bird’s nest frame is a fun and easy way to create a unique wall decor for your home. With just a few basic materials such as spray glue, a glue gun, ribbon, and paint, you can turn an ordinary picture frame into a beautiful work of art.
To get started, gather your materials and choose a picture frame that you want to decorate. Next, use spray glue to attach bird prints, nests, eggs, or any other decorations you desire to the frame. Once the glue has dried, you can add additional details with a glue gun and ribbon.
To complete your baby bird’s nest frame, paint the frame in a color that complements your decorations. Allow the paint to dry completely before displaying your new wall decor.
With these easy steps, you can create a beautiful and personalized baby bird’s nest frame that will be cherished for years to come. So, let your creativity soar and start crafting today!
How to Make a Mermaid Picture Frame

Making a mermaid picture frame is an easy and fun DIY project that will add a touch of magic to any room. To get started, you will need a cut file, acrylic craft paint, gelato in a mermaid color, and modeling paste. Follow these simple steps to create your own mermaid picture frame:
- Hand-cut your frame using the cut file.
- Paint the frame with acrylic craft paint in a mermaid color.
- Add some gelato to the frame for an extra special touch.
- Finish it off with modeling paste for a perfect finishing effect.
With these easy steps, you can create a beautiful mermaid picture frame that will bring all kinds of beauty and sparkle into any space. So don’t wait; get started now and make your own mermaid picture frame!
How to Make a Cardboard Photo Frame

Making a cardboard photo frame is a fun and easy way to show your love and appreciation for your mum. Here are the step-by-step instructions to create your own unique photo frame:
- Gather the materials needed: cardboard, photos of you and your mum, yarn, and paint.
- Cut the cardboard into the desired size and shape for your frame.
- Paint the cardboard in your favorite colors and let it dry completely.
- Arrange the photos on the cardboard and glue them in place.
- Use the yarn to create a border around the photos, gluing it in place as you go.
- Add any additional embellishments or decorations that you like.
- Let the glue dry completely before displaying your new handmade photo frame.
With these simple steps, you can create a beautiful and personalized photo frame that your mum will cherish for years to come.
Summary
Looking for creative ways to display your favorite photos? DIY picture frames are a great option. With a little creativity and some basic materials, you can create unique frames that showcase your pictures in style. Some popular ideas include using reclaimed wood, repurposing old items like window frames or shutters, or adding decorative elements like paint or embellishments. Get inspired and start crafting your own personalized picture frames today!