If you’re in need of a monitor stand but don’t want to spend a fortune, look no further. We’ve compiled a list of 25 DIY monitor stand projects that are sure to fit your needs, regardless of your skill level. From simple designs to more intricate ones, there’s something for everyone. With the rise of flat-screen monitors and limited desk space, these projects are a practical and cost-effective solution.
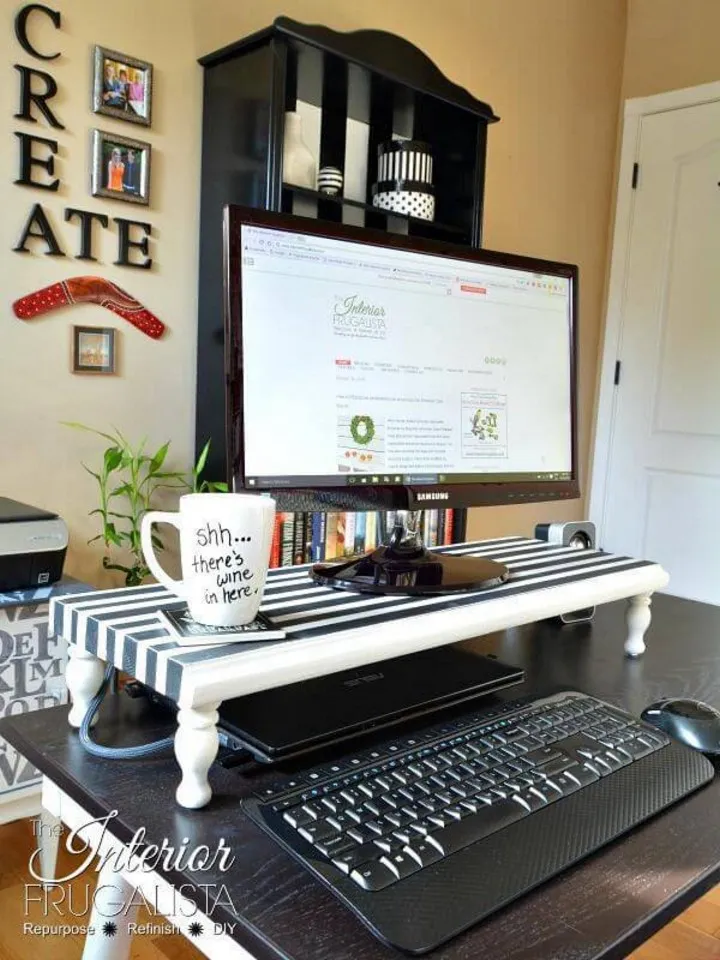
Homemade DIY Monitor Stand

If you’re looking to save some money and add a personal touch to your workspace, building your own monitor stand is a great option. Not only is it a fun project, but it can also help cut down on desk clutter. With hundreds of materials and designs available, the possibilities for your DIY monitor stand are endless.
When it comes to building your own monitor stand, there are many designs to choose from. Some plans may be better than others in terms of functionality, sturdiness, and safety. However, with a little research and creativity, you can find the perfect design for your needs.
To help get you started, we’ve compiled a list of 25 DIY monitor stand projects. Whether you’re looking for a sleek and modern design or something more rustic and vintage, there’s sure to be a project here that fits your style.
So why not try building your own monitor stand? It’s a great way to add some personality to your workspace while also saving money.
DIY Monitor Stand
Looking for a way to get off your desk and avoid hunching over while working? A DIY monitor stand is a great solution! This versatile stand can be customized with different wood finishes to match any room decor or style. All you need are basic carpentry skills and a few materials that can be purchased from any home improvement store.
To make your own monitor stand, you’ll need wood and dowels. Follow these simple steps:
- Cut the wood to your desired size and shape.
- Drill holes in the wood for the dowels.
- Insert the dowels into the holes.
- Sand the wood to smooth out any rough edges.
- Finish the wood with your desired wood finish.
By following these steps, you can create a simple and functional monitor stand that will elevate your workspace and improve your posture.
DIY Desk Monitor Stand With Shelf
If you want to improve your desk organization and create a comfortable and ergonomic workspace, a DIY desk monitor stand with a shelf is a great option. This stand is designed for 21″ and 23″ monitors but can be easily modified for others. The sliding mounts allow for easy adjustment based on your height for optimal viewing. The shelf is perfect for storing office supplies such as printers and paper cutters, keeping your desk clutter-free. With just a few materials and tools, you can create a custom monitor stand that fits your needs. Click for more details on how to make your own DIY desk monitor stand with shelf.
DIY Cardboard Monitor Stand

If you are looking for an affordable and easy way to elevate your computer monitor and improve your workspace, then a DIY cardboard monitor stand might be the solution for you. This simple yet effective stand can be built using materials that you may already have at home, such as cardboard boxes or even cereal boxes.
The height adjustment design of this monitor stand allows you to adjust the height of your screen to your liking with a simple turn of a knob. This means that you can achieve an ergonomic position that will help you work comfortably for longer periods of time. Additionally, the sturdy and durable construction of the stand ensures that it won’t wobble or make any noise when you type or walk by.
Overall, this DIY cardboard monitor stand is a great solution for anyone who wants to improve their workspace without breaking the bank. With just a few simple steps, you can create a functional and attractive monitor stand that will enhance your productivity and comfort.
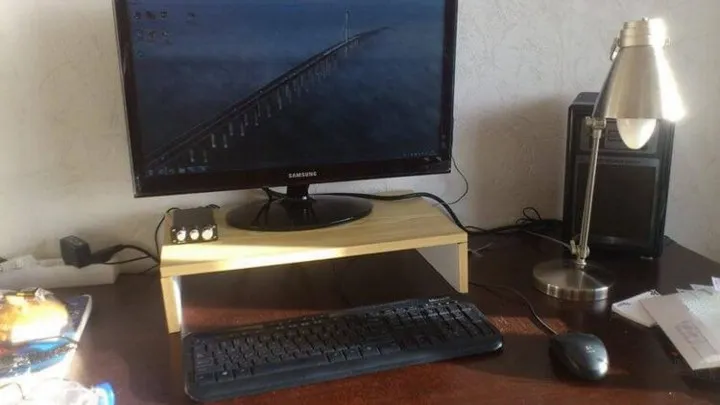
DIY Smart Monitor Stand
Looking to add some flair to your workspace? Look no further than the DIY Smart Monitor Stand. With a wooden board and USB 3 hub, you can create a unique monitor stand that not only looks great but also keeps your devices organized. This project can accommodate two monitors on either side, making it perfect for those who need multiple screens. Plus, the USB hub allows for easy access to plug in your devices.
The Craftsman Monitor Stand features fun designs such as clouds or colorful flowers, allowing you to personalize your workspace even further. With some handiwork and a little creativity, you can create a one-of-a-kind monitor stand that will impress your colleagues and make your workspace more efficient. Click for more details and get started on your DIY Smart Monitor Stand today!
DIY Monitor Stand

Upgrade your workspace with a sleek and simple DIY Monitor Stand that you can make in under an hour. With just a few supplies, you can create a modern and sophisticated touch to your work area. This easy-to-follow guide will help you create a beautiful and functional monitor stand that will keep your keyboard and mouse closer at hand. Here are the materials you’ll need:
- 2 wooden boards (12 inches x 6 inches x 1 inch)
- Sandpaper
- Wood glue
- Clamps
- Paint or stain (optional)
Follow these simple steps:
- Sand the edges and surfaces of the wooden boards until they are smooth.
- Apply wood glue to one of the boards and press the other board on top of it.
- Clamp the boards together and let them dry for at least 30 minutes.
- If desired, paint or stain the monitor stand to match your workspace decor.
That’s it! You now have a beautiful and functional monitor stand that will make your workspace more comfortable and organized.
$20 DIY Monitor Stand
Looking for a budget-friendly and stylish way to elevate your monitor? Look no further than this simple and versatile DIY monitor stand. With just a few hours of spare time and less than $20 in materials, you can create a sturdy and customizable stand that will make your workspace more comfortable and efficient.
This monitor stand is perfect for a home office, playroom, or bedroom. It allows you to adjust your monitor, keyboard, or mouse to a comfortable range for easy use. Plus, it adds a personal touch to your desk and looks like it came from a store.
To build this monitor stand, you’ll need some basic woodworking skills and the following materials:
- 1×10 board (cut to desired length)
- 2×4 board (cut to desired height)
- Screws
- Wood glue
- Sandpaper
- Paint or stain (optional)
Follow these simple steps to create your own DIY monitor stand:
- Cut your 1×10 board to the desired length for your monitor.
- Cut your 2×4 board to the desired height for your stand.
- Screw the 1×10 board onto the top of the 2×4 board.
- Apply wood glue to the joints for added strength.
- Sand down any rough edges.
- Paint or stain your monitor stand to match your desk or personal style.
In less than an hour, you’ll have a functional and stylish monitor stand that you can be proud of. So why not give it a try this weekend and see the difference it can make in your workspace?
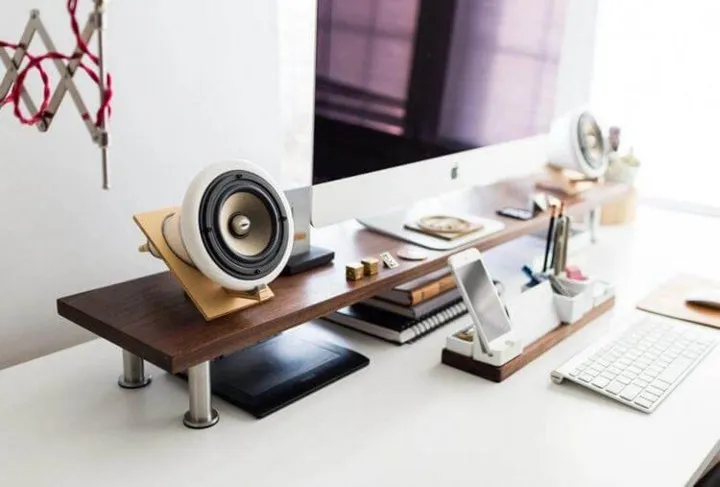
DIY Mucem Monitor Stand

Looking for a simple and elegant way to raise your screen to a comfortable height? Look no further than this DIY monitor stand made of beautiful wood and other materials. With its carefully crafted design, it can fit almost anywhere in your home or office.
This monitor stand is not only stylish but also practical, with a generous width that can hold two screens, making it perfect for designers or small businesses with dual monitors. By elevating your screen to a comfortable height, you can work for longer periods with less strain on your neck and eyes.
With this DIY project, you can create a monitor stand that is built to last and customized to your exact specifications. So why not give it a try and add a touch of elegance to your workspace? Click for more details.
DIY Smart Monitor Stand
Save space and add a touch of style to your workspace with this DIY Minimalist Ebonized Oak Smart Monitor Stand. With a unique design and sturdy materials, this stand is perfect for any desk. Plus, it connects to your computer for added convenience.
Customize the stand to fit your specific needs, whether you’re using it for gaming or as a home office workstation. To create your own stand, you’ll need red oak, a belt sander, drill and drill bits, router, pull saw, polyurethane, orbit sander, dowels, and a USB hub. Follow the construction instructions carefully, and your stand will be ready in no time.
Avoid the expense of readymade monitor stands and create your own with this easy-to-follow tutorial. With just a few tools and some basic materials, you can have a high-quality stand that perfectly suits your needs.
DIY Simple Monitor Stand
If you’re struggling to find the perfect space for your computer monitor, a DIY monitor stand can help you get more out of your home office with a space-saving design. By placing your monitors at eye level on a sleek stand, you can reduce clutter on your desk and improve your posture. Building your own monitor stand is a simple project that can be completed in just a few hours.
The DIY Simple Monitor Stand is a sturdy and ergonomic solution for your desktop computer, laptop, or tablet. It can help reduce neck and shoulder pain caused by looking down for long periods. This monitor stand is designed to be both functional and stylish, with a minimalist design that will complement any workspace.
To build your own DIY Simple Monitor Stand, you will need the following materials:
- Plywood
- Wood glue
- Screws
- Sandpaper
- Paint or stain (optional)
Follow these steps to build your monitor stand:
- Cut the plywood to the desired size and shape for your monitor stand.
- Sand the edges and surfaces of the plywood to ensure a smooth finish.
- Apply wood glue to the edges of the plywood and clamp them together.
- Allow the glue to dry completely before removing the clamps.
- Use screws to reinforce the joints and add stability to the stand.
- Sand the entire stand again to remove any rough spots or excess glue.
- Paint or stain the stand to match your workspace decor (optional).
With these simple steps, you can create a functional and stylish monitor stand that will help you work more comfortably and efficiently. Plus, building your own stand is a great way to save money and personalize your workspace.
DIY Space-Saving Monitor Stand

If you’re looking to tidy up your workspace and save some desk space, consider making your own monitor stand. This DIY monitor stand is made of sturdy acrylic and wire hooks, and can be assembled easily in an afternoon. Best of all, it won’t cost you more than $20.
Here’s what you’ll need:
- One sheet of ⅛” acrylic
- Wire hooks
- A saw or jigsaw
- Sandpaper
Follow these steps to make your own space-saving monitor stand:
- Measure and mark the acrylic sheet to the desired size of your monitor stand.
- Use your saw or jigsaw to cut the acrylic sheet to size.
- Sand the edges of the acrylic sheet until they are smooth.
- Attach the wire hooks to the acrylic sheet using screws or adhesive.
- Place your monitor on top of the stand and enjoy your new, organized workspace!
This DIY monitor stand is a great way to save space and keep your desk tidy. Plus, it’s made of sturdy materials and won’t break the bank. Give it a try and see how it can improve your workspace.
DIY Simple Monitor Stand
Looking for a stylish and functional monitor stand? Look no further than this simple DIY project made from walnut wood. With just a few tools and some wood oil and stain, you can protect your screen from damage and make it easy to clean. Plus, you get to design your own unique stand! This project is so easy, you can complete it in just an afternoon. Each monitor stand comes with all the necessary tools, making it a breeze to build your own. Get started today and elevate your workspace!
DIY Cheap Wood Monitor Stand
If you’re looking for a simple and inexpensive way to raise your monitor to eye level, a DIY wood monitor stand is a great option. With just a few tools and materials, you can create a sturdy and functional monitor stand in about an hour. Here’s what you’ll need:
| Tools | Materials |
|---|---|
| Saw | Wood |
| Drill | Screws |
| Sandpaper | Wood Glue |
To build your monitor stand, simply follow these steps:
- Cut your wood to the desired size and shape for your monitor stand.
- Sand the edges and surfaces of the wood to create a smooth finish.
- Use wood glue to attach the pieces of wood together.
- Use screws to reinforce the joints and add stability.
- Allow the glue to dry completely before using your new monitor stand.
This DIY monitor stand is a versatile and affordable solution that can be used for a variety of purposes. Whether you’re using it for your computer screen or an entertainment system, this monitor stand will provide you with a better viewing experience at a fraction of the cost of store-bought options.
How to Create Your Own Monitor Stand
If you’re looking for a cost-effective and simple way to elevate your monitor, a DIY monitor stand is a great option. With just some wood, glue, and screws, you can create a sturdy and stylish monitor stand that will last for years to come.
To start, you’ll need to cut kerfs into bent parts of the wood so that they can withstand pressure at both ends. This will ensure that your monitor stand is durable and can hold the weight of your monitor. Once you’ve cut the kerfs, you can begin to assemble the stand by gluing and screwing the pieces together.
This DIY project is perfect for beginners who are new to woodworking. With this tutorial, you’ll learn how easy it is to build a monitor stand that you can use in your home or office. The total cost for this project is under $20, making it an affordable and practical option.
In summary, making your own monitor stand is a great way to add a personal touch to your workspace while also saving money. With just a few basic materials and some simple steps, you can create a monitor stand that is both functional and stylish.
Benefits of DIY Monitor Stand Projects
If you’re looking for a way to save money and create a custom piece of furniture for your home or office, then DIY monitor stand projects are the way to go. Here are some of the benefits:
- Affordable: DIY monitor stands are an affordable solution, with materials costing less than $50. You can use recycled materials or parts around your house to save even more money.
- Customizable: With DIY monitor stands, you can create a stand that fits your exact needs. Do you need a desk that is tall enough for standing? Or do you want something that rolls around on casters? You can build it exactly how you want it.
- Easy to Build: Most DIY monitor stands can be built in an afternoon using wood glue and finishing nails. You don’t need any special tools or skills, making it an easy project for beginners.
- Satisfaction of Building: When you build a DIY monitor stand, you’ll feel good about making something yourself instead of buying it at the store. It’s a great way to showcase your creativity and craftsmanship.
Overall, DIY monitor stand projects provide an affordable and customizable solution for anyone looking to create a custom piece of furniture for their home or office.
DIY Walnut Monitor Stand
Create the perfect workspace with this DIY Walnut Monitor Stand. Its simple design makes it a great project for anyone to take on. The contemporary look of the waterfall shape and mitered corners will add a touch of elegance to your home office. The shelves are held in place using mortise and tenon joints, ensuring stability and durability. The base is made of premium quarter-sawn white oak, while the top is made of walnut, creating a beautiful contrast between the two natural colors. Follow the instructions carefully to build this impressive monitor stand as a unique custom piece that will enhance your workspace.
DIY IKEA Desktop Monitor Stand
Looking for an easy and cost-effective way to get more workspace and avoid cluttering? Consider building a DIY IKEA desktop monitor stand. This project is quick and easy to assemble, and costs only around $20. Simply mount the desk stand onto the corner of your table and enjoy the benefits of a clutter-free workspace. You can use any shelf with legs for this purpose, and the stand comes in various finishing options to match your decor. With this simple DIY project, you can create a beautiful and functional monitor stand that works perfectly for any desk or table.
How to Build a DIY Monitor Desk Stand
If you’re looking for a way to elevate your monitor and add style to your workspace, building a DIY monitor desk stand is a great solution. With a few power tools and some wood of your choice, you can easily create a custom desk stand that fits your needs and style.
To build your own monitor desk stand, follow these steps:
- Determine the size and height you want for your desk stand and cut your wood accordingly.
- Use a table saw or circular saw to create the grooves for the shelf and monitor to sit in.
- Sand all the pieces of wood to create a smooth finish.
- Assemble the desk stand by attaching the pieces together using wood glue and clamps.
- Let the glue dry completely before sanding any rough edges and applying a finish of your choice.
Once complete, your DIY monitor desk stand will provide a sturdy and stylish platform for your monitor, laptop, or tablet. Not only will it free up valuable desk space, but it will also add a personal touch to your workspace.
Smart Monitor Stand DIY
Looking for a way to tidy up your desk and free up some space? Look no further than this DIY smart monitor stand! Made of wood, this stand features slots for holding items such as a keyboard, mouse, and more, making it a great way to declutter your workspace. Plus, with its customizable design, you can make it look however you like. And as a bonus, the built-in USB hub makes it easy to keep all your devices connected. Say goodbye to a cluttered desk and hello to a more organized workspace with this smart monitor stand DIY project.
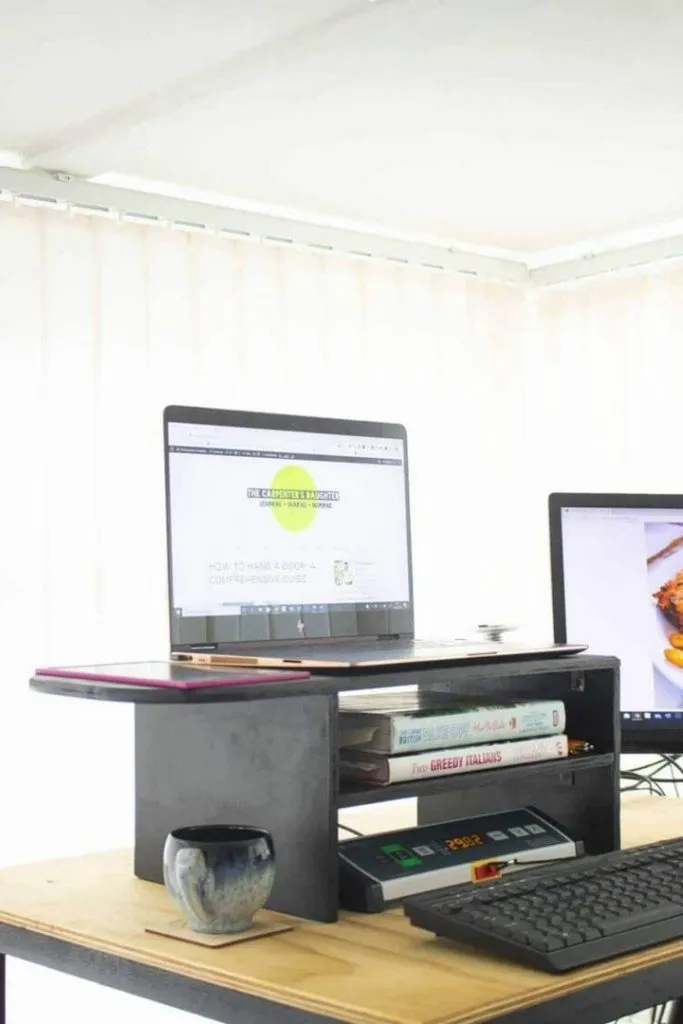
DIY Monitor Stand and Desk Shelf
If you’re looking to optimize your workspace, a DIY monitor stand and desk shelf can help keep your work surface organized and clutter-free. This simple yet effective solution provides ample space for your laptop, mouse, and other accessories. Whether you’re a gamer or a business professional, this monitor stand can help you maximize your area and boost your productivity. By building your own monitor stand, you can customize it to fit your specific needs and preferences. This sturdy and solid stand will last a long time, making it a worthwhile investment for your workspace.
DIY Dual Screen Monitor Stand

If you’re looking for a cheap and easy solution to mounting your monitors, this DIY monitor stand is a great option. With just a few minutes and some simple tools, you can build a mount that is designed like an IKEA shelf unit. This monitor stand is pure genius! It offers an easy and inexpensive way to turn two monitors into one. With little space on your desk, the dual monitor stand offers room for work and style. Here are some key features of this DIY dual screen monitor stand:
- Easy to build with simple tools
- Offers an inexpensive solution to mounting two monitors
- Designed like an IKEA shelf unit
- Provides more desk space for work and style
Overall, this DIY dual screen monitor stand is a great option for anyone looking to save money and space while still having a functional dual monitor setup.
DIY Vented Monitor Stand
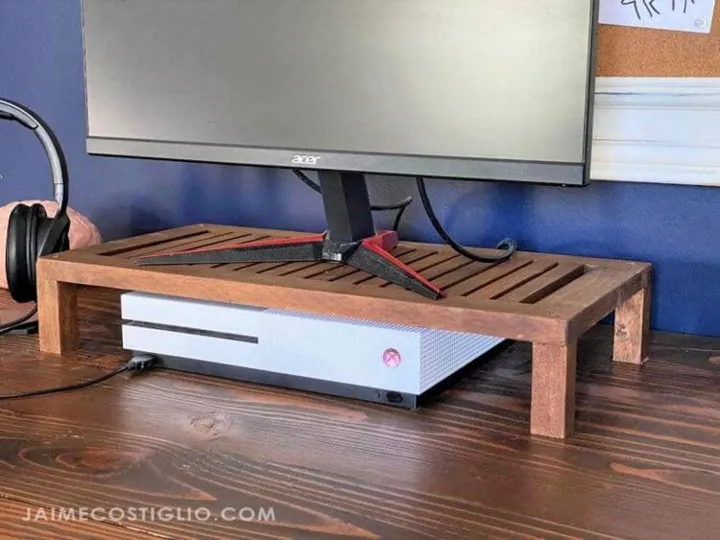
Elevate your gaming experience with this easy-to-build DIY vented monitor stand. Not only does it look stylish, but it also prevents your console from overheating during those long gaming sessions. With just a few hours of work and some basic tools, you can create a functional and practical addition to your gaming room.
To build this monitor stand, you will need the following materials:
- 1 sheet of plywood
- Jig saw
- Measuring tape
- Sandpaper
- Paint or stain (optional)
Follow these simple steps to create your own DIY vented monitor stand:
- Measure and mark the dimensions of the stand on the plywood sheet.
- Cut out the base and sides of the stand using a jig saw.
- Cut out a vent on the back panel of the stand using a jig saw.
- Sand the edges of the stand to smooth out any rough edges.
- Paint or stain the stand to match your gaming room decor (optional).
With this DIY vented monitor stand, you can enjoy your gaming sessions without worrying about your console overheating. Plus, it’s a great way to show off your handyman skills!
DIY Computer Monitor Stand
If you’re looking for an affordable and functional option for a monitor stand, consider making one yourself. This DIY monitor stand is not only visually appealing but also takes only 3 hours to complete. By placing your monitor and its accessories on this stand, you’ll free up desk space and avoid stacking monitors on top of each other. Plus, its design ensures that your monitor is at the perfect height for comfortable viewing. With just a few basic materials and tools, you can create a customized monitor stand that fits your needs and style. Click for more details.
How to Build a Monitor Stand for Less Than $50
If you’re on a tight budget, building your own monitor stand is an excellent way to save money. With just a few simple materials and tools, you can create a sturdy and attractive stand that will keep your monitor at eye level and improve your posture. Here’s how to do it:
Materials:
- 2×4 lumber
- Screws
- Wood glue
- Sandpaper
- Varnish (optional)
Tools:
- Saw
- Drill
- Screwdriver
Instructions:
- Cut the 2×4 lumber to the desired length for your monitor stand.
- Sand the edges of the lumber to smooth out any rough spots.
- Apply wood glue to the edges of the lumber and join them together to create the stand.
- Use screws to reinforce the joints and ensure the stand is sturdy.
- Sand the stand again to remove any excess glue or rough spots.
- If desired, apply varnish to the stand to create a glossy finish.
With these simple steps, you can create a monitor stand that is both functional and attractive for less than $50. Plus, you’ll have the satisfaction of knowing you built it yourself!
DIY Wooden Monitor Stand
If you want a monitor stand that’s both affordable and visually appealing, consider making your own. With some basic tools, woodworking skills, and a bit of patience, you can create a custom monitor stand that fits your specific needs. This project can be completed in about three hours with an additional hour for sanding and staining the wood. The best part is that this monitor stand can be adjusted to fit any size screen without having to re-cut anything. All you need is a piece of wood cut and stained to your specifications. Here are the tools you’ll need:
- Electric drill
- Measuring tape
- Saw
- Sandpaper
- Stain
- Paintbrush
Follow these simple steps to create your own DIY wooden monitor stand:
- Measure the width and depth of your monitor to determine the size of your stand.
- Cut the wood to the appropriate size using a saw.
- Sand the wood until it’s smooth and free of any rough edges.
- Apply your chosen stain to the wood using a paintbrush and let it dry.
- Place your monitor on top of the stand and enjoy your new custom creation!
Creating your own wooden monitor stand is an easy and affordable way to add a personal touch to your workspace. With just a few tools and some basic woodworking skills, you can create a beautiful and functional monitor stand that’s perfect for your needs.
Summary
Creating a DIY monitor stand is a simple and cost-effective way to improve your workstation setup. By using materials such as wood, metal, or PVC pipes, you can customize the height and design of your monitor stand to fit your specific needs. Additionally, a DIY monitor stand can help reduce neck and eye strain, improve posture, and increase desk space. With a few basic tools and materials, you can easily create a functional and stylish monitor stand that enhances your productivity and comfort.