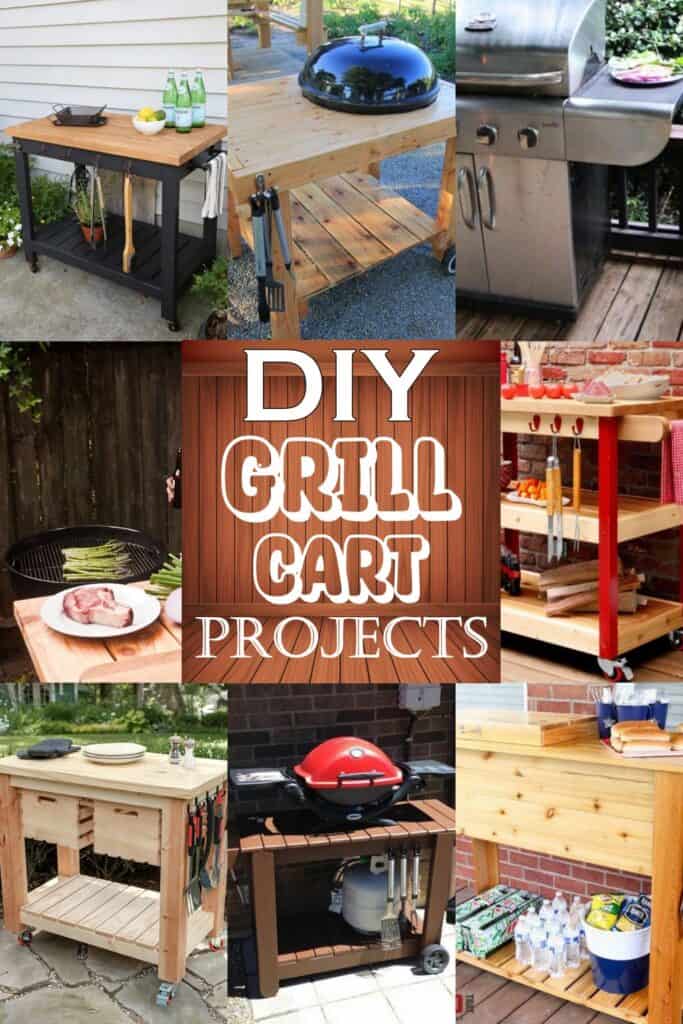
If you’re someone who loves hosting barbecues and cookouts, you know that space can be a real issue. Fortunately, a grill cart is a stylish and practical solution that can help you keep everything you need in one place. DIY Grill Cart Projects are a great way to add extra space to your grill area and make your next cookout a success.
Limited space on your deck or patio can make grilling difficult, but a grill cart can help you overcome this problem. With more room for cooks and a stylish design, you can relax with friends and enjoy your next cookout to the fullest.
Grill Cart Creation Plan
To create a functional grill cart, you need to consider the following elements:
- Lower shelf for storing firewood and charcoal
- Three upper shelves for holding sauce/spicy water bottles and other supplies
- Tabletop for placing charcoal holders and cooking utensils such as spatula or tongs
By having these elements in place, you can easily access all the necessary items while grilling without having to constantly move around. The lower shelf will keep the firewood and charcoal within reach, while the upper shelves will hold all the supplies you need for a successful grilling session. The tabletop will provide a convenient space for placing your cooking utensils and charcoal holders. With this grill cart, you’ll have everything you need for a great grilling experience.
Grill Cart Idea

Looking for a simple DIY grill cart that is perfect for cooking on the go? You might want to try out this grill cart idea. With dimensions of 333⁄4” wide, 39½” long, and 34″ tall, this grill cart is designed to be easily adjustable by using different casters or lengths of the legs. The grill cart features four drawers that can be used to hold tools, accessories, and even charcoal briquettes. Additionally, the collapsible design allows you to store it vertically or horizontally when not in use.
Reclaimed Grill Cart Project

Looking for a durable, rustic, and functional portable grill cart that doesn’t use caster wheels? Look no further than the Reclaimed Grill Cart Project! This unique cart uses a wheel from an old cart that can be found at your local hardware store. With leftover wood, you can create a one-of-a-kind grill cart perfect for backyard parties or tailgating events. You could even sell it locally in lawn and garden shops using your own brand. Get started on your own Reclaimed Grill Cart Project today!
How To Build A DIY Grill Cart

Building a DIY grill cart is a great way to add convenience to your outdoor cooking experience. Here are some steps to help you build your own:
- Gather materials such as wood, screws, casters, and a grill.
- Cut the wood to the desired size and assemble the frame.
- Attach the casters to the bottom of the frame for mobility.
- Install the grill onto the top of the frame.
- Add any additional features such as shelves or hooks to hang utensils.
By following these steps, you can create a functional and stylish grill cart that will make outdoor cooking and entertaining a breeze.
Grill Cart Creation Project
If you have some carpentry skills, creating your own DIY grill cart can be a fun and rewarding project. To build one, you will need a wooden board, 2×6, 2×4, miter saw, screws, drill, and paint. You can customize the cart’s appearance by painting or staining it to match your house or deck furniture. The grill cart can serve as a storage space for cooking utensils, seasonings, and other grill equipment, as well as a convenient serving table for outdoor gatherings. With some effort and creativity, you can create a practical and stylish addition to your patio.
How to Make a BBQ Cart
To make a BBQ cart, select a wooden board of your desired size and shape. Choose wood pieces and fasten them together with screws. Use wood glue to secure the parts firmly. Paint the cart with an olive green color to make it look appealing. The design of the cart is amazing, and the wooden board comes in different sizes, shapes, and dimensions. You can choose the wood according to your taste and requirement.
Barbecue Grill Cart Project
Looking for an easy woodworking project to build your own barbecue grill cart? Look no further than this simple design, perfect for grilling anytime and anywhere. The cart can hold two propane tanks and an ample supply of charcoal briquettes and wood chips. With hand-stamped stainless steel tools, you can easily manage the grill’s temperature and cooking style when preparing your meal. Assembling the grill is straightforward once you have the materials and essential tools. Get ready to impress your friends and family with your grilling skills!
How to Make an Outdoor Grill Cart
Building an outdoor grill cart is a great way to enhance your grilling experience. Here are the steps to create your own DIY grill cart:
- Choose the type of wood or metal sheets that you prefer to use for your cart. Cedar wood is a popular choice due to its durability and resistance to decay.
- Cut the wood into the desired size and shape for the cart’s base, sides, and shelves.
- Use pocket hole joinery to assemble the cart. This technique involves drilling angled holes into the wood and then using screws to join the pieces together. This helps keep the screws hidden and maintains the cart’s aesthetic appeal.
- Add wheels to the bottom of the cart to make it mobile and easy to move around your outdoor space.
- Optionally, add hooks, shelves, and other accessories to customize the cart to your needs.
By following these steps, you can create a functional and stylish outdoor grill cart that will make your grilling experience more enjoyable.
BBQ Grilling Station Plan
If you’re a grill enthusiast looking for versatility in your cooking setup, a BBQ grilling station on wheels might be the perfect solution. With the ability to move your cooking station from place to place, you can easily prep food wherever you need it. Whether you’re in your garage, backyard patio, or any other outdoor space, you can transport your grill cart with ease. This makes it a great option for those who want to get the most out of their grilling experience.
Weber Grill Cart BBQ Station
Looking for an affordable and easy-to-build solution for your outdoor kitchen area? Consider building your own DIY Weber Grill Cart. This cart can be used as a storage solution or as a cart for your grill. You can save money by building it yourself instead of purchasing a cart from Weber. Check out this informative video for detailed instructions on how to make your own Weber Grill Cart. With this DIY project, you can have a functional and stylish addition to your outdoor kitchen area without breaking the bank.
How to Build a Rolling Grill Cart

A rolling grill cart is a convenient and practical addition to your outdoor cooking setup. Here are the steps to build your own:
- Choose the right materials: You’ll need a sturdy metal frame, wheels, and a handle for easy movement.
- Build the frame: Cut the metal pieces to size and weld them together to form the frame.
- Add the wheels: Attach the wheels to the bottom of the frame, making sure they are secure and can roll smoothly.
- Install the handle: Attach a handle to the top of the frame so you can easily push or pull the cart.
- Add shelves and hooks: Install shelves and hooks on the cart to hold your grilling equipment and ingredients.
With these simple steps, you can create a rolling grill cart that will make your outdoor cooking experience more enjoyable and convenient.
Patio Cooler & Grill Cart Combo Plan

Looking for a versatile and convenient way to entertain guests outdoors? Look no further than the Patio Cooler & Grill Cart Combo! This portable cart and cooler can be used together or separately, making it a great option for any outdoor gathering.
The grill cart features four casters with locking mechanisms, allowing you to easily move it around your patio or deck while cooking. Plus, the sturdy stainless steel surface on top of the cart provides a reliable cooking area. Two power outlets on either side of the cart illuminate the cooking surface, ensuring you have enough light for grilling or chilling.
With a built-in cooler, you can keep most beverages cold and easily accessible, making this combo a must-have for outdoor entertaining. Don’t miss out on this convenient and versatile option for your next outdoor gathering!
Rolling Grill Cart Plan

If you want to have a mobile outdoor grill, you can make your own rolling grill cart using cedar wood and thick aluminum angles. Although it requires some time and effort, it is not a difficult task. The design is similar to a regular kitchen cart, but with wheels for easy transport. Here are some tips to help you create your own rolling grill cart:
- Choose high-quality cedar wood and thick aluminum angles for durability and stability.
- Use a saw to cut the wood and angles to the desired size and shape.
- Assemble the cart using screws and bolts, ensuring that everything is securely fastened.
- Attach wheels to the bottom of the cart for mobility.
- Add hooks or shelves for utensils and condiments.
With your new rolling grill cart, you can easily move your outdoor grill to any location you desire.
Weber Grill Cart Station

A Weber grill cart station is the perfect solution for keeping all your grilling equipment and ingredients organized and within reach. This cart allows you to have everything you need for your grilling session in one place, without having to make extra trips back and forth. With ample space for multiple dishes and ingredients, you can easily prepare a variety of foods without cluttering your grill area. A grill cart also helps keep your grilling area clean and organized, allowing you to focus on the cooking and enjoying your meal.
Simple DIY BBQ Cart
If you own a Weber grill and want to keep all your charcoal and grill equipment in one place, this simple and easy DIY BBQ cart is perfect for you. With step-by-step instructions, you can build this cart yourself and have a designated space for your charcoal and grill equipment, as well as storage space for all your barbecue ingredients. Check out the link for more information and get started on building your own BBQ cart today.
Easy Outdoor Grill Cart
If you’re an avid griller, you understand the need for a sturdy and functional grill cart. Not only does it provide a convenient space to store your grilling tools and accessories, but it also keeps your grill safe from harm. Building your own outdoor grill cart may seem daunting, but with the right tools and guidance, it can be a straightforward and rewarding DIY project.
To get started, download the SketchUp file provided by Woodbrew and follow their step-by-step video tutorial. This will guide you through the process of building your own outdoor grill cart using SketchUp and preparing it for use in your backyard. With this project, you’ll be able to save space and keep your grilling materials organized while enjoying the great outdoors.
Rolling Cart DIY

To build your own DIY grill cart, you will need six parts: a heavy tabletop, caster wheels, three frames, four metal bars to hold the frames together, and a wooden handle. The handle not only helps protect the frames but can also be used to hang towels. The front of the cart has small metal hangers to hang utensils like skewers or tongs for easy access while cooking. With these simple steps, you can easily build your own rolling cart for your grill.
How to Build Your Own Grilling Cart
Looking for a way to take your grilling game to the next level? Look no further than our DIY grilling cart! With easy assembly and a built-in cooler space, this cart is perfect for outdoor gatherings with family and friends. Here’s how to make your own:
- Gather your materials: a utility cart, a cooler, a drill, screws, and a saw.
- Measure and cut a hole in the top of the cart for the cooler to fit snugly.
- Attach the cooler to the cart using screws.
- Use the drill to attach hooks and shelves for grilling utensils and condiments.
- Add wheels to the bottom of the cart for easy mobility.
- Decorate and personalize your cart to match your outdoor decor.
With this easy-to-follow guide, you’ll have a DIY grilling cart that’s perfect for any outdoor occasion.
Easy Grill Station Plan
To create a DIY grill cart, you will need some wood pieces and essential tools. Follow these simple steps to build your own grill station:
- Cut the wood pieces to size and sand them thoroughly with an orbital sander.
- Place a piece of wood that is 2×4 inches long on the rack attached to your grill. This will hold most grills upright.
- Drill through holes in both pieces of wood.
- Screw the two pieces of wood together using two screws. This will provide stability while also being easy to remove when needed.
By following these steps, you can easily create your own grill station that is both functional and stylish. This DIY project is perfect for those who love to grill and want to customize their outdoor cooking space.
How To Make A BBQ Cart
Building a BBQ cart for your 22″ Weber Kettle can be a fun and rewarding project. Here are some simple steps to follow:
- Gather Materials: You can use cedar fence boards or any other sturdy material to construct the cart. You will need a saw, drill, screws, and clear deck sealant.
- Cut the Boards: Cut the boards to the desired length and width for the cart’s frame, top, and drawers. Make sure to measure the Weber grill to ensure a proper fit.
- Assemble the Frame: Use the screws to assemble the frame of the cart. Make sure to leave space for the grill and drawers.
- Build the Drawers: Cut and assemble the drawers, making sure they fit snugly underneath the grill.
- Apply Sealant: Apply a clear deck sealant to protect the wood from the elements.
- Add Wheels: Attach wheels to the bottom of the cart for easy mobility.
With these simple steps, you can build a custom BBQ cart that will make your grilling experience more enjoyable.
Outdoor Grill Cart
Looking for a functional and stylish outdoor grilling setup? Look no further than the cedar grill cart. Made from solid cedar wood and stainless steel, this cart is sturdy enough to handle even the toughest grilling tasks. With its open sides, your guests can get a full view of all their food being cooked on the grill. Plus, the cart’s casters make it easy to move around your backyard or patio. Don’t settle for an ordinary grill setup – upgrade to the cedar grill cart for a truly impressive outdoor cooking experience.
How To Make A Grill Station

To make a grill station, first, you need to decide what type of grill you want to use. For this project, we recommend using a gas grill, but you can also use propane or charcoal. Once you have decided on the type of grill, you need to determine the location for the grill station and measure out the space for it. You can mark out where all the materials should go by using a little guide and a power saw, drill, and square. With these tools, you can have your grill station up and running in no time.
Grill Cart Plan With Concrete Top
To create a unique and eye-catching grill cart, follow these simple steps to make a concrete top. Begin by gathering scraps of 2×6 and 4×4 boards, metal brackets, metal screws, and a high-temperature epoxy such as Devcon 5 Minute Epoxy. The legs of the cart will be made from pieces of 4×4, while the rest of the cart will be made from the 2×6 scraps.
Here are the steps to create your grill cart with concrete top:
- Cut the 2×6 boards to the desired size for the cart base and shelves.
- Attach the metal brackets to the corners of the base using metal screws.
- Cut the 4×4 boards to the desired length for the legs and attach them to the base using metal screws.
- Cut and attach additional 2×6 boards to create the sides of the cart.
- Mix the high-temperature epoxy according to the manufacturer’s instructions.
- Pour the epoxy onto the cart top and spread it evenly with a trowel.
- Allow the epoxy to dry completely before using the cart.
With these simple steps, you can create a stylish and functional grill cart with a concrete top that will impress your guests and enhance the look of your patio or deck.
DIY Grill Cart Project
Looking for a versatile addition to your outdoor cooking space? Consider building a DIY grill cart! This easy-to-build cart is made from sturdy wood pieces and features four casters for easy mobility. Use it as a prep table, cooking station, or serving cart. With two doors, you can store all of your grilling accessories quickly and easily. The center of the grill cart can be used as a worktop, making it a great addition to any outdoor cooking area. Enjoy the convenience of a prep, serving, or grill cart with this easy-to-build DIY project.
DIY Grilling Cart

If you want to make your grilling experience more efficient, a rolling grill cart is a must-have. This durable and sturdy grill cart is made with fir stock and metal rods, and it’s mobile so you can easily move it around. When not in use, you can push it back into your house to protect it from the weather conditions. The grill can lock into the upright position to keep it stable while not in use. Additionally, it’s designed with a fold-down side shelf and a hinged door to provide easy access to your grilling tools.
Conclusion:
In conclusion, having a DIY grill cart can be a practical and stylish addition to your outdoor cooking setup. With the 25 easy-to-build projects we have presented, you can find the perfect design to fit your needs and budget. From backyard BBQs to tailgating parties, these grill carts offer ample space for grilling your favorite foods and keeping all your grilling tools organized. Don’t wait any longer to build your own DIY grill cart and take your outdoor cooking to the next level!