Create a personalized touch to your living space with a DIY dream catcher. With 35 easy DIY dream catcher patterns and step-by-step guides, you can craft your own unique and beautiful dream catcher. From simple designs for beginners to more elaborate patterns for seasoned crafters, this collection of DIY dream catcher tutorials has something for everyone.
Dream catchers hold a rich history and cultural significance, symbolizing protection and filtering out negative energy. By incorporating various materials like yarn, beads, feathers, and embroidery hoops, you can customize your dream catcher to match your personal style and home decor. Get creative and bring a touch of charm and positive energy to your living space with your very own handcrafted dream catcher.
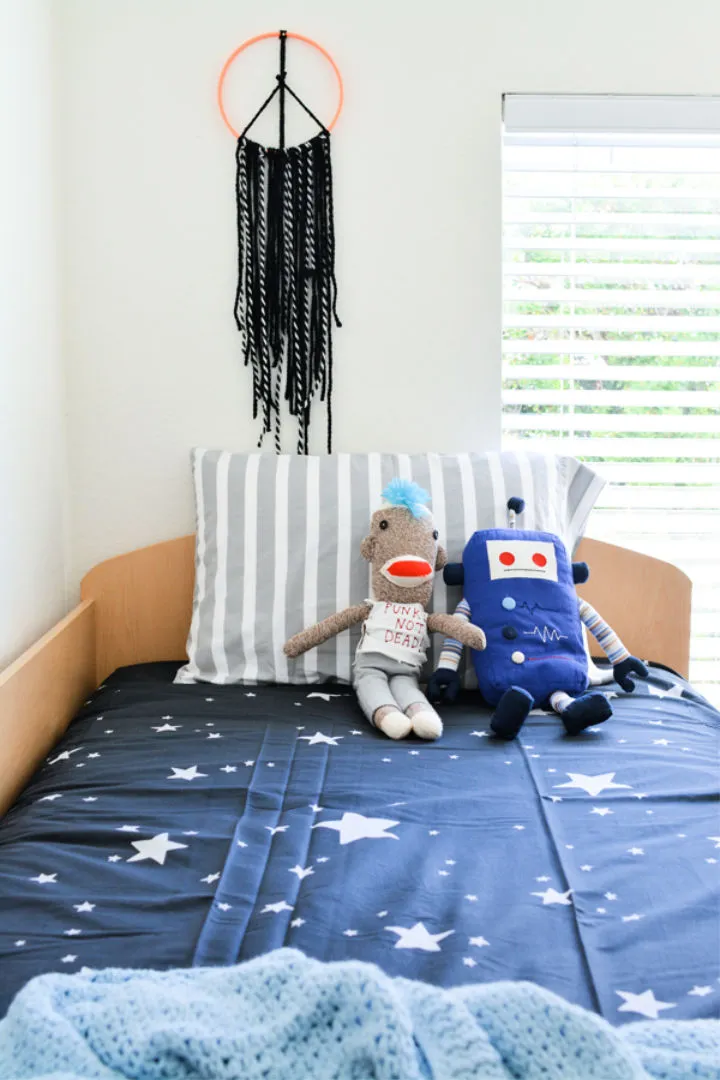
Easy DIY Dream Catcher for Beginners
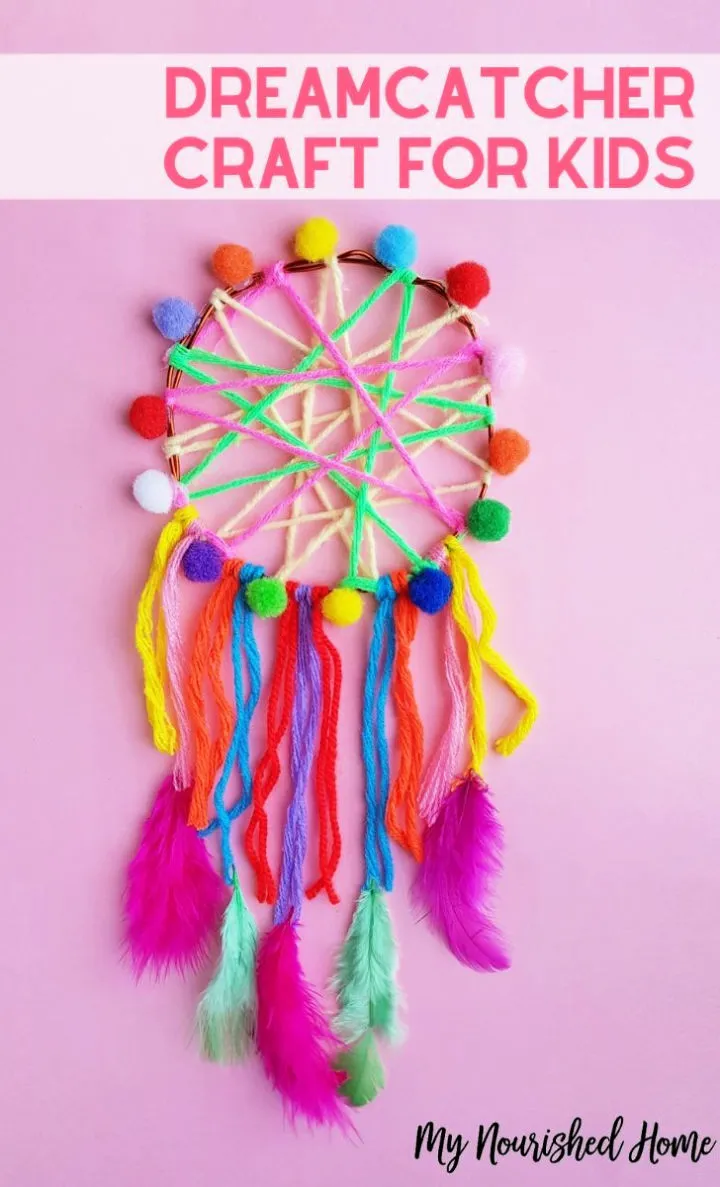
Looking for a fun and easy DIY project that adds a pop of color to any area of your house? Try making a dream catcher! This project is perfect for both kids and adults, and requires only basic craft supplies that you probably already have on hand. Not only is it a great way to brighten up your space, but you can also use your handmade dream catcher as a thoughtful gift for your loved ones.
To get started, gather the following materials:
- Craft wire
- Yarn in any color
- Pom-poms
- Craft feathers
- Construction paper
- A marker
- Scissors
- Hot glue gun
Follow these simple steps to create your dream catcher:
- Shape the craft wire into a circle and wrap it with yarn, securing the ends with hot glue.
- Cut several pieces of yarn in varying lengths and tie them to the bottom of the wire circle.
- Cut out several feather shapes from construction paper and attach them to the yarn strands with hot glue.
- Add pom-poms to the yarn strands, using hot glue to secure them in place.
- Use the marker to add any additional details or designs to your dream catcher.
With these easy steps, you can create a beautiful dream catcher that will add a personal touch to any room in your home.
Colorful Leaf Dream Catcher – Step By Step

Looking for a fun and easy fall decor project? Look no further than this colorful leaf dream catcher plan. With just a few basic supplies, you can create a beautiful and unique piece that adds a pop of color to any space.
To get started, gather leaves from your yard and acrylic paint in your desired colors. Paint the leaves and let them dry completely. Then, wrap an embroidery hoop with white yarn and tie a loop for hanging.
Next, cut several long pieces of green yarn and tie them to the bottom of the hoop. Use hot glue to attach the painted leaves to the green yarn, spacing them out evenly.
Finally, tie shorter pieces of yarn to the bottom of the leaves and add any additional embellishments you desire. Hang your colorful leaf dream catcher in a sunny window or on a wall for a cheerful and positive addition to your home decor.
This project is perfect for involving kids and letting them get creative with their own unique designs. Customize it to meet your needs and watch as it brings a touch of nature and color to your space.
Homemade Fiber Feather Dream Catcher
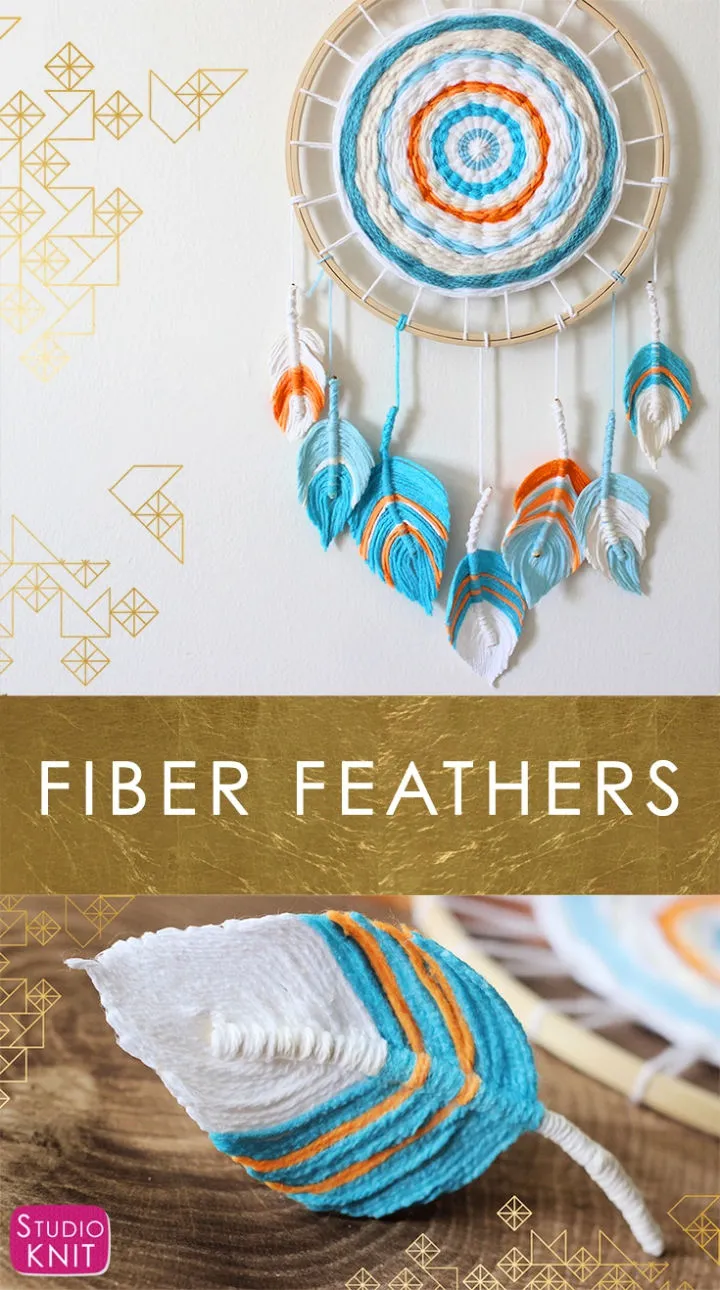
To add a fresh boho-style decor to your home, try making this homemade fiber feather dream catcher. Not only is it a fun spring project to do with your loved ones, but it can also protect you and your little ones from bad dreams. All you need are some basic craft supplies that you probably already have at home, such as yarn, floral wire, craft glue, wire cutters, scissors, paint brushes, corn starch, and a hair dryer. Follow this tutorial by studioknits to create your own beautiful dream catcher.
Make a Unicorn Dreamcatcher with Your Kids
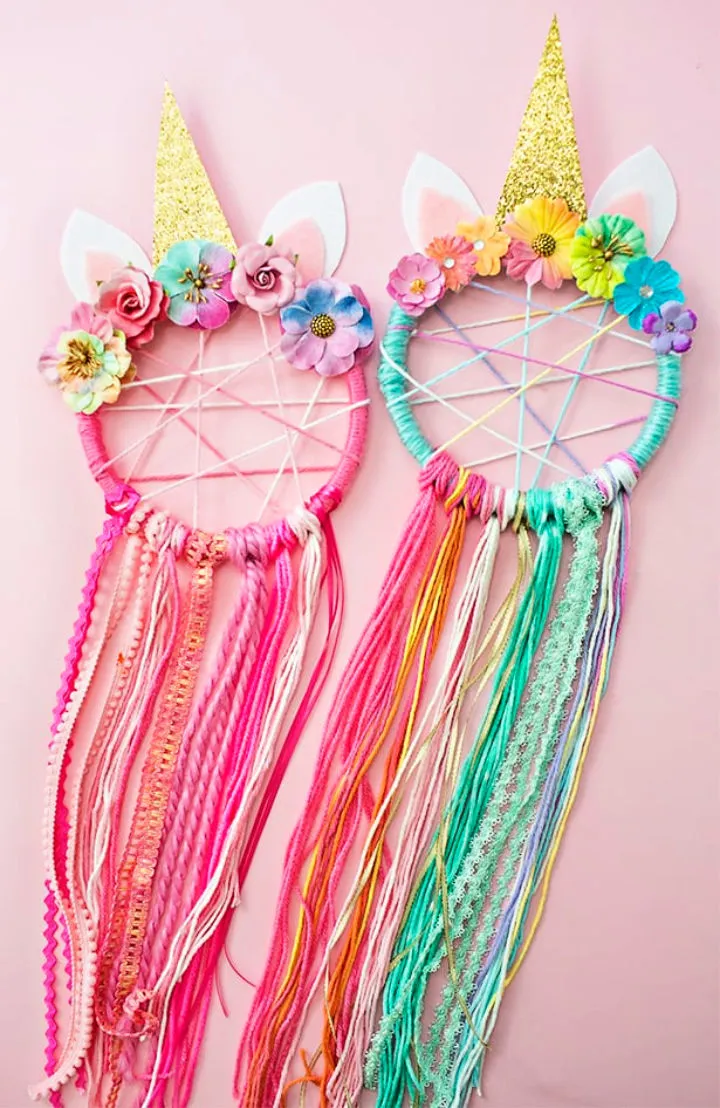
Creating a unicorn DIY dreamcatcher is a fun and engaging activity for kids. All you need are some basic materials such as embroidery hoops, yarn, ribbon, hot glue, felt, decorative craft flowers, glitter paper, and scissors. By following some simple steps, your child can make a beautiful dreamcatcher with their own hands. Here’s how to make a unicorn dreamcatcher:
- Wrap the yarn around the embroidery hoop until it is completely covered.
- Cut a piece of ribbon and tie it to the top of the hoop to create a hanger.
- Cut out a unicorn horn from glitter paper and glue it to the center of the hoop.
- Cut out felt ears and glue them to the top of the hoop.
- Tie ribbons of various textures to the bottom of the hoop.
- Decorate with decorative craft flowers.
Your child will love making their own unicorn dreamcatcher and will be proud to hang it up in their room. This activity is not only fun but also helps to improve their creativity and hand-eye coordination.
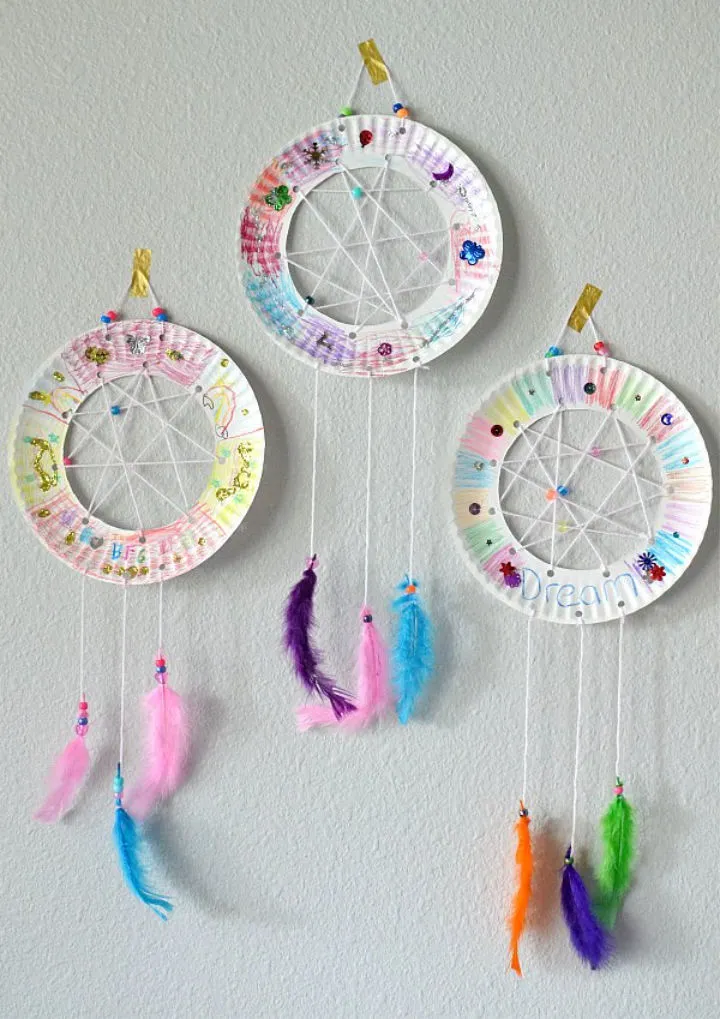
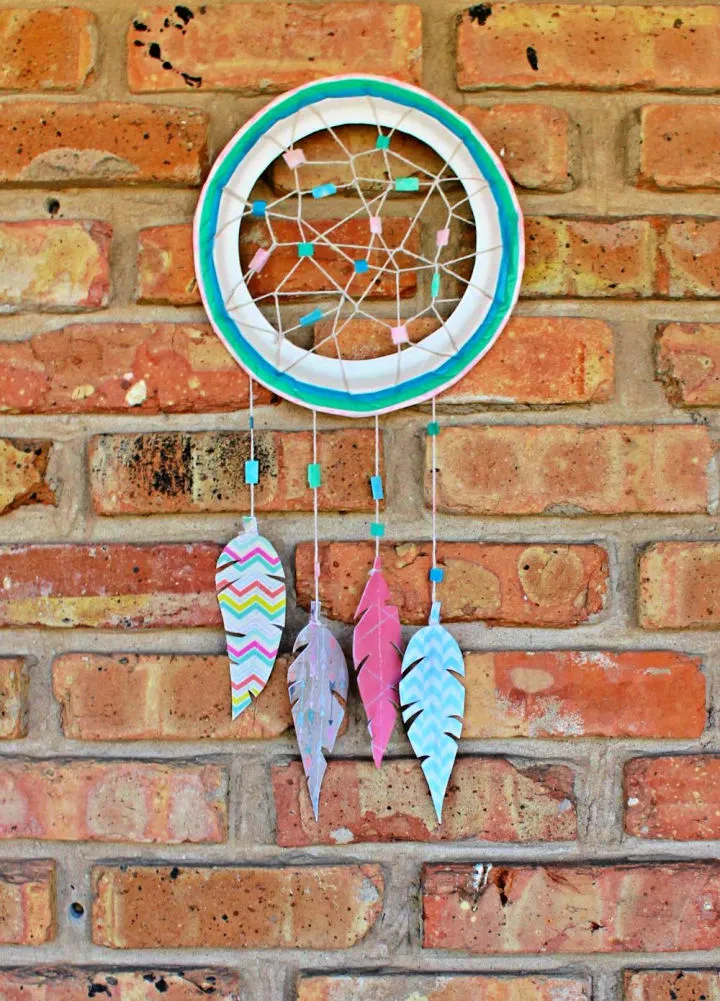
How to Create a Dreamcatcher Using Paper Plates
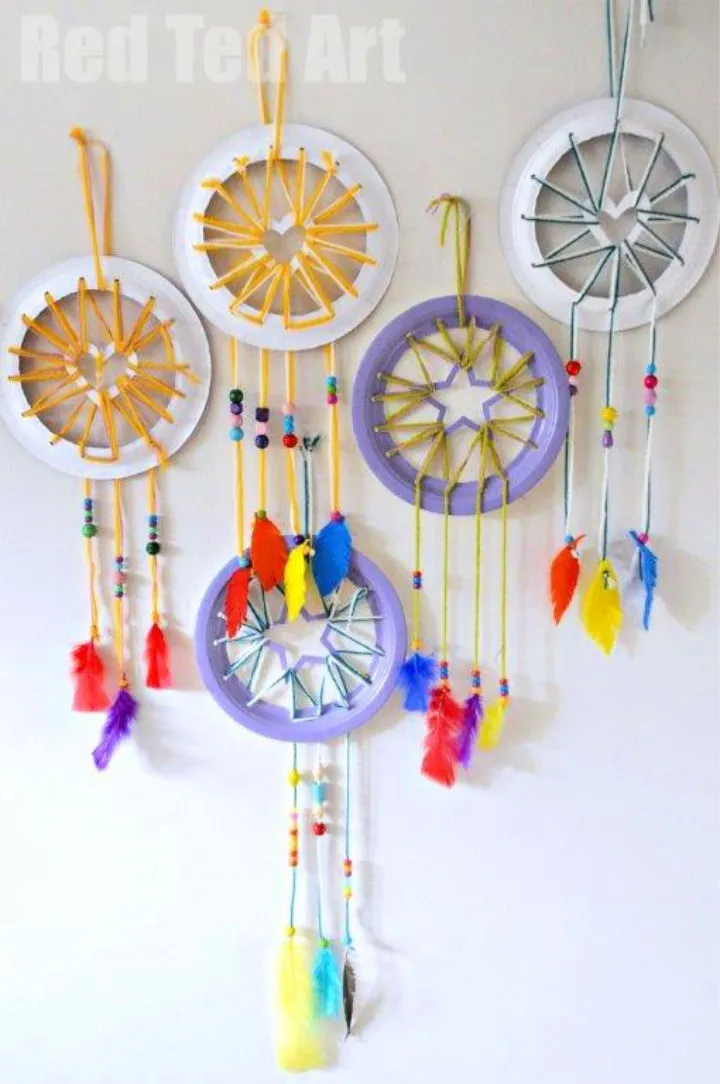
Making a paper plate dreamcatcher is a fun and easy DIY project that you can do at home. Not only is it a great way to add some unique and inexpensive decor to your home, but it can also help you sleep more peacefully by catching any bad dreams.
To get started, you will need a few basic supplies including paper plates, scissors, string or wool, beads, and felt feathers. Follow these simple steps to create your own paper plate dreamcatcher:
- Cut the center out of the paper plate to create a circular frame.
- Use the scissors to cut notches around the edge of the plate.
- Tie a piece of string or wool to the plate at one of the notches.
- Begin weaving the string or wool in and out of the notches to create a web-like pattern.
- Add beads to the string or wool as you go along.
- Once you have finished weaving the web, tie off the string or wool at another notch.
- Cut several lengths of string or wool and tie them to the bottom of the dreamcatcher.
- Add felt feathers to the ends of the strings or wool.
With these simple steps, you can create a beautiful paper plate dreamcatcher that will add a unique touch to your home decor. For more detailed instructions and ideas, check out the complete plan at redtedart.
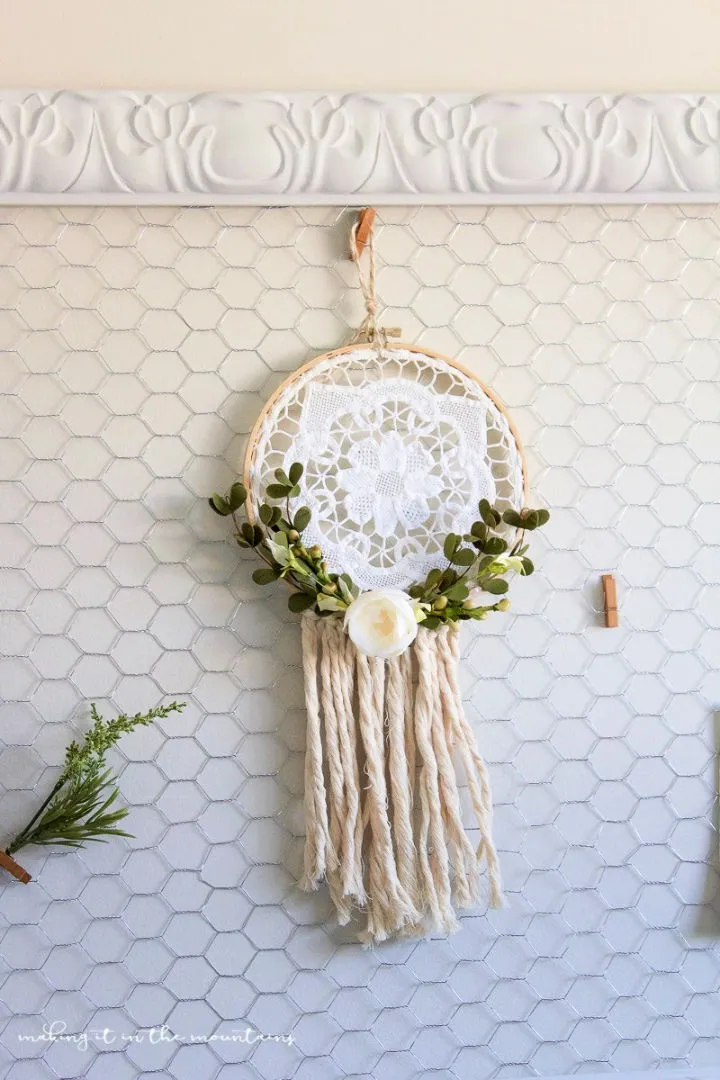
Simple Hexagon Dreamcatcher Design

Looking for a DIY dreamcatcher that will complement your home’s decor? Look no further than this easy hexagon dreamcatcher design! With just a few simple materials that you probably already have on hand, you can create a beautiful dreamcatcher that will add a touch of personalized charm to any room. Plus, it makes for a thoughtful and unique gift for anyone you love. Check out the complete project for a full list of materials and step-by-step instructions on consumercrafts.
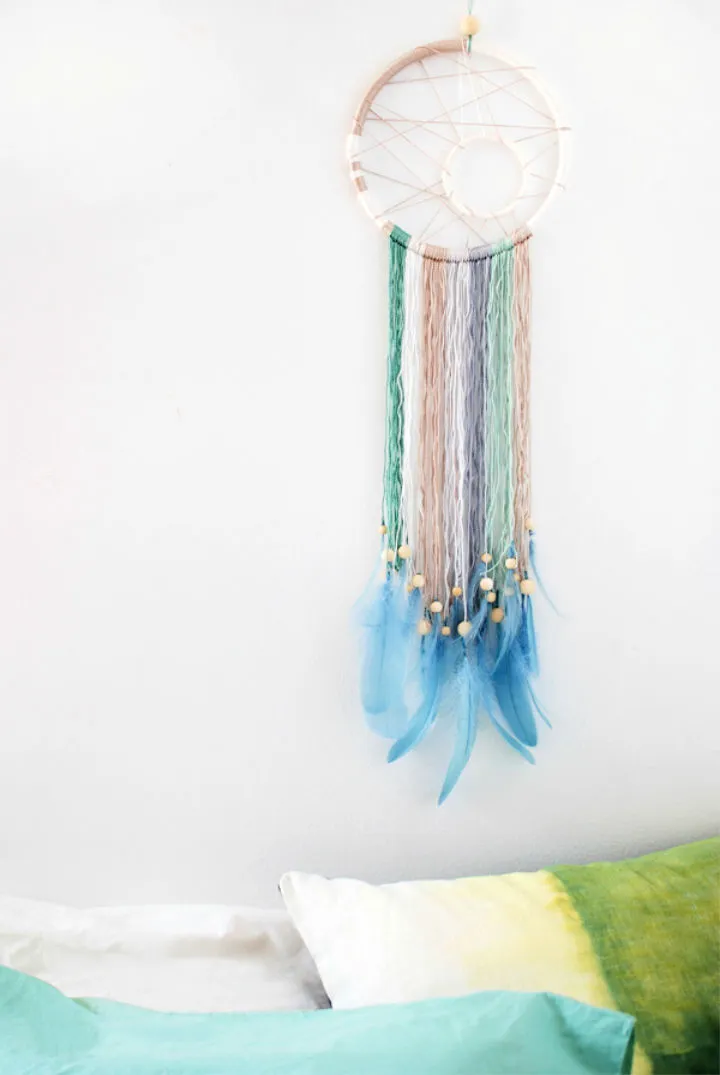
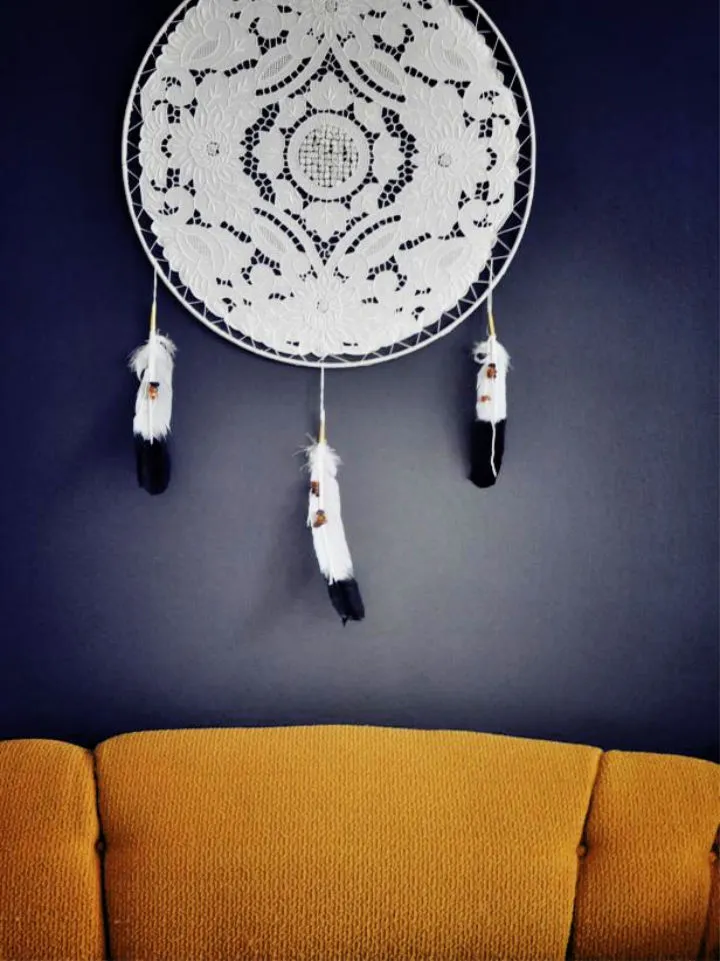
Make Your Own Dreamcatcher
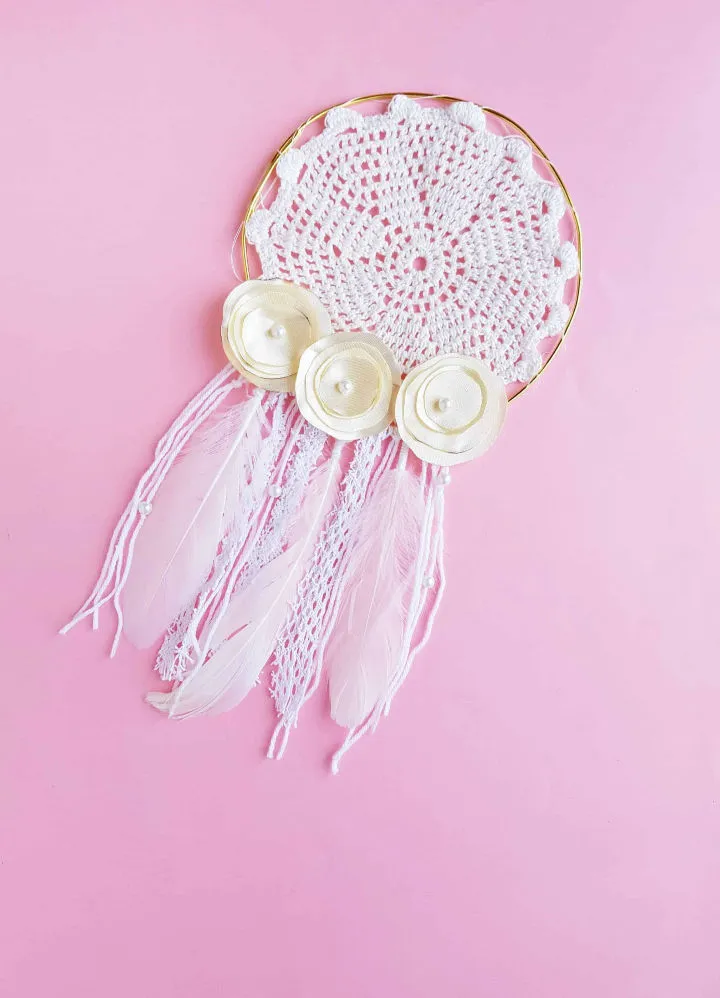
If you want to make your own dreamcatcher, it’s easier than you might think. Here’s what you’ll need:
- Craft wire
- Crochet doily
- Yarn
- Crochet lace
- Faux pearl beads
- Satin fabric
- Needle and thread
- Lighter
- Scissors
- Hot glue gun
Once you have your materials, follow these steps:
- Bend the craft wire into a circle and wrap it with yarn.
- Attach the crochet doily to the wire circle with the yarn.
- Cut several lengths of yarn and tie them to the bottom of the doily.
- Thread faux pearl beads onto the yarn and tie knots to keep them in place.
- Cut strips of satin fabric and tie them to the bottom of the dreamcatcher.
- Cut strips of crochet lace and tie them to the bottom of the dreamcatcher.
- Use a needle and thread to attach additional beads, feathers, or other decorations to the dreamcatcher.
- Use a lighter to carefully burn the ends of any frayed yarn or fabric.
Now you have your very own dreamcatcher that will not only help you sleep better but also add a touch of bohemian charm to your room.
Embroidery Hoop Dreamcatcher
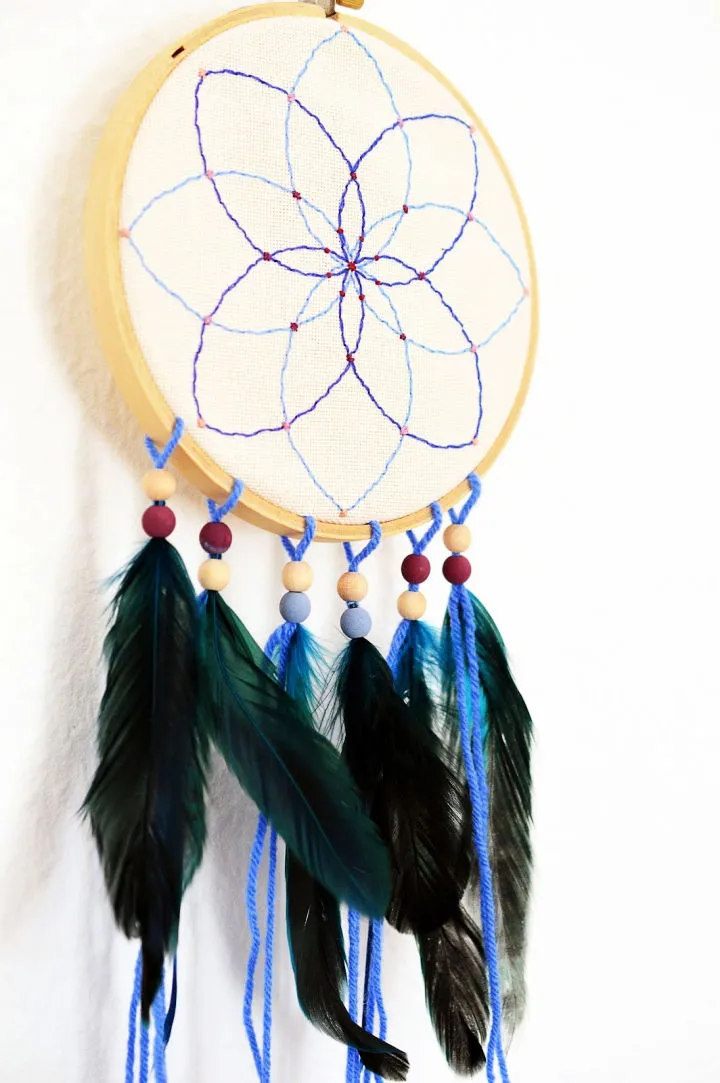
Looking for a way to get rid of those nightmares? Try making your own embroidery hoop dreamcatcher! This hand-crafted version is easy to make with materials you probably already have at home. Not only is it customizable to suit your needs, but it also makes for great home decor when hung above your bed or anywhere else in your house. To make this dreamcatcher, you will need embroidery fabric, an embroidery hoop, thread, sewing thread, feathers, beads, yard, scissors, an embroidery needle, and pins. Add some beads and feathers to make it even more unique and beautiful.
Simple Vine and Lace Dream Catcher
Creating a beautiful dream catcher for your home has never been easier. With just a few supplies, you can make a stunning addition to your decor that also has practical use. To make this dream catcher, you will need a vine wreath base, wax cord, seed beads, colored lace, and food coloring. Follow these simple steps to create your own dream catcher:
- Wrap the vine wreath base with wax cord.
- Tie the colored lace onto the wreath in a pattern of your choosing.
- String seed beads onto the wax cord, spacing them out evenly.
- Use food coloring to dye the lace for a unique touch.
- Hang your dream catcher in a prominent place to protect your family and add a touch of style to your home.
This easy DIY project is perfect for beginners and can be completed in just a few hours. Give it a try and see the difference it can make in your home decor.
How To Make A Tree Of Life Dreamcatcher
Protect your little ones from bad dreams with this easy-to-make tree of life dreamcatcher. You don’t need to be a professional crafter to create this beautiful piece of home decor. Here’s what you’ll need:
- Glass beads in any size and color you love
- A metal ring
- Nylon cord
- Scissors
- A lighter
Follow these simple steps to create your dreamcatcher:
- Tie the nylon cord to the metal ring and start wrapping it around the ring until it’s completely covered. Tie a knot to secure the end of the cord.
- Cut a longer piece of cord and tie it to the bottom of the ring. This will be used to create the web of the dreamcatcher.
- Start making the web by tying a knot around the cord and then wrapping it around the ring. Keep repeating this until you reach the center of the ring.
- Once you reach the center, tie a knot to secure the web and cut off the excess cord.
- Thread your glass beads onto the remaining cord and tie a knot at the end to keep them in place.
- Cut off any excess cord and use the lighter to melt the ends of the cord to prevent fraying.
- Finally, add some extra cord to the bottom of the dreamcatcher and attach your chosen decorations, such as feathers or leaves, to create the tree of life design.
Hang your dreamcatcher above your bed or in any room of your home for a stunning piece of decor that’s also functional.
The BFG Paper Plate Dream Catchers
Looking for a fun and cost-effective way to add some charm to your living room decor? Look no further than the BFG paper plate dream catchers! This project is not only easy to make, but it’s also a great way to involve your kids in a fun crafting activity. All you need are a few supplies from your local craft store, including paper plates, yarn, crayons, sequins, glitter, feathers, pony beads, glue, scissors, and a hole punch. Check out the complete instructions for this DIY project on thesuburban for a step-by-step guide on how to create your very own dream catchers.
Modern DIY Dreamcatcher
Looking for a unique and affordable way to add some personality to your bedroom? Why not try making your own modern dreamcatcher? This DIY project is easy to complete and won’t break the bank. Plus, you can customize it to match your personal style or create a handmade gift for someone special. To get started, you’ll need a rattan hoop or metal craft ring, craft feathers, wooden beads, thread of your choice, scissors, and craft glue. Follow the steps provided by crafts tutsplus to create a stunning dreamcatcher that will make a statement in any room.
Sheet & Lace Doily Dream Catcher Pattern
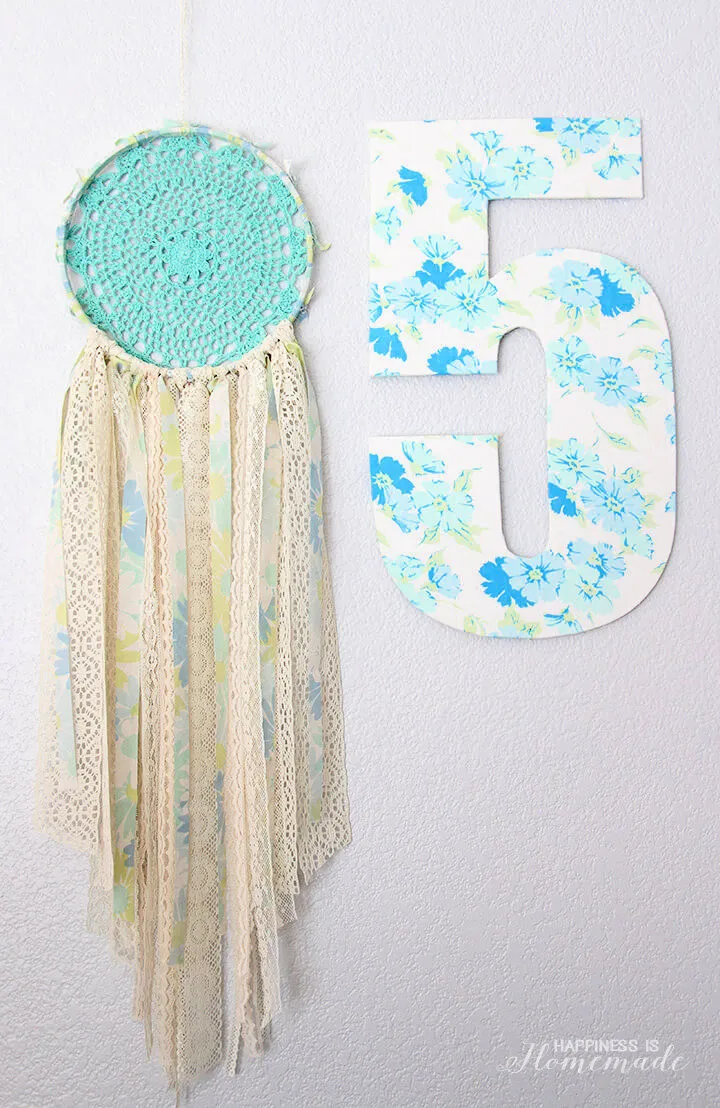
Looking to add some character to your home décor? Look no further than the sheet and lace doily dream catcher pattern. Not only will this unique piece keep bad dreams away from your child, but it will also serve as a beautiful focal point in any room. The best part? You can customize the project to your liking without breaking the bank. To get started, gather an embroidery hoop, vintage sheets, a doily, scissors, and plenty of pretty lace. With these materials and a little creativity, you’ll have a stunning dream catcher in no time.
DIY Macrame Dream Catcher
Creating your own macrame dream catcher is a great way to add a unique touch to your space without breaking the bank. With just a few supplies, you can make a beautiful dream catcher that will be sure to catch your eye. To get started, you will need an iron or wooden ring, a rattan ring, cotton rope, craft scissors, and some time to work on the project. Follow the step-by-step instructions to create a stunning dream catcher that will be the envy of all your friends. Not only will it serve as a beautiful piece of decor, but it also has the added benefit of stopping bad dreams.
Doily Bohemian Dream Catcher Tutorial
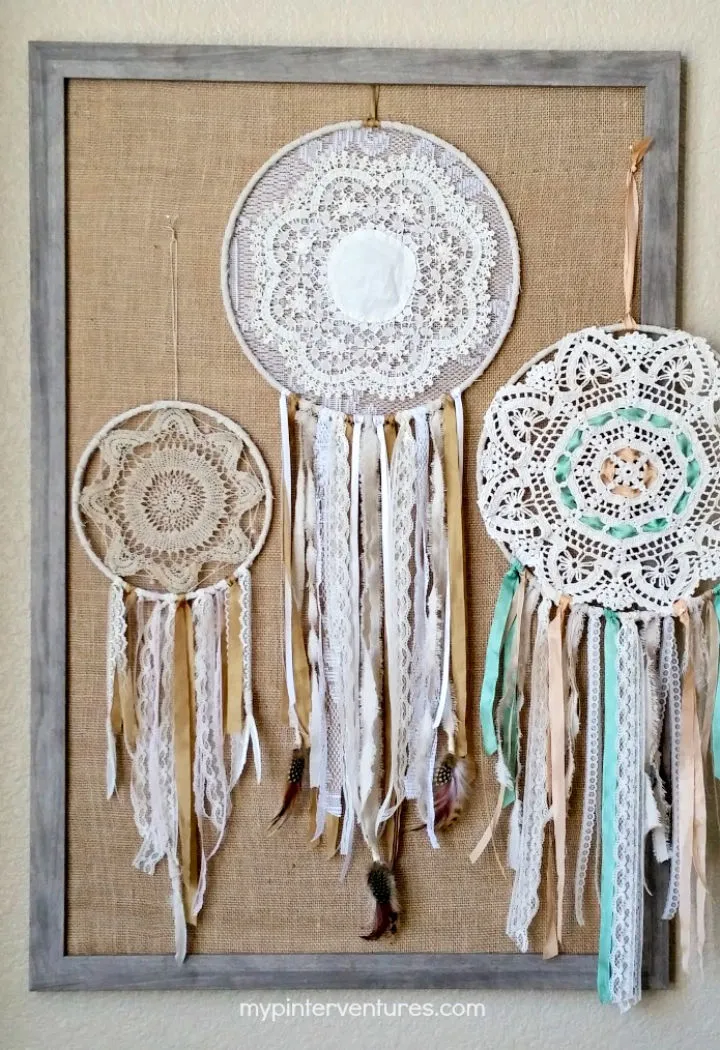
Looking for a unique and affordable way to add a personal touch to your dream catcher? Look no further than this impressive tutorial for making dream catchers with vintage doilies. With a few simple supplies like a metal macrame ring, vintage doilies, lace tablecloth, ribbon, and feathers, you can create a super gorgeous dream catcher that matches your home’s decor. Don’t forget to use fray check to prevent fraying and hot glue to secure everything in place. Follow these easy steps to create your own beautiful doily bohemian dream catcher:
- Cut a length of hemp cord and tie it around the metal macrame ring.
- Cut strips of lace tablecloth or fabric scraps and tie them around the ring, spacing them evenly.
- Use hot glue to attach vintage doilies to the ring, layering them for a more intricate look.
- Add ribbon and feathers to the bottom of the dream catcher, securing them with hot glue.
- Finish by tying a length of hemp cord to the top of the dream catcher for hanging.
With this tutorial, you can create a unique and beautiful dream catcher that adds a touch of bohemian charm to any room.
Simple Doily Dream Catcher Outline
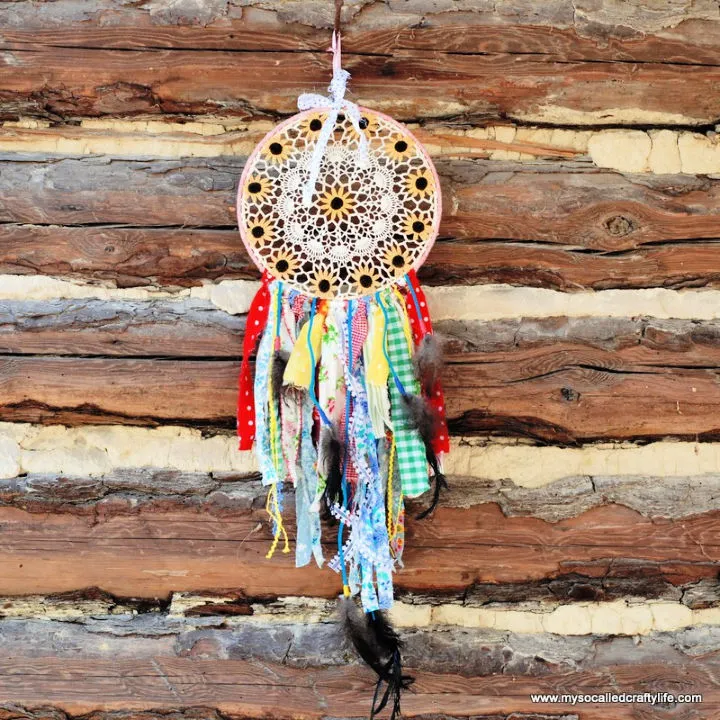
Create a charming doily dream catcher with this easy-to-follow guide. You can achieve a vintage look for your home decor with just a few simple materials. To get started, gather a doily, an embroidery hoop that fits your doily, yarn, ribbon, fabric scraps, leather lacing, embroidery floss, feathers, double-stick tape, and scissors. Then, follow the step-by-step instructions to assemble your dream catcher. Once complete, you can display your creation indoors or outdoors for a beautiful visual effect. This project is affordable and perfect for crafters of all skill levels.
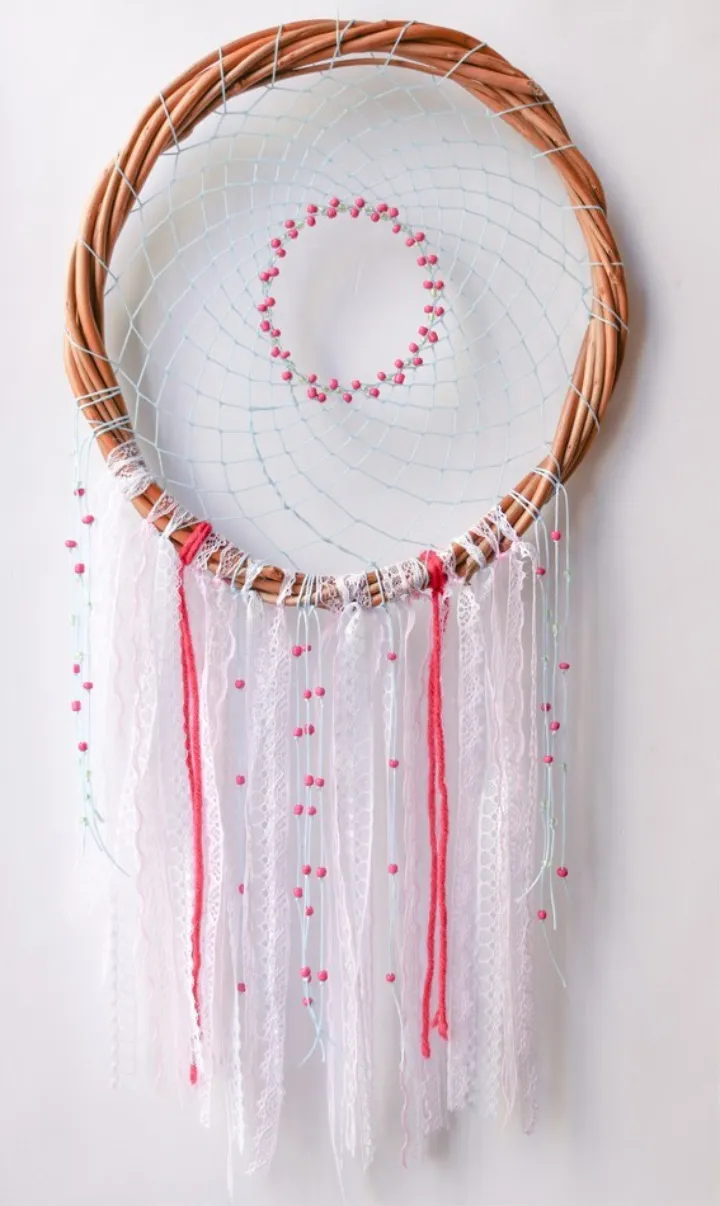
Making Indian-Styled Dream Catcher
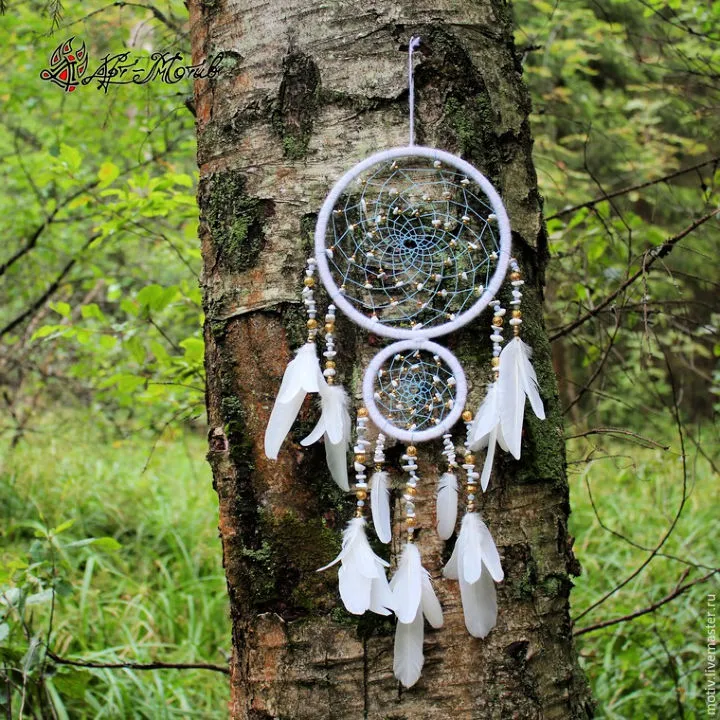
Making an Indian-styled dream catcher is an easy DIY project that requires minimal materials. To get started, you will need two rings in different sizes, a white and blue buckle, stone chippings, metal beads, clamping beads, and jewelry wire or fishing wire.
Here are the steps to make your own Indian-styled dream catcher:
- Take the bigger ring and wrap the jewelry wire around it. Tie a knot and leave a tail of about 5 inches.
- String the metal beads onto the wire until you reach the starting point.
- Take the smaller ring and wrap the wire around it. Tie a knot and leave a tail of about 5 inches.
- String the stone chippings onto the wire until you reach the starting point.
- Take the tails of the wire and tie them together, securing the two rings together.
- Cut a length of wire and tie it to the bottom of the bigger ring. String the clamping beads onto the wire and tie it to the bottom of the smaller ring.
- Cut another length of wire and tie it to the top of the bigger ring. Attach the white and blue buckle to the wire.
- Cut a length of wire and tie it to the top of the smaller ring. Attach the stone chippings to the wire.
Your Indian-styled dream catcher is now ready to hang in your space and keep bad dreams away.
How To String A Dreamcatcher
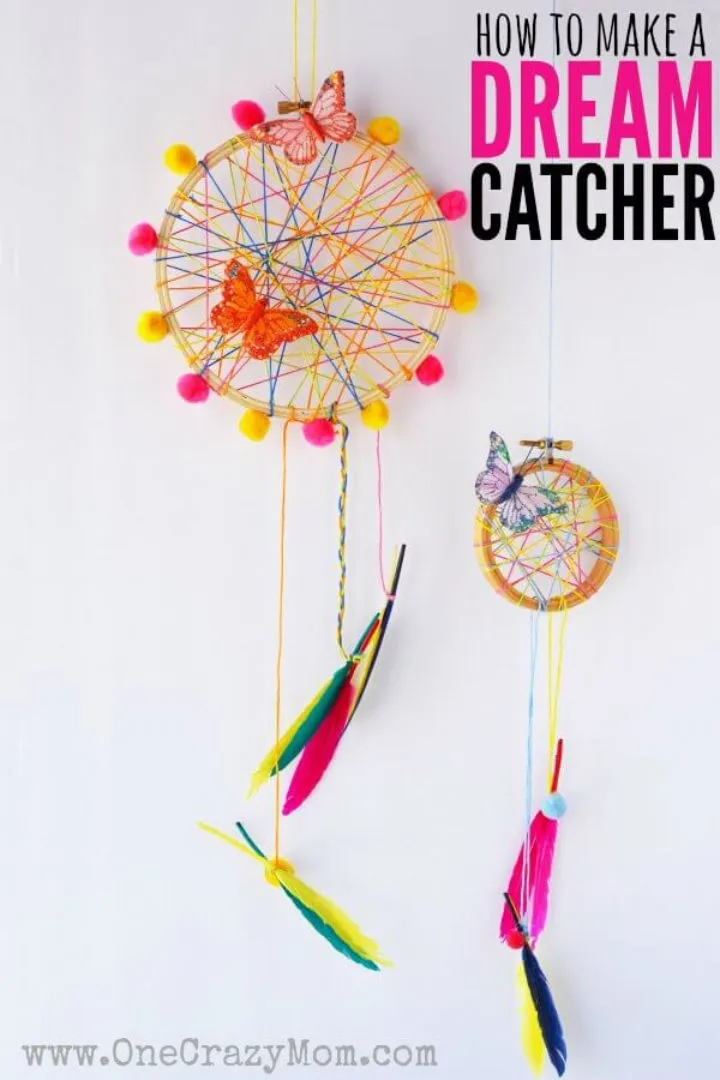
To string a dreamcatcher, you will need some basic materials such as embroidery hoops, embroidery floss, pom-poms, feathers, butterfly floral picks, low-temperature hot glue gun, and scissors. Follow these easy steps to create your own dreamcatcher:
- Take the embroidery hoop and wrap it with embroidery floss until it is completely covered.
- Tie a knot at the top of the hoop and begin weaving the floss in a circular pattern around the hoop.
- Continue weaving until you reach the center of the hoop.
- Tie a knot at the center of the hoop and leave a long tail of floss.
- Attach feathers, pom-poms, and butterfly floral picks to the tail of floss using a low-temperature hot glue gun.
- Create a loop at the top of the dreamcatcher for hanging.
- Your dreamcatcher is now ready to hang up and enjoy!
This fun and easy project is perfect for kids and adults alike. With just a few simple materials, you can create a beautiful and whimsical dreamcatcher to add a touch of calmness to your home decor.
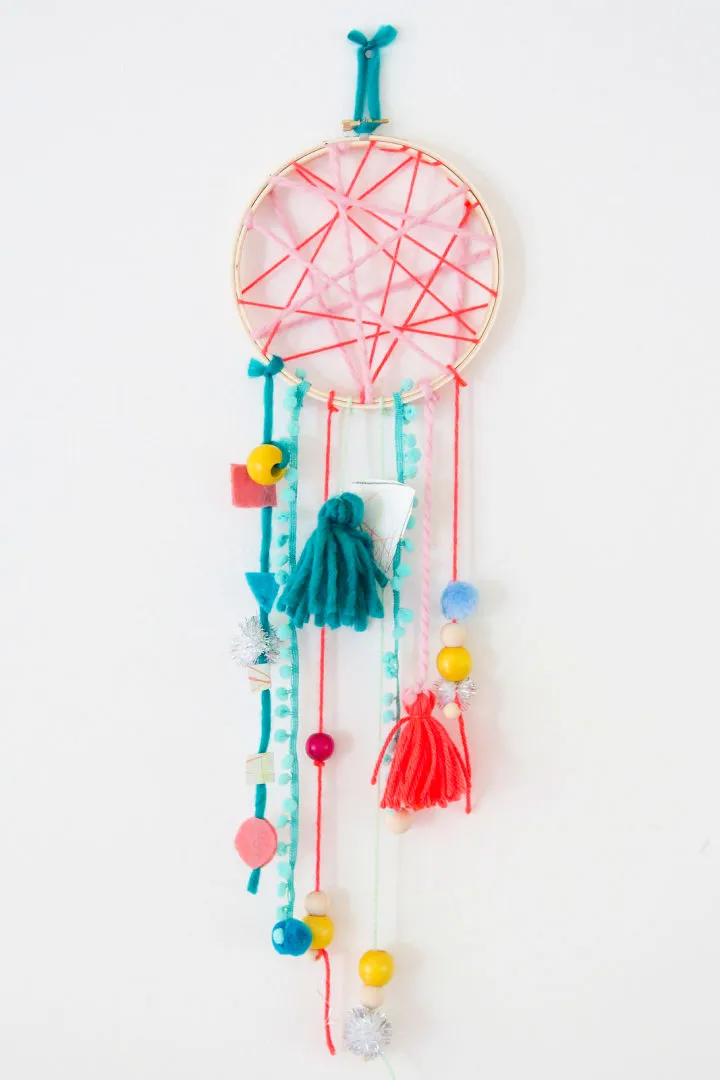
How to Make a Dreamcatcher
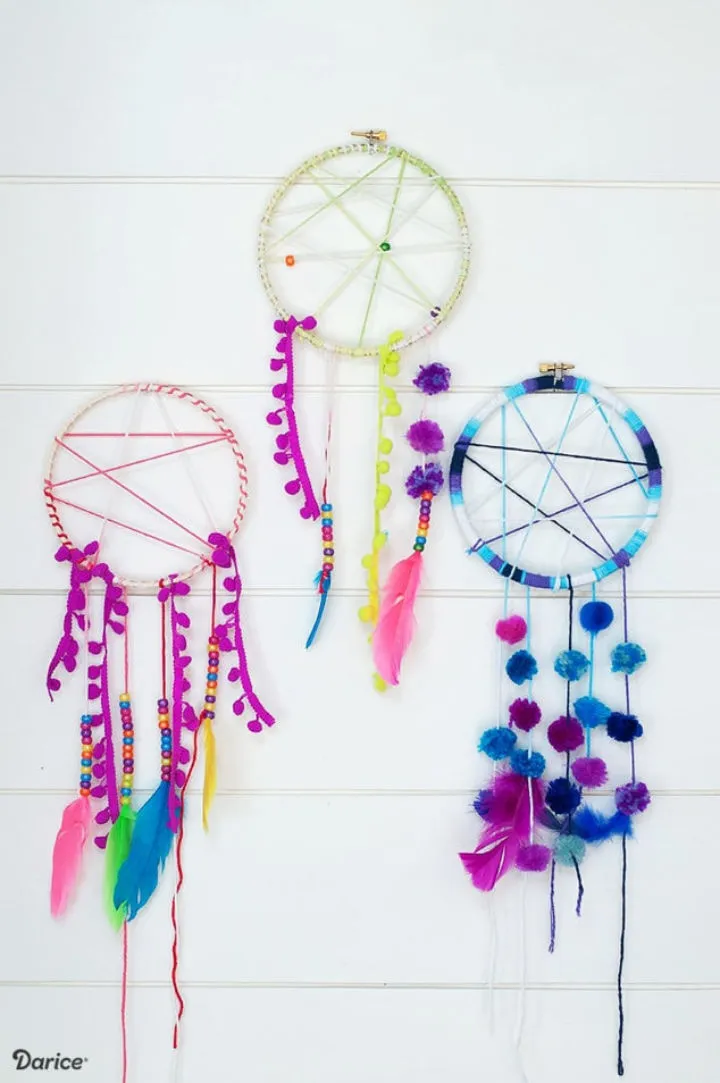
If you want to create a dreamcatcher at home, it’s easier than you might think. Here’s a step-by-step guide to help you through the process:
- Gather your materials: wooden embroidery hoops, yarn, assorted pom-poms, pom-pom garlands, feathers, needlepoint needles, and pony beads in assorted colors.
- Take the embroidery hoop and wrap it tightly with yarn. Tie a knot to secure the end.
- Cut a long piece of yarn and tie it to the hoop. Leave a tail of about 4 inches and then wrap the yarn around the hoop, leaving spaces in between.
- Continue wrapping the yarn around the hoop until you reach the starting point. Tie a knot to secure the yarn and trim off the excess.
- Cut another piece of yarn and tie it to the hoop. Leave a tail of about 4 inches and then tie a feather to the yarn.
- Continue tying feathers to the yarn until you have the desired amount.
- Cut a long piece of yarn and tie it to the bottom of the hoop. Thread pony beads onto the yarn and tie a knot to secure them in place.
- Tie pom-poms and pom-pom garlands to the bottom of the dreamcatcher.
Follow these simple steps to create a beautiful dreamcatcher that will not only help you sleep better but also add a touch of charm to your room.
Dream Catcher With Beads
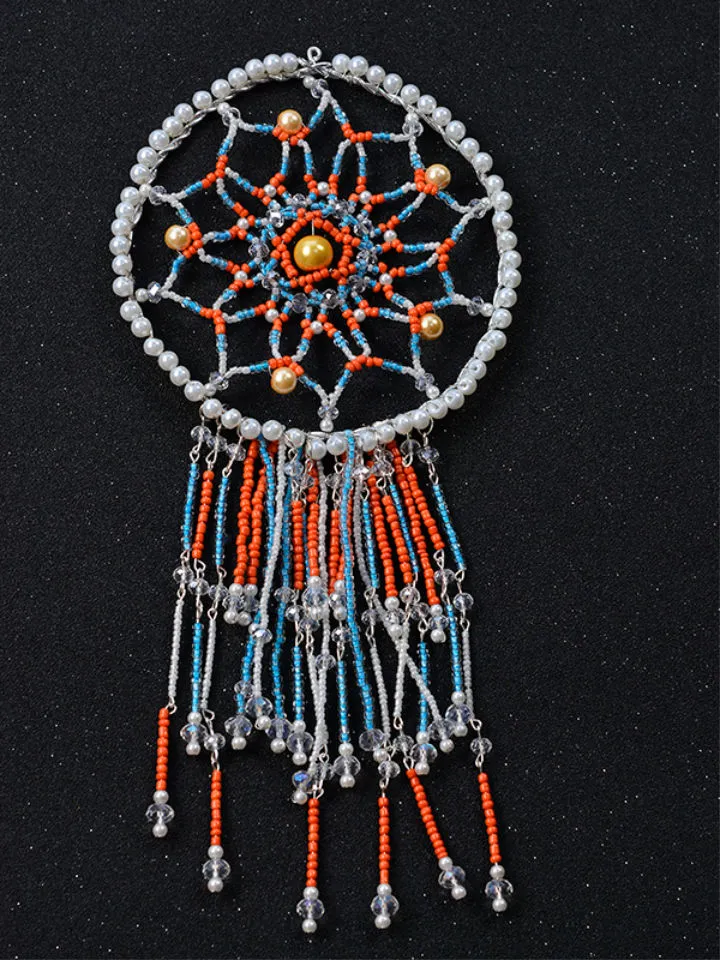
Create your own dream catcher with beads for a personalized touch and save money on expensive store-bought versions. This DIY project is simple and can be completed with a few materials including transparent faceted glass beads, pearl beads, aluminum wire, copper wire, jump rings, eye pins, iron headpins, round nose pliers, and side-cutting pliers. Use the step-by-step instructions to craft a dream catcher that will catch bad dreams and add a cozy touch to your child’s bedroom or stunning decor to any space.
How to Make a Fall Dream Catcher
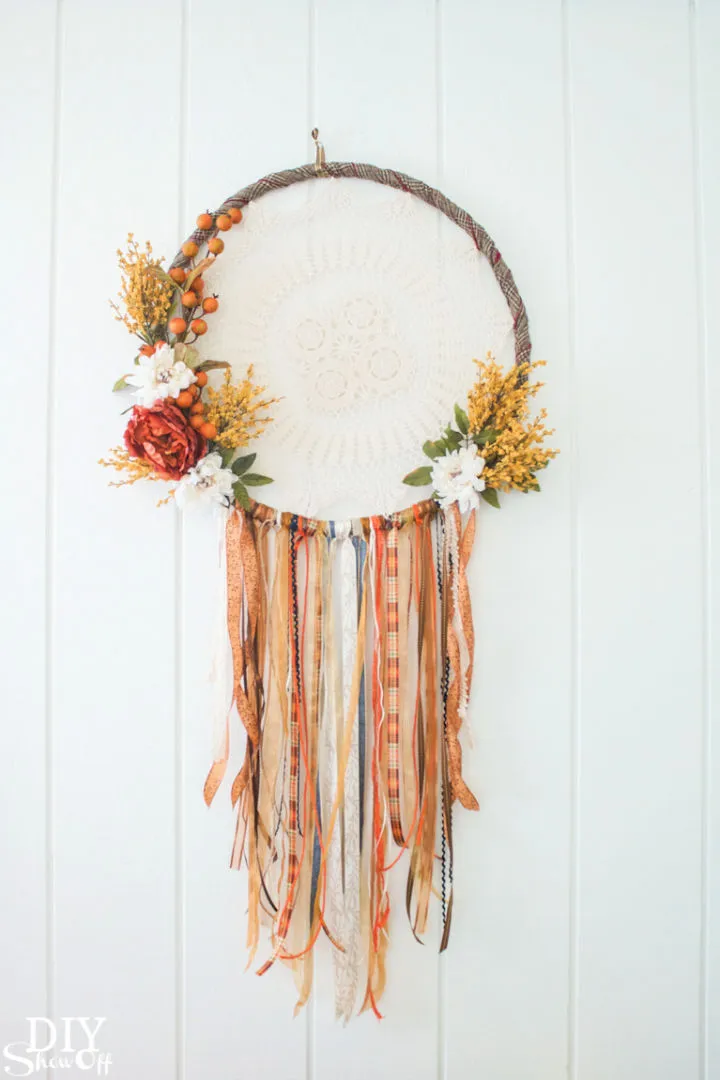
To make a fall dream catcher, you will need a small hula hoop, a doily, string, assorted ribbons or lace trims, fall florals, and hot glue with a gun. Follow these steps:
- Wrap the hula hoop with the string, securing it with hot glue as you go.
- Attach the doily to the center of the hoop using hot glue.
- Cut ribbons or lace trims into varying lengths and attach them to the bottom of the hoop using hot glue.
- Add fall florals to the dream catcher by attaching them to the ribbons or lace trims using hot glue.
- Hang your fall dream catcher on the wall and enjoy the beautiful fall decor.
By following these simple steps, you can create a stunning fall dream catcher that will add a statement to your home walls. You can also customize it with anything you love to match your home’s decor.
DIY Boho-Style Dreamcatcher
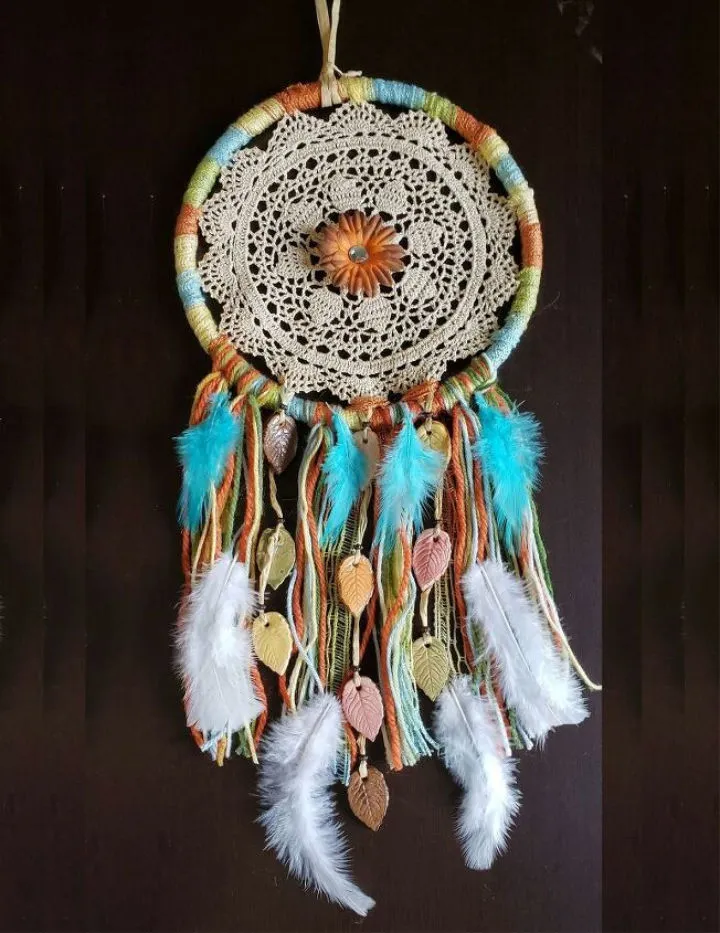
If you’re looking for a unique and creative way to spruce up your home decor, try making your own DIY boho-style dreamcatcher. Not only will it add a statement piece to your space, but it can also help filter out bad dreams and prevent them from reaching you while you sleep.
To make your own dreamcatcher, you’ll need a few supplies, including a wood or metal craft ring, a crochet doily, yarns, raffia string, feathers, silk flowers, scissors, beads, a glue gun, and glue sticks. Follow these simple steps:
- Begin by wrapping the craft ring with yarn or raffia string, securing the ends with hot glue.
- Next, attach the crochet doily to the center of the ring, using hot glue to secure it in place.
- Cut several lengths of yarn or raffia string and tie them to the bottom of the dreamcatcher, spacing them out evenly.
- Add feathers, silk flowers, and beads to the lengths of yarn or raffia string, tying them in place with knots.
- Finally, add a loop of yarn or string to the top of the dreamcatcher for hanging.
With these simple steps, you’ll have a beautiful boho-style dreamcatcher that’s not only functional but also adds a unique touch to your home decor.
Dream Catcher Design for Kids
Crafting a dream catcher is a fun and creative activity for kids that can enhance their crafting skills and help them stop bad dreams. To create a kid-friendly dream catcher, you will need some basic materials such as scissors, margarine containers or metal rings, yarn, beads, feathers, and tackle glue. Follow these simple steps to create a beautiful dream catcher:
- Cut the yarn into pieces of equal length, depending on the size of the ring.
- Tie one end of the yarn to the ring and start wrapping the yarn around the ring.
- Continue wrapping the yarn until the entire ring is covered.
- Tie the end of the yarn to the ring and cut off any excess.
- Cut a longer piece of yarn and tie it to the top of the ring.
- Thread beads onto the yarn and tie feathers at the end.
- Attach the feathers to the bottom of the dream catcher.
- Hang your dream catcher in a place where it can catch your dreams.
With a little bit of time and creativity, you can create a beautiful and unique dream catcher that will not only decorate your home but also bring positive energy and peaceful dreams to your kids.
DIY Farmhouse-Style Dreamcatcher
Looking for a quick and easy way to add a rustic touch to your space? Try making a DIY farmhouse-style dreamcatcher using just a few items you likely already have at home. This project is perfect for those who want to create something beautiful in just a few moments. Plus, you can hang it anywhere – but it looks especially great on top of a bed to keep bad dreams at bay.
One of the best things about this DIY project is that it also makes a great handmade gift for any occasion. To get started, simply follow the step-by-step instructions and gather the items listed in the plan below. With a little creativity and some basic crafting skills, you’ll have a beautiful dreamcatcher in no time.
DIY Dreamcatcher Out of Brass Hoops
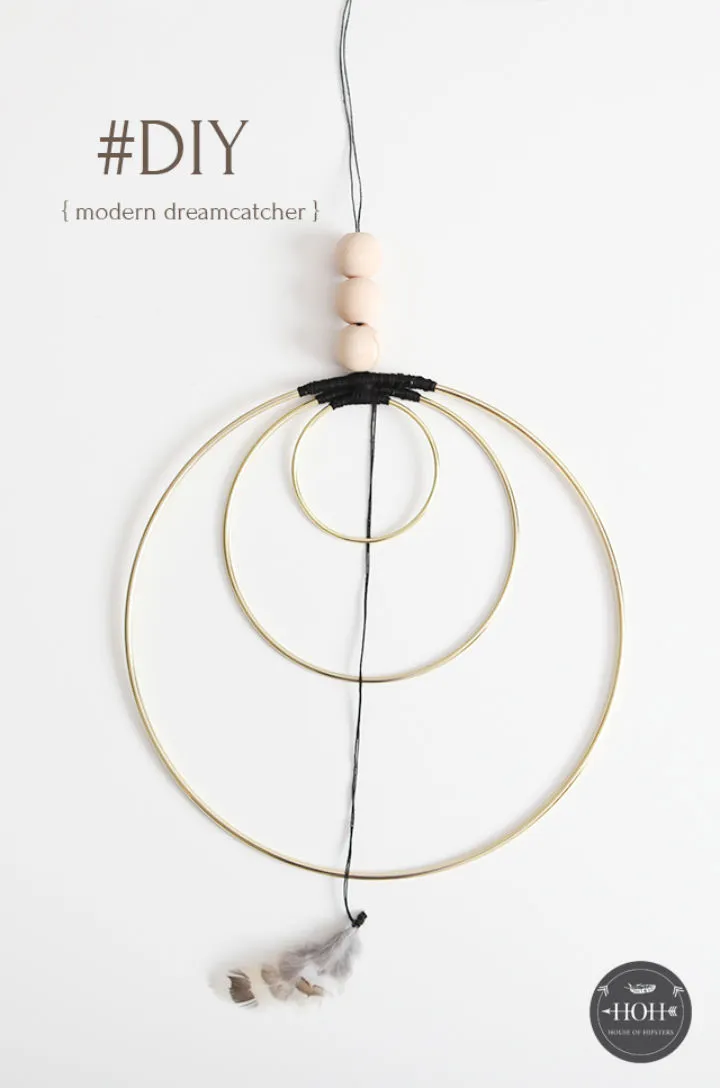
If you’re looking for a dream catcher DIY that matches your home decor, this DIY dreamcatcher made out of brass hoops is a great option. It’s not only versatile, but it’s also easy to put together in just a few minutes. You won’t have to break the bank to make a functional focal point in your home that keeps bad dreams at bay.
To create this dreamcatcher, you will need the following materials:
- Brass hoops
- Black crochet thread
- Wooden beads
- Tacky adhesive dots or a glue gun
- Small feathers
Simply wrap the black crochet thread around the brass hoop until it is completely covered. Then, attach wooden beads and feathers to the bottom of the dreamcatcher using the tacky adhesive dots or glue gun. Hang it up in your home and enjoy a peaceful night’s sleep.
Dream Catcher Craft for Children’s
If your child is having trouble sleeping alone, a handmade dream catcher craft can provide a sense of comfort and security. This fun and easy project allows kids to create their own unique dream catcher to hang above their bed. To make the dream catcher, you’ll need an embroidery hoop, brightly colored twine in two shades, different-colored beads, feathers, and a hot glue gun. Follow these simple steps:
- Wrap the embroidery hoop with twine, making sure to cover the entire hoop.
- Tie a knot at the top of the hoop and begin weaving the twine in a circular pattern.
- Add beads to the twine as desired.
- Attach feathers to the bottom of the dream catcher using hot glue.
- Hang the dream catcher above your child’s bed.
Your child will love having a personalized dream catcher to catch their bad dreams and bring them peaceful sleep.
Make Your Own Dreamcatcher
Making a dreamcatcher at home is a simple and affordable way to add a personal touch to your decor. You can customize the design to match your style and color scheme. Not only does it look great, but it also serves a practical purpose by keeping bad dreams away from your child’s room. It also makes for a thoughtful and unique gift for any occasion. To get started, gather the necessary materials and follow the tutorial provided by Jenloveskev. With a little bit of patience and creativity, you can create a beautiful dreamcatcher that will bring positive vibes to your home.
Colorful Feather Dream Catcher
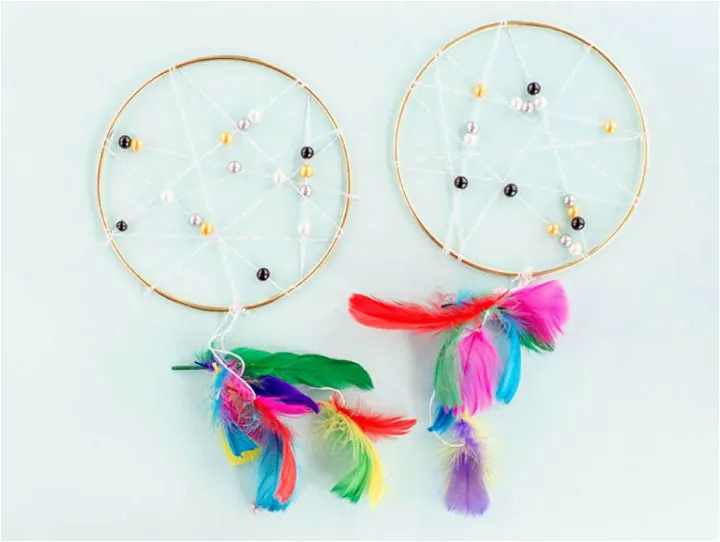
Create a beautiful and positive energy-filled dream catcher with this beginner-level DIY project. This craft is an easy and quick way to add attractive decor to your home walls. Gather your materials, including gold metal rings, colorful feathers, bright baker’s twine, pearl beads in your desired colors and size, scissors, and a needle. Follow these simple steps to bring your dream catcher to life:
- Wrap the metal ring with baker’s twine, securing the end with a knot.
- Cut a long piece of twine and tie it to the ring, leaving a tail of about 6 inches.
- Thread a pearl bead on the twine and knot it in place.
- Continue threading beads and knotting them in place until you reach the end of the twine.
- Cut a length of twine and tie it to the ring, leaving a tail of about 6 inches.
- Thread a feather onto the twine and knot it in place.
- Continue threading feathers and knotting them in place until you reach the end of the twine.
- Repeat steps 5-7 until you have several strands of feathers hanging from the ring.
- Tie a length of twine to the top of the ring for hanging.
Hang your colorful feather dream catcher in your bedroom or any other room where you want to promote positive energy and peaceful dreams.
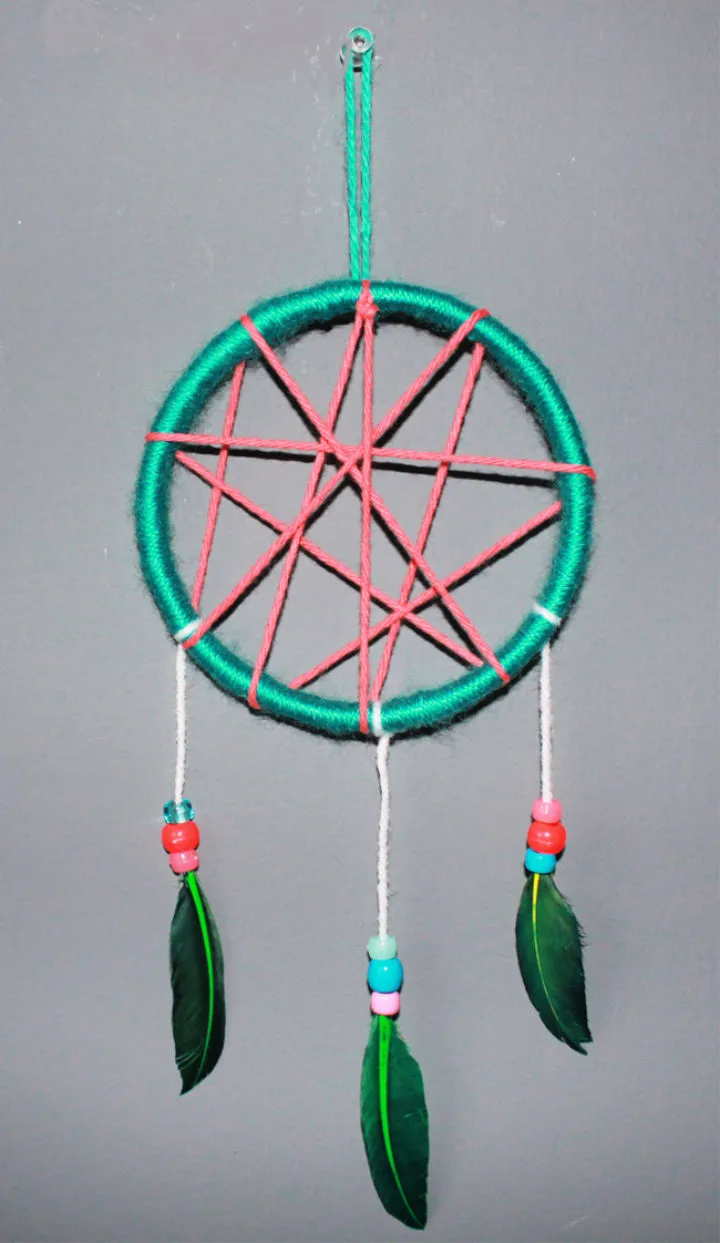
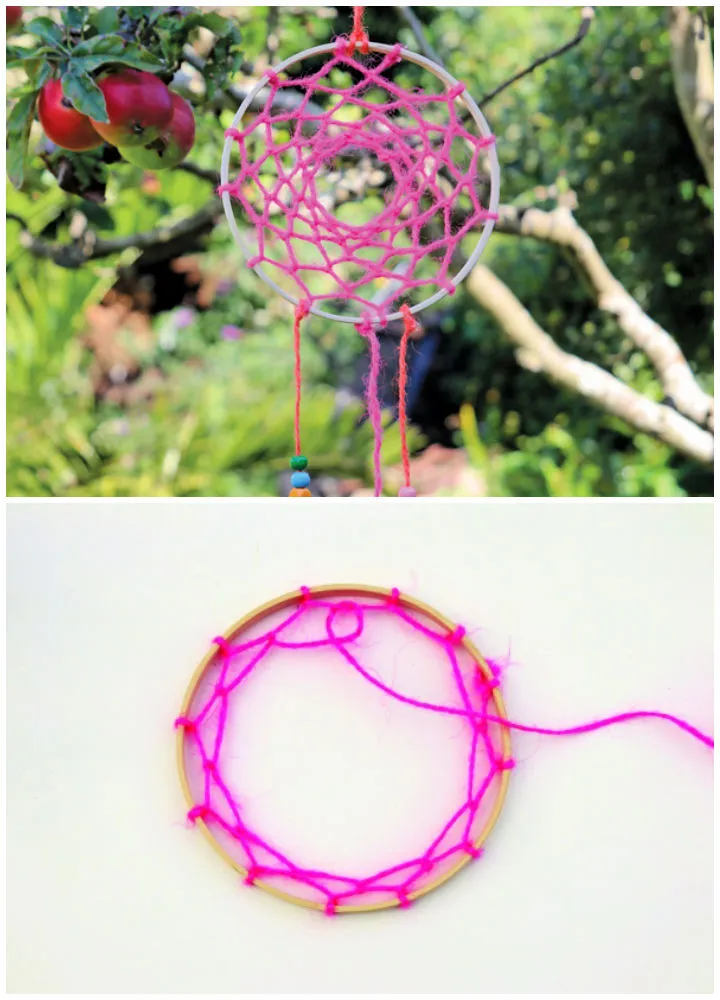
How To Make A Dreamcatcher With Yarn
Making a dreamcatcher with yarn is an easy and affordable way to add a unique touch to your home decor. To get started, you will need an embroidery hoop, yarn, and scissors. Follow these simple steps to create your own dreamcatcher:
- Take your embroidery hoop and wrap yarn around it until it is completely covered. Tie a knot to secure the end of the yarn.
- Cut a long piece of yarn and tie it onto the hoop, leaving a tail for hanging. This will be used to create the web of the dreamcatcher.
- Make a loop with the yarn and tie it onto the hoop, leaving a small space between the knot and the edge of the hoop. Continue this process around the hoop until you reach the starting point.
- Once you have completed the first round, start the second round by tying the yarn onto the first loop and creating a loop around the hoop. Repeat this process until you have created a web in the center of the hoop.
- Tie a piece of yarn onto the bottom of the dreamcatcher and attach feathers or beads for decoration.
- Hang your dreamcatcher in a place where it can catch your dreams and bring positive energy into your space.
Creating a dreamcatcher with yarn is a fun and creative activity that you can enjoy with your kids. It’s also a great way to add a personal touch to your home decor without breaking the bank.
Handmade Doily Dream Catcher
If you have a large doily lying around your home, you can use it to create a beautiful handmade doily dream catcher. This stunning decor can be displayed on your bed top and can prevent bad dreams from reaching the sleepers, allowing for a comfortable sleep. The hanging feathers add a finishing touch to this eye-catching piece. You can easily make this budget-friendly dream catcher by following the basic instructions and gathering the necessary materials. Check out the material list and instructions on HGTV for a step-by-step guide.
Paper Plate Dream Catcher Pattern
If you’re looking for a fun and creative project to do with your kids, try making a paper plate dream catcher. This easy craft only requires a few supplies that you probably already have at home, including a paper plate, twine, scissors, a pencil, coordinating scrapbook papers, and washi tape. Follow these simple steps to create your own dream catcher:
- Cut the center out of the paper plate and discard the outer rim.
- Cut a length of twine and tie one end to the center of the plate.
- Wrap the twine around the plate in a spiral pattern until you reach the outer edge. Tie off the twine and trim any excess.
- Cut strips of scrapbook paper and washi tape and attach them to the twine in a pattern of your choice.
- Tie additional lengths of twine to the bottom of the dream catcher and attach beads or feathers for decoration.
This project is a great way to spend quality time with your kids while creating a beautiful and unique piece of art. Plus, you can give it as a handmade gift to your loved ones.
Summary
To create your own DIY dream catcher, you will need a few basic materials such as a hoop, string, and feathers. Begin by wrapping the hoop in the string, then create a web design by looping the string around the hoop. Tie feathers or other decorative items onto the bottom of the dream catcher to complete the look. With a little patience and creativity, you can make a beautiful dream catcher to hang in your home or give as a gift.