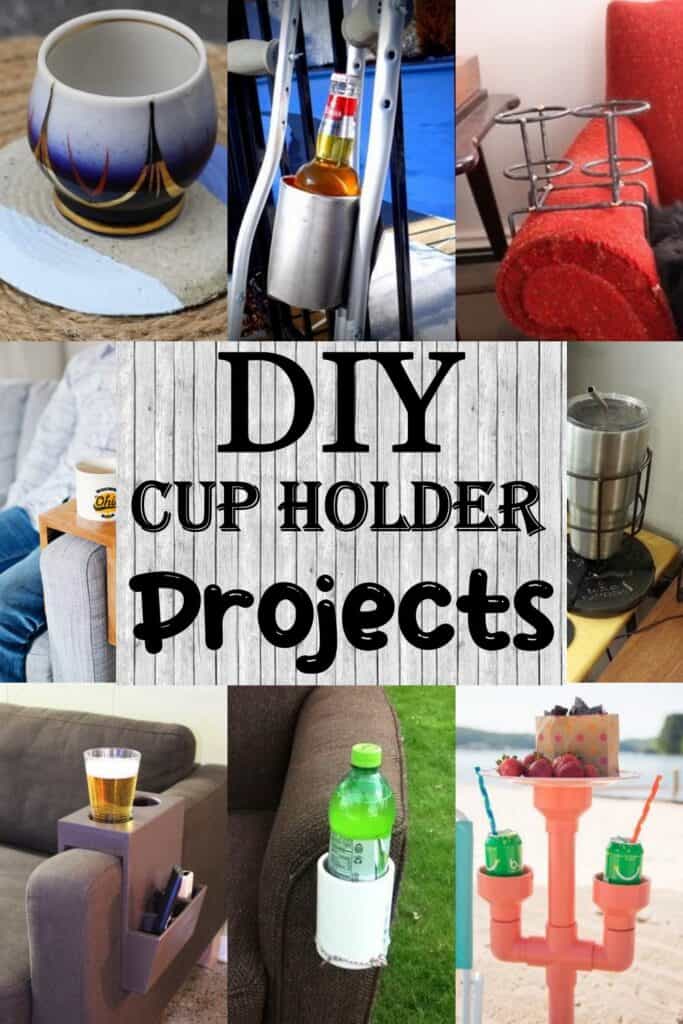
If you’re tired of spilling your drinks while working or relaxing, DIY cup holder ideas might be just what you need. With these projects, you’ll never have to worry about balancing your drink or tripping over it again. Whether you’re in the office, spending time with family, or even driving, these cup holders will keep your hands free and your mind at ease.
These ideas are perfect for anyone who wants to enjoy their favorite beverage without the hassle of holding onto it. From coffee to beer, these DIY cup holders will solve any drink holder issues you might be having. Keep reading for some creative and practical ideas to make your life easier.
Concrete Cup Holder

Looking for a DIY project to add a unique touch to your home or patio? Consider making a concrete cup holder. This cup holder is heavy-duty yet lightweight, as concrete is much stronger than particleboard. With the addition of detailing acrylic paint, the cup holder has a high definition look that is sure to impress. Plus, this cup holder is durable and will last a lifetime. You can even take it with you on the go. Follow the link provided to learn how to make your own concrete cup holder.
Desk Cup-Holder

Working at your desk for extended hours can be tiring, and you may feel thirsty or hungry. However, getting up and leaving the office is not always an option. That’s where the DIY Desk Cup Holder comes in handy. This innovative project allows you to create a cup holder that attaches to your desk, keeping your favorite mug within reach while you work. With this DIY project, you can easily create your own desk cup holder that will be there when you need it most, such as during those long 9-5 workdays. Click the link above to learn more about this fantastic project.
How to Make a Magnetic Cup Holder
Making a magnetic cup holder is an easy and impressive DIY project that involves cutting wood in a specific way. This unique cup holder is designed to stick to metal objects and keep your cup in place, making it perfect for use in your car, house, or anywhere else. If you’re tired of dealing with spilled drinks, this project is for you! To make a magnetic cup holder, you’ll need a minimal amount of scrap wood and some magnetic strips. Follow these simple steps to create your own magnetic cup holder:
- Cut a piece of wood into a rectangle shape.
- Cut a groove in the wood that is the same width as your magnetic strip.
- Glue the magnetic strip into the groove.
- Sand the edges of the wood to smooth out any rough spots.
- Apply a finish to the wood if desired.
With these easy steps, you can create a unique and practical magnetic cup holder that will impress everyone who sees it.
Cup Holder

The cup holder is a practical and affordable solution for keeping your drinks secure while you enjoy your favorite TV shows or movies. With this easy-to-make accessory, you will never have to worry about spills or interruptions again. The materials used to create the cup holder are readily available and inexpensive, making it an ideal DIY project for anyone. Whether you are a seasoned DIY enthusiast or a beginner, you will surely enjoy making this useful accessory. Click the link provided to learn more about this exciting project.
How To Make A Serving Tray Cup Holder
If you’re tired of spilling your drinks while carrying your serving tray, a serving tray cup holder is the perfect solution. With just a little bit of woodworking knowledge and some basic tools, you can create a simple and elegant cup holder that will keep your drinks secure while you transport your tray.
To make a serving tray cup holder, follow these steps:
- Gather your materials: You’ll need a piece of wood, a saw, a drill, a spade bit, and some sandpaper.
- Cut your wood to size: Measure the width of your serving tray and cut your piece of wood to match.
- Drill the cup holes: Use a spade bit to drill holes into the wood where you want your cups to go.
- Sand the wood: Sand the edges and surface of the wood to ensure a smooth finish.
- Attach the cup holder to your serving tray: Use screws to attach the cup holder to the bottom of your serving tray.
With these simple steps, you can create a serving tray cup holder that will make transporting your drinks a breeze. So why not give it a try and impress your guests with your DIY skills?
DIY Neck Cup Holder

Are you tired of fumbling around with your drinks while driving? Look no further than this DIY Neck Cup Holder! Keep your favorite beverage by your side and at the perfect temperature every time. This instructable allows you to make a holder for any mug or cup of your choosing. It’s also great for keeping soda cans cool during hot summer months. The holder keeps your drink upright and your hands-free. Best of all, this DIY project is simple and requires only a few supplies. Stay refreshed and focused on the road with this easy-to-make Neck Cup Holder!
Wooden Sofa Cup Holder

If you are a woodworking enthusiast, the DIY Wooden Sofa Cup Holder is a practical and comfortable addition to your sofa. This unique cup holder fits snugly into your armrest, providing a convenient place to hold your drink while you relax on the couch. Making this cup holder requires woodworking tools, wood glue, and a saw. With these materials, you can create a product that meets your specific needs. This project is perfect for those who enjoy creating items at home and want to add a personal touch to their living space. Click the link provided to learn more about this project.
DIY Cup Holder Ideas
Create stylish cup holders for any room in your house with just a few items. Wooden racks can be used to hold cups on your kitchen cabinets, bedroom dresser, bathroom countertop, and more. Not only will these cup holders prevent your drinks from falling and spilling, but they will also enhance the decor of any room. The wooden racks blend beautifully into any decor when not in use. Enjoy your favorite hot drink in style without the risk of making a mess.
DIY Tumbler and Cup Holder

Looking for a quick and easy DIY project? Why not build your own tumbler and cup holder? This project is perfect for anyone who wants to add a touch of style to their kitchen. The best part is that it can be completed in just one hour or less if you have the required tools.
This heavy-duty and comfortable mug organizer is made of laminated mildew-resistant material, which makes it very durable and easy to clean. The exterior look of this tumbler holder is what makes it stand out from the rest. It can hold several cups and tumblers, making it a great addition to your kitchen.
To build this tumbler and cup holder, you will need the following tools:
- Saw
- Measuring tape
- Drill
- Screws
- Sandpaper
Once you have all the required tools, follow these simple steps:
- Measure and cut the laminated material to the desired size.
- Sand the edges of the material to make it smooth.
- Drill holes for the cups and tumblers.
- Attach the holder to the wall using screws.
In just a few easy steps, you can have your own DIY tumbler and cup holder. It’s a great way to add a touch of style to your kitchen while also keeping your cups and tumblers organized. So why not give it a try?
K-Cup Holder

Looking for a cute and easy DIY project? Look no further than this k-cup holder! With just a few simple materials like scrapbooking paper, thick cardboard, heavy adhesive tape, and cupcake stencils, you can create a practical and stylish accessory for your kitchen. Plus, it’s a great way to recycle a case of water bottles. Follow the instructions provided to build this holder out of used water bottles, and use your imagination to decorate it in any way you like. Once it’s finished, you can easily attach it to the side of your refrigerator for convenient access to your k-cups. Click the link provided to get started on this fun and easy project!
PVC Chair Cup Holder

Are you tired of your drinks or phone constantly moving around on your patio table? The PVC pipe cup holder provides a simple solution by allowing you to mount it on top of your chair. This DIY project is easy to build, even for those without woodworking skills. With this cup holder, you can enjoy the comforts of home while relaxing outside.
Here are some key features of the PVC chair cup holder:
- Made of PVC pipe, making it durable and weather-resistant
- Can be customized to fit your chair’s dimensions
- Provides a stable and secure place for your drink or phone
- Easy to assemble and disassemble for storage or transport
Click the link provided to learn how to build your own PVC chair cup holder and enjoy your outdoor space even more.
Cup Holder Hacks
Looking for a way to save money on drink holders? Look no further than these awesome cup holder hacks! With just a few simple materials, you can create a DIY cup holder that can hold any can or bottle for less than four dollars. These hacks are perfect for use in your car, but can also be applied to almost anything. Impress your friends and family with your creativity and resourcefulness by making an awesome cup holder out of ordinary materials you already have. Check out this DIY tutorial for step-by-step instructions and get started on your own cup holder today!
Crutch Cup Holder

If you are on crutches, you know how important it is to have a stable place to put your drink. The DIY crutch cup holder is a perfect solution to this problem. It is simple to make, affordable, and can be attached to any part of your crutches, providing you with a worry-free experience. Once you have made your own crutch cup holder, you will never have to worry about your drink falling over again. This holder can be a great item to have if you are constantly placing drinks down while using crutches. Click the link provided to learn how to make your own crutch cup holder.
Cup Holder for Chair

A cup holder for your chair is a quick and easy DIY project that you can do at home. It requires inexpensive materials and takes only a short amount of time to complete. The end result is a convenient place to safely store your drink while you relax in your chair.
This cup holder is also universal, meaning it can be used with any chair of your choice. It provides a convenient spot to store other small items such as your television remote or a pen.
To create your own cup holder for your chair, simply follow the instructions provided in the link below. This DIY project is easy enough for anyone to do and will provide you with a convenient and useful addition to your chair.
Click here to learn how to make your own cup holder for your chair.
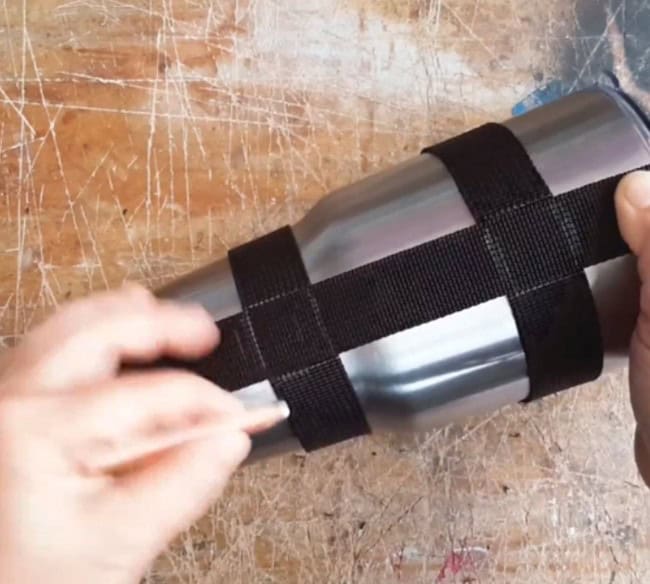
DIY Outdoor Cup Holder

If you are looking for a convenient way to bring your drinks outdoors, a DIY outdoor cup holder is an easy solution. This cup holder comes with a strap attached to it, making it easy to hang on the handlebar. You can easily find the materials needed for this project in your garage or backyard.
To build this cup holder, follow these simple steps:
- Gather materials: PVC pipe, a saw, a drill, sandpaper, and a strap.
- Cut the PVC pipe to the desired length using the saw.
- Use the drill to make a hole in the center of the pipe.
- Sand the edges of the pipe to make it smooth.
- Attach the strap to the cup holder using screws or glue.
This cup holder is great for keeping your beverages cold while enjoying the beautiful sunsets from the comfort of your patio chair. With this DIY project, you can easily bring your drinks with you without having to worry about carrying them in your hands.
Click Here for more DIY outdoor projects.
Chair Drink Holder

If you’re looking for a simple way to keep your drink close by while lounging in your favorite chair, a DIY chair drink holder is the perfect solution. With just a few basic hand tools and access to a drill press, you can create a cup holder that will prevent spills and keep your drink within arm’s reach. Here’s how to build one:
- Gather your materials: You’ll need a piece of wood, a drill bit, a saw, sandpaper, and some wood glue.
- Cut your wood to size: Measure the diameter of your cup or bottle and cut a hole in your wood that’s slightly larger. Then, cut the wood to the desired size and shape.
- Sand the edges: Use sandpaper to smooth out any rough edges and give your cup holder a finished look.
- Drill a hole for the cup holder: Use a drill press to create a hole in the arm of your chair where you want your cup holder to sit.
- Attach the cup holder: Apply wood glue to the bottom of your cup holder and insert it into the hole in your chair. Allow the glue to dry completely before using.
With this simple DIY project, you’ll never have to worry about spilling your drink again. Plus, you’ll have a cool and functional addition to your favorite chair.
Pallet Coffee Cup Holder DIY
Looking for a rustic and easy-to-make cup holder for your kitchen? Try making a pallet coffee cup holder! This cup holder is perfect for holding your favorite coffee or canned drinks and can be hung on the wall or placed on a counter. To make this cup holder, you will need 1x2s and 2x2s, although 1x3s could also work. Follow these simple steps to create your own pallet coffee cup holder:
- Cut the 1x2s and 2x2s to the desired length.
- Sand the wood to ensure a smooth finish.
- Assemble the pieces using wood glue and nails.
- Paint or stain the holder to match your kitchen decor.
- Hang the holder on the wall or place it on a counter.
With just a few supplies and some basic tools, you can create a beautiful and functional pallet coffee cup holder for your home. So why not give it a try and add a touch of rustic charm to your kitchen today?
DIY Yeti Cup Container
When you’re on the go or at a party, having a cup holder is essential. Rather than placing your cup on the ground, why not make a cup holder that you can hang around your neck? This DIY project is simple enough for anyone to do, including kids. All you need is some plywood or cardboard sheets, glue, scissors, and your trusty tools. With just a few steps, you can create a cup holder for yourself that costs less than $2.
To make your own DIY Yeti Cup Container, follow these steps:
- Cut out a rectangular shape from your plywood or cardboard that is slightly larger than the base of your cup.
- Cut out a strip of cardboard or plywood that is long enough to fit around your neck comfortably.
- Glue the strip of material to the back of the rectangular piece, making sure it is centered.
- Cut out a small circle from the center of the rectangular piece, leaving enough space for your cup to fit snugly.
- Decorate your cup holder as desired with paint, stickers, or other embellishments.
With these simple steps, you’ll have a cup holder that is both functional and stylish. So go ahead and make your own DIY Yeti Cup Container today!
How To Make A Beach Cup Using PVC

If you want to enjoy your time at the beach with your friends, you can make a functional and portable beach cup holder using PVC pipes. This project is easy to follow and can be done by people of all ages. The finished product is an eye-catching accessory that will make your beach day even better.
To make the beach cup holder, you will need PVC pipes, a saw, a measuring tape, a drill, and some sandpaper. Follow these steps to make your own beach cup holder:
- Measure and cut the PVC pipes to the desired length using the saw.
- Use sandpaper to smooth the edges of the cut pipes.
- Drill holes into the pipes for the cups to fit into.
- Assemble the pipes into the desired shape using connectors.
- Install the cup holder into the sand at the beach.
This beach cup holder is a cost-effective project, as it will only cost you less than $10 to make and about 15 minutes to install. With this DIY project, you can enjoy your beach day in style and keep your drinks within reach.
How To Make A Car Cup Holder
Making a car cup holder is an easy DIY project that requires only a few household items. Here are the steps to create your own car cup holder:
- Gather your materials: a cardboard box, scissors, glue, and a marker.
- Cut the cardboard box to the desired size and shape of your cup holder.
- Use the marker to trace the outline of your cup on the cardboard.
- Cut out the traced circle on the cardboard.
- Fold the cardboard to create a cup holder shape.
- Glue the edges of the cardboard together to hold the shape.
- Allow the glue to dry completely before using.
By following these simple steps, you can create a cup holder for your car that is both functional and cost-effective. Plus, you’ll be able to keep your car organized and avoid spills while driving.
DIY Washi Tape Cup Holder

Looking for a simple and affordable way to keep your small items organized? Try making a DIY washi tape cup holder! This easy-to-follow guide will show you how to transform a plain cup into a colorful and functional holder for your glasses, phone, pens, keys, and more.
To make your own washi tape cup holder, you’ll need the following materials:
- A plain cup
- Assorted washi tape in your favorite colors and patterns
- Scissors
- Optional: glue or Mod Podge for added durability
To create your cup holder, simply follow these steps:
- Start by wrapping strips of washi tape around the cup in a spiral pattern, overlapping each strip slightly to create a layered effect.
- Continue wrapping the tape around the cup until you reach the top. If desired, you can add a second layer of tape for added durability.
- Use scissors to trim any excess tape from the top and bottom of the cup.
- Optional: apply a layer of glue or Mod Podge over the tape to help it stay in place and add extra durability.
- Allow the cup to dry completely before using it to hold your small items.
With just a few simple steps, you can create a colorful and functional washi tape cup holder that’s perfect for keeping your desk, nightstand, or other small space organized. Give it a try today and see how easy and fun it can be!
DIY Cup Holder
If you’re tired of having too many cups in your kitchen without a proper rack or arrangement, try making your own DIY Cup Holder. This fun and easy process will make your place look nice and neat, with your cups neatly arranged on the cup rack. Plus, you can experiment with different materials to create your own unique set of cup holders.
Not only is the DIY Cup Holder aesthetically pleasing, but it’s also practical. It can be used by someone with poor sight, small hands, or trouble reaching cup holders on the counter. Additionally, it keeps all cups organized in one place, making it easier to find the cup you need quickly.
To make your own DIY Cup Holder, simply follow the steps below:
- Gather your materials, such as wood, metal, or plastic.
- Measure and cut the material to the desired size.
- Sand the edges and surfaces to ensure a smooth finish.
- Drill holes for the cups to sit in, making sure they are evenly spaced.
- Paint or stain the cup holder to match your kitchen decor, if desired.
With a little bit of time and effort, you can create a beautiful and functional DIY Cup Holder that will add a touch of organization and style to your kitchen.
How To Make A Bicycle Cup Holder
If you’re an avid biker, staying hydrated is crucial. However, carrying enough water can be a challenge. While plastic bottle holders are readily available, they don’t always accommodate regular cups. Fortunately, creating a bicycle cup holder is a simple solution that takes only 15-20 minutes using items you likely already have in your garage and kitchen.
To make a bicycle cup holder, follow these steps:
- Gather materials: You will need a metal coat hanger, pliers, a drill with a metal bit, a marker, and a measuring tape.
- Measure and mark: Use the measuring tape to determine the desired height of your cup holder. Then, use the marker to mark the coat hanger at the appropriate length.
- Bend the coat hanger: Use the pliers to bend the coat hanger at the marked spot, forming a loop to hold your cup.
- Drill holes: Use the drill to create two holes at the bottom of the coat hanger loop, allowing for attachment to the bike frame.
- Attach to bike: Use screws or zip ties to attach the cup holder to your bike frame.
With your new bicycle cup holder, you can easily carry a cup of your favorite beverage on your bike rides.
Summary
Creating a DIY cup holder can be a fun and practical project. With just a few materials, you can design a custom cup holder that fits your needs. Consider using PVC pipes, wooden planks, or even repurposed materials like old bicycle tires. Make sure to measure your cups or bottles beforehand to ensure a snug fit. Personalize your cup holder with paint, stickers, or other decorations. Enjoy your favorite beverages hands-free with your new DIY cup holder.