If you’re a cat owner, you know how important it is to have a scratching post for your furry friend. But buying one can be expensive and inconvenient. Luckily, there are plenty of DIY options that won’t break the bank. Whether you’re into woodworking or crafting, there’s a homemade scratching post out there that will fit your budget and style. Keep reading for some easy and fun ideas that will keep your cat entertained and your wallet happy.
DIY Vase Scratching Post
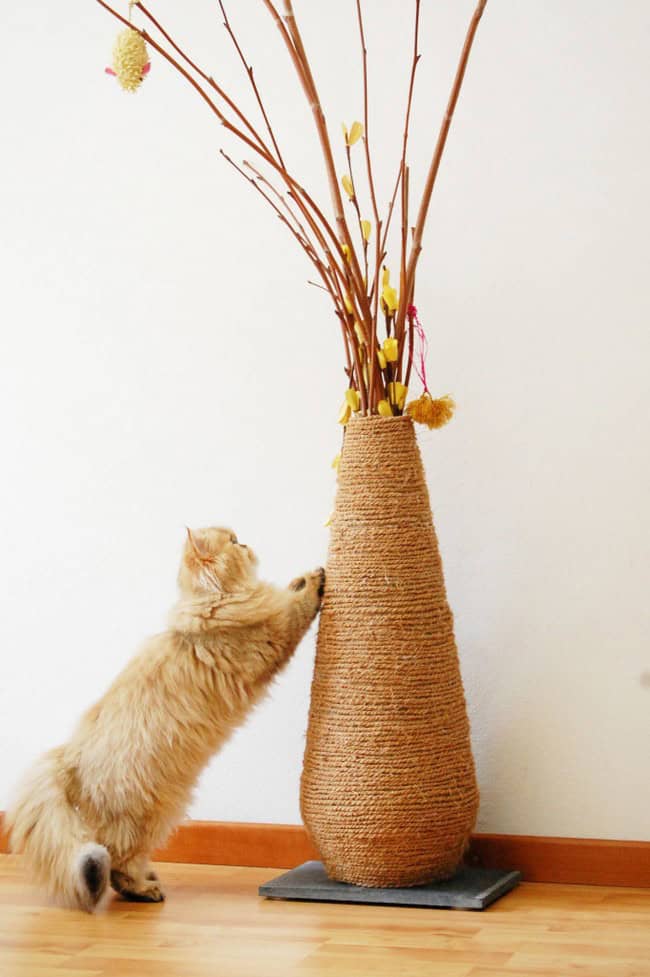
If you’re looking for a way to keep your cat’s claws healthy while adding a stylish touch to your home, consider making a DIY vase scratching post. This project is easy and quick to complete, and can be customized to match your home decor. Here’s what you’ll need:
- A vase of your desired size and shape
- Sisal rope
- Hot glue gun
- Scissors
To make the scratching post, follow these steps:
- Start at the bottom of the vase and apply a small amount of hot glue to the vase.
- Attach the end of the sisal rope to the glue and hold it in place until the glue dries.
- Wrap the sisal rope tightly around the vase, adding hot glue every few inches to secure it in place.
- When you reach the top of the vase, cut the sisal rope and secure the end with hot glue.
Once you’ve finished, your cat will have a sturdy scratching post that will last for years. Plus, the vase will add a decorative touch to any room in your home.
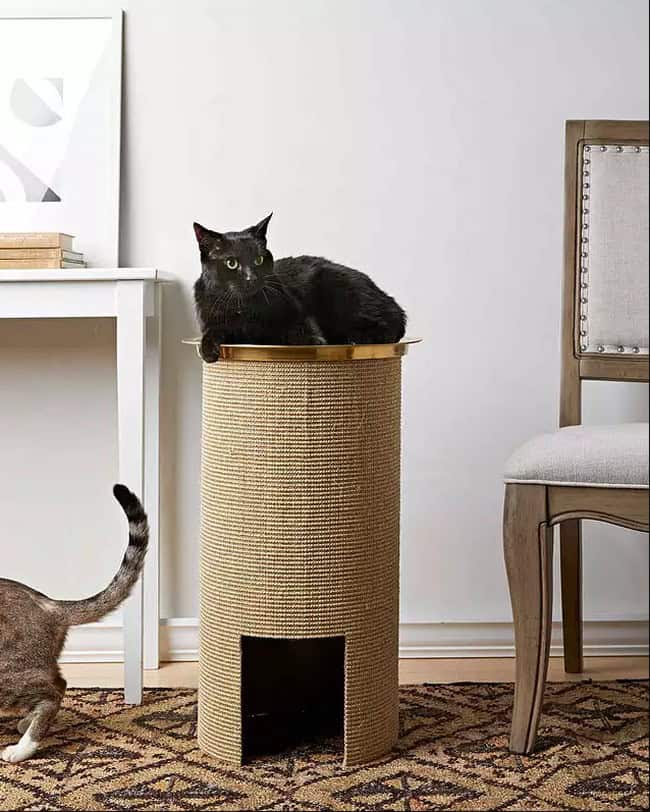
DIY Cat Scratching Post and Storage Bin

If you’re looking for an easy way to make a scratching post for your cat without using woodwork and glue, this DIY is perfect for you. All you need is a bucket with a lid and some rope.
To start, glue the beginning of the rope to the bottom of the bucket and wind it up to the lid. You can then fill the bucket with sand for stability. The result is a sturdy scratching post that requires no construction skills at all.
You can make it unique by painting it yourself or adding some fancy fabric to the covering to make it soft and comfy for your cat. Plus, the bucket serves as a storage bin for your cat’s toys and treats.
This DIY is an affordable and easy way to keep your cat happy and entertained.
Cat Scratching Post
Looking for an eco-friendly and affordable way to keep your feline friend entertained? Our Cat Scratching Post is the perfect solution! Made from a sturdy but lightweight cardboard cylinder typically used in concrete projects, this scratching post stands at 48″ tall and can easily be cut in half with a handsaw for multiple uses.
To customize your cat’s new scratching post, simply add your choice of carpeting. Not only will this satisfy your cat’s natural scratching instincts, but it also provides a fun way to showcase their personality.
With our Cat Scratching Post, you can easily train your cat to scratch a post and keep them entertained for hours. Plus, it’s a great way to repurpose materials and reduce waste. Try it out today and see the difference it can make for your furry friend!
DIY Cat Scratcher
If you’re looking for a fun and easy DIY project, why not build your own cat scratcher? This sturdy plywood scratcher comes with a rope toy attached, perfect for your feline friend to scratch and play with. Here’s how to make your own:
Materials:
- 1 sheet of plywood
- Rope toy
- Screws
- Screwdriver
- Saw
Instructions:
- Cut the plywood into the desired shape and size for your cat scratcher.
- Use the screwdriver to attach the rope toy to the scratcher.
- Screw the scratcher onto a stable surface, such as a wall or floor.
Not only is this DIY cat scratcher a fun project, but it also provides your cat with a perfect place to scratch and stretch. Plus, the rope toy adds an extra element of playtime. Give it a try and see how much your cat loves it!
DIY Cat Scratching Post Using PVC
Building a cat scratching post is an easy and fun project that you can complete in just one afternoon. By using PVC pipe and rope, you can create a durable and inviting place for your kitty to scratch and play. Here are the materials you will need:
- PVC pipe
- Rope
- Drill
- Measuring tape
- Hot glue gun
To begin, measure and cut the PVC pipe to your desired height. Then, drill holes into the pipe and thread the rope through the holes, securing it with hot glue. Finally, wrap the remaining rope around the post, securing it with hot glue as you go.
This DIY cat scratching post is perfect for any cat lover who wants to build a custom post for their furry friend. With just a few materials and some basic tools, you can create a fun and functional addition to your cat’s play area.
DIY Hanging Cat Scratching Pad

If you’re looking for a fun and easy DIY project for your cat, consider making a Hanging Cat Scratching Pad. To get started, gather your supplies, including 1×4 wood, rope, hot glue, leather string, carpet remnant, and scissors. Then, wrap the rope around the 1×4 and secure it with glue. Hang the finished product from a doorknob or let your cat scratch away on their very own door perch. This adorable scratching pad is sure to be a favorite in your cat’s collection.
Cat Scratching Post
If you’re a cat owner, you know how important it is to have a scratching post for your furry friend. Not only does it protect your furniture and curtains, but it also provides a fun and exciting place for your cat to scratch. This scratching post is built to last, with sturdy wood and a carpet covering. The sisal rope is attractive and efficient for cats of all sizes. Your pet will love using it as a resting place, as well as a scratching pad. Invest in this durable and practical scratching post for your beloved feline companion.
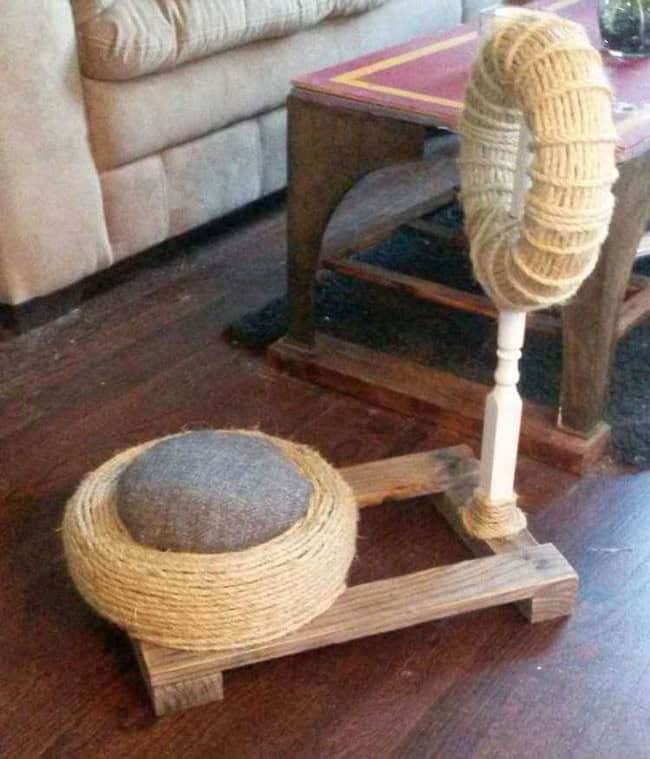
Elegant Horizontal Cat Scratching Post
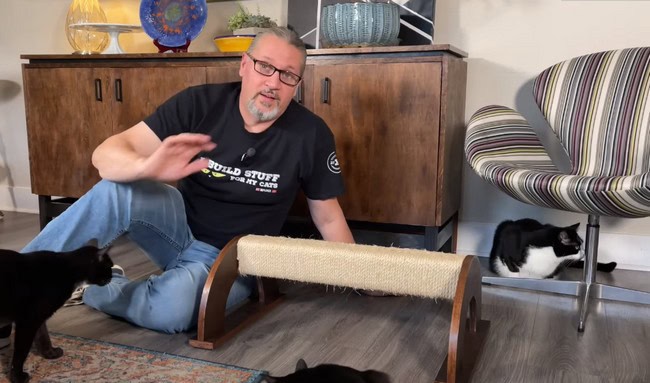
Looking for a stylish and functional cat scratching post? Look no further than this DIY Elegant Horizontal Cat Scratching Post! The horizontal layout of this post makes it a great choice for cats of all ages, and its sturdy base ensures there is no risk of falling over during playtime.
Crafted from recycled materials, this post also features rope wrapping around the post, giving your cat a textured surface to scratch and climb on. You can even dye the rope to match your home decor! Whether you make it as a standalone scratcher or incorporate it into your cat’s castle, your feline friend is sure to love this elegant and practical addition to their play area.
Key Features:
- Horizontal layout suitable for cats of all ages
- Sturdy base for safe playtime
- Made from recycled materials
- Rope wrapping provides a textured surface for scratching and climbing
- Can be dyed to match your home decor
Give your cat the gift of a stylish and functional scratching post with this DIY Elegant Horizontal Cat Scratching Post!
DIY Cat Scratching Tower
Building a non-permanent cat scratching tower is an easy DIY project that can be completed in a few hours. Start by measuring and cutting shelves to size, then upholster the shelves with carpet. Fix the top and bottom ends of the tower, and measure and cut a pole to fit between them. Install caps on the end of the pole once it’s in place. Wrap rope onto the pole, securing it in place with glue or staples. Use a ½ inch drill bit for holes in your wall, and liquid nail for mounting the shelf to the wall. Use a staple gun to secure the carpet to the base and a screw gun to secure the shelf onto the pole.
With your new DIY cat scratching tower, your feline friend can scratch, lounge, and play to their heart’s content. This piece of cat furniture will provide years of enjoyment for your kitty. For more DIY cat furniture ideas, check out our article on DIY cat shelves.
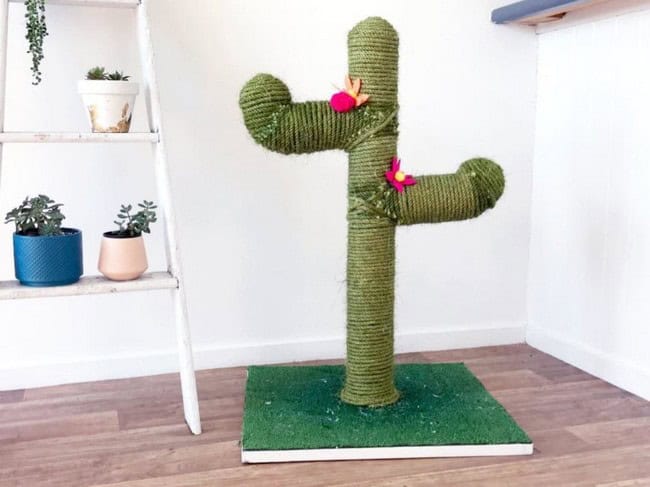
DIY Cat Scratching Post

If you’re tired of your cat scratching up your furniture, why not make them a scratching post of their own? This DIY cactus scratching post made of pipe is not only functional, but also adds a unique touch to your home decor. Here’s what you’ll need to make your own:
Materials
- PVC pipe
- Rope
- Hot glue gun
- Scissors
Instructions
- Cut the PVC pipe to the desired height and shape of your cactus.
- Use the hot glue gun to attach the rope to the pipe, starting from the bottom and wrapping it tightly around the pipe.
- Continue wrapping the rope around the pipe until you reach the top, making sure to cover the entire pipe.
- Cut the excess rope and glue the end to the pipe.
- Add any additional decorations, such as flowers or pom-poms, to give your cactus some personality.
Your cat will love having their own scratching post, and you’ll love not having to worry about them ruining your furniture. Plus, this DIY project is a fun and easy way to add some character to your home.
How to Make a Cat Scratcher
To make a cat scratcher, you will need a 12-by-12-inch plywood, a wood screw, a drill, a dowel rod, and cardboard squares of different sizes. Begin by building the base using the dowels and plywood. Attach the dowels to the edges of the larger piece of plywood using a screwdriver. Next, add the cardboard squares on top of each other to create a climbing structure. You can add up to eight inches on each side, using smaller pieces between each layer until you reach the final layer (two 5 x 5-inch squares). Once you have completed the structure, you can paint it if desired for aesthetic purposes.
Here’s a list of the materials you will need:
- 12-by-12-inch plywood
- Wood screw
- Drill
- Dowel rod
- Three 8 x 8-inch squares of cardboard
- Two 7 x 7-inch squares of cardboard
- Two 6 x 6-inch squares of cardboard
Follow these steps to make your cat scratcher:
- Build the base using the dowels and plywood.
- Attach the dowels to the edges of the larger piece of plywood using a screwdriver.
- Add the cardboard squares on top of each other to create a climbing structure.
- You can add up to eight inches on each side, using smaller pieces between each layer until you reach the final layer (two 5 x 5-inch squares).
- Paint the structure if desired for aesthetic purposes.
Durable Cat Scratching Post
If you want to keep your cat happy and healthy, a DIY cat scratching post is a great way to provide your feline friend with a place to claw. This scratch post is perfect for kittens and cats of any age, and it is made from rigid and durable material that will stand up to even the toughest claws. You can decorate the scratcher with your own style or leave it plain, and it will help your pet get plenty of exercise while also keeping their nails trimmed. Your cat will love their new scratching post, and you’ll love how it keeps your furniture safe.
Cat Scratching Post

If you’re tired of your cat scratching up your furniture, a DIY cat scratching post is a great solution. Not only will it save your furniture, but it will also provide your cat with a dedicated scratching area. Here’s what you’ll need to make your own scratching post:
- 2x4s
- Rope
- Cable wire
- Screws
- Circular saw
- Drill & bit
- Utility knife
- Staple gun
- Hammer
With these materials and tools, you can easily create a safe and effective scratching post for your feline friend. Plus, it’s a fun and rewarding DIY project that you can complete in no time. Give your cat a place to scratch and save your furniture with this simple DIY solution.
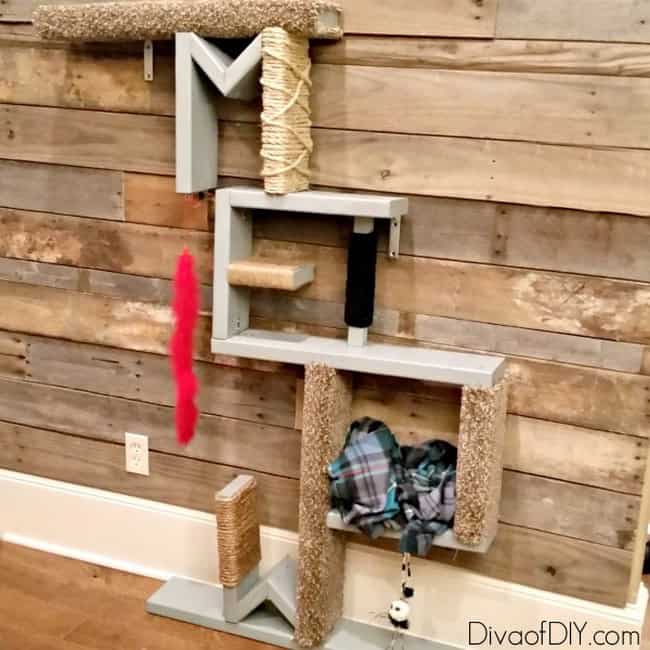
Colorblocked Cat Scratching Post
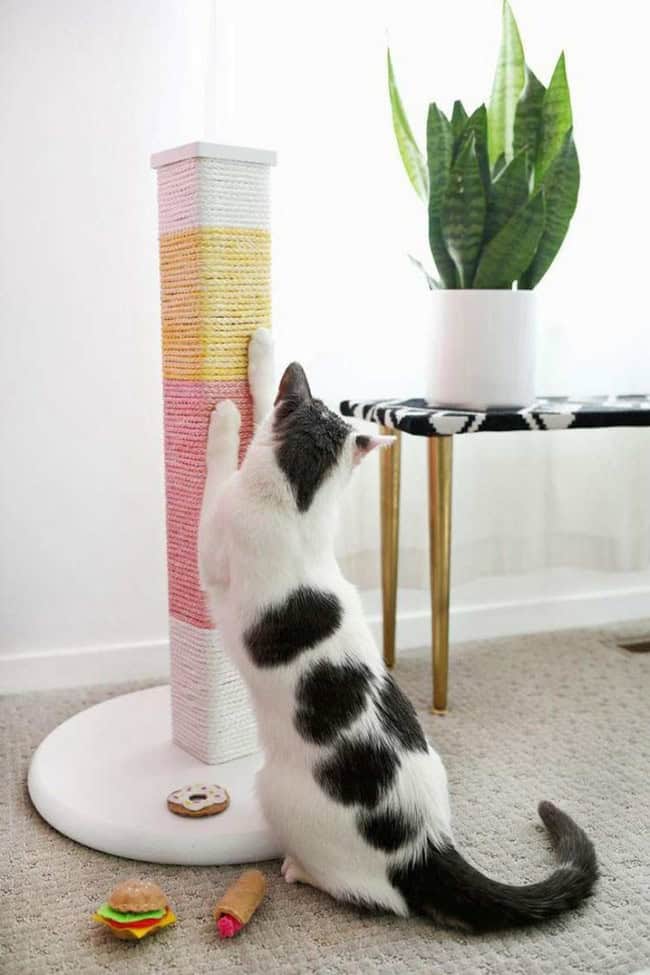
Looking for a stylish and functional cat scratching post? Look no further than the Colorblocked Cat Scratching Post! This unique piece of cat furniture is not only visually appealing, but also provides a great outlet for your cat’s natural scratching and climbing instincts.
Crafted from recycled wood and ¼” nylon rope, the post can be dyed in any color scheme you desire. The rope wrapping around the post gives it a texture that cats can take advantage of for scratching and climbing. Plus, the post’s sturdy construction ensures it will last for years to come.
Whether you’re looking to add a pop of color to your home decor or provide your cat with a fun and functional scratching post, the Colorblocked Cat Scratching Post is the perfect choice. Click for details and start creating your own today!
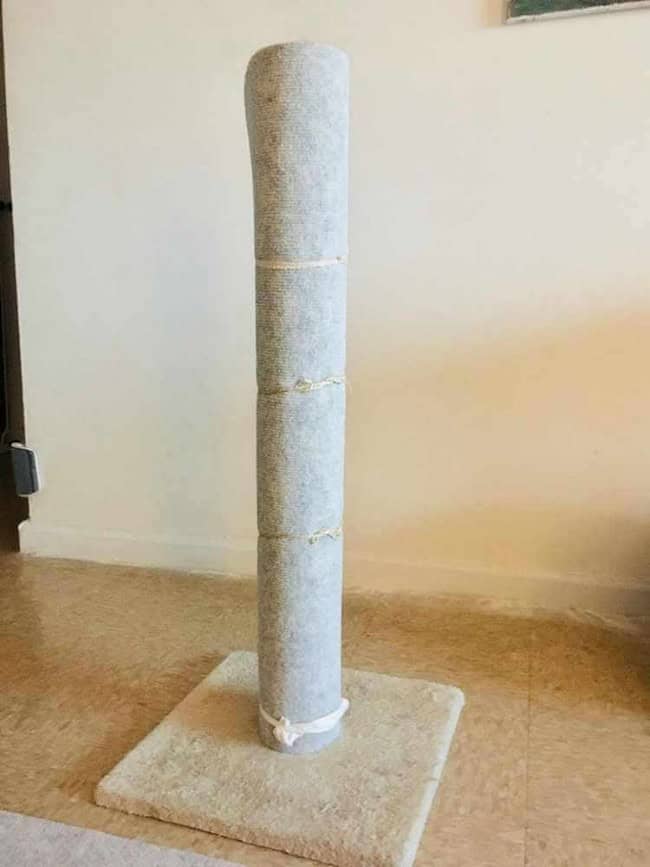
Durable Cat Scratching Post
If you have a big kitty cat, this scratching post is perfect for them! The extra-tall post boasts a large, carpeted, comfortable, and sturdy platform that will keep your cat happy and healthy. The post has been wrapped in rope to add durability, making it last longer than traditional scratching posts. This post is made from an old base from a previous scratching post, so you can feel good about salvaging instead of buying new materials. Plus, it’s easy to assemble, saving you time and effort. Get your cat scratching happily today!
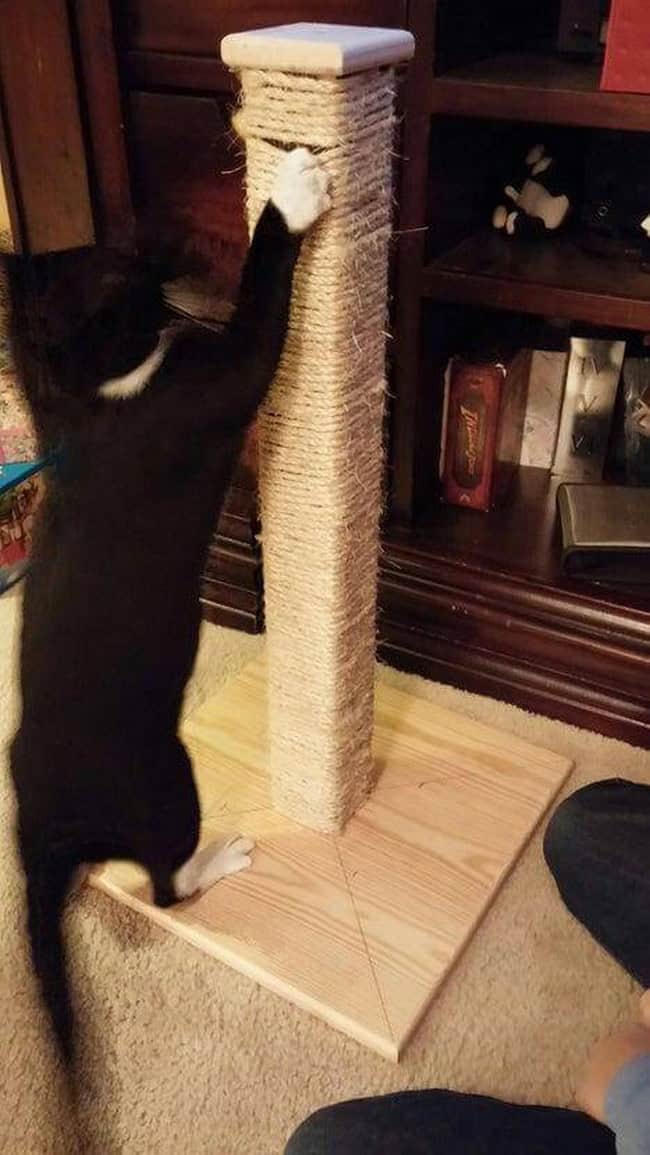
Scratching Post Building Plan
If you’re looking for a fun and easy DIY project to spoil your cat, this Scratching Post Building Plan is perfect for you. Not only will it keep your cat entertained, but it will also help maintain the health of their claws.
This design features an Oak post that can be painted or left as is, making it a versatile addition to any home. The base and post are made of ply, which allows you to paint it any color to match your mood or room decor.
The best part about this scratching post is that it can be customized to fit your personal style. Whether you prefer a more modern or rustic look, this design can be tailored to your liking.
As a woodworker, I love making something personal in my own home, and this scratching post is the perfect project for any cat lover. With just a few simple steps, you can create a beautiful and functional scratching post that your cat will love.
Here’s a breakdown of the materials and steps needed to build this scratching post:
| Materials |
|---|
| Oak post |
| Plywood base |
| Wood glue |
| Screws |
| Paint (optional) |
Steps:
- Cut the plywood base to your desired size.
- Cut the Oak post to your desired height.
- Drill holes in the base and post where they will be attached.
- Apply wood glue to the holes and attach the post to the base with screws.
- Paint the post and base (optional).
With these simple steps, you can create a beautiful and functional scratching post that your cat will love.
DIY Cat Scratching Pole
Building a heavy-duty cat scratching pole is an excellent way to provide your feline friend with the necessary exercise. With a staple gun, you can easily complete the project using materials such as rope, carpet, and plywood found in your home. Our instructions will guide you on how to create a scratch pole that will give your cat plenty of exercise. The scratch pole is made from eco-friendly materials and can be customized according to your cat’s size and personality. This DIY project is a cost-effective way to keep your cat entertained and happy.
To build a cat scratching pole, you will need the following materials:
| Materials |
|---|
| Plywood |
| Rope |
| Carpet |
| Screws |
| Staples |
| Wood glue |
Steps to Build a Cat Scratching Pole:
- Cut the plywood into a square base and a long pole.
- Glue the carpet to the plywood base and wrap it around the pole.
- Secure the carpet with staples and screws.
- Wrap the rope around the pole and secure it with staples and glue.
- Attach a toy or feather to the top of the pole to entice your cat to play.
By following these steps, you can create a heavy-duty cat scratching pole that will keep your cat entertained and happy for hours.
Easy Cat Scratching Post Ideas
Cats need to scratch, and it’s essential for their physical and mental health. Scratching helps them stretch their muscles, relieve stress, and keep their claws healthy by eliminating old claw sheaths. However, cat owners may not want their furry friends to scratch their furniture or curtains. That’s why it’s important to provide them with a scratching post.
Here are some easy DIY cat scratching post ideas that you can make at home:
| Scratching Post Idea | Materials | Instructions |
|---|---|---|
| Cardboard Scratcher | Cardboard box, scissors, glue | Cut the cardboard into strips and glue them together to form a scratching surface. |
| Sisal Rope Scratcher | Sisal rope, wooden post, glue | Wrap the sisal rope around the post and secure it with glue. |
| Carpet Scratcher | Carpet square, wooden board, nails | Nail the carpet square onto the wooden board to create a scratching surface. |
These DIY scratching posts are simple to make and can be customized to suit your cat’s preferences. They will provide your cat with a safe and satisfying place to scratch, which will also help protect your furniture. So, give them a try and see how much your cat will love them!
DIY Cat Scratcher With Carpet
If you’re looking for an inexpensive and easy way to make a cat scratcher, consider using an old piece of carpet. Here’s how you can make one:
- Find a piece of carpet that you no longer need. It should be large enough to wrap around a base.
- Cut the carpet to the size you need. Make sure it’s large enough to wrap around the base with some extra material to spare.
- Glue the carpet onto the base. Use a strong adhesive to ensure that the carpet stays in place.
- Add some catnip to the carpet. This will attract your cat to the scratcher.
By making your own cat scratcher, you can save money and customize it to your liking. Plus, your cat will love having a new place to scratch!
Why Creating Your Own Cat Scratching Post is Essential?
If you own a cat, you know how important it is to keep them happy and healthy. Part of this responsibility includes providing them with a suitable place to scratch. Creating your own DIY cat scratching post is not only cost-effective but also allows you to customize it to your cat’s preferences. Moreover, it prevents your cat from damaging your furniture and belongings. DIY cat scratching posts also provide an opportunity for your cat to relieve stress and stretch their muscles. By creating your own cat scratching post, you can ensure your feline friend has a happy and healthy life.
How to Make Cat Scratching Post
If you’re a cat owner, you know how important it is to have a scratching post for your furry friend. Building one yourself can be a simple and cost-effective solution. Here’s how you can make your own cat scratching post using PVC pipes, rope, and hot glue.
Materials Needed
- PVC pipes (sewer pipe and triangle)
- Rope
- Fur fabric
- Tape
- Plywood
- Pipe caps
- Pipe 90 angle
- Pipe coupler
- Hot glue
- Saw
- Staple gun
Instructions
- Cut the PVC pipes to the desired length using the saw.
- Attach the pipe caps to the ends of the pipes to prevent fraying of the rope.
- Wrap the rope tightly around the pipes, gluing it as you go to secure it in place.
- Cut a piece of plywood to use as the base of the scratching post.
- Attach the triangle pipe to the base using the pipe coupler.
- Attach the 90 angle pipe to the top of the triangle pipe.
- Cover the 90 angle pipe with fur fabric and secure it in place with hot glue.
- Attach the PVC pipes to the 90 angle pipe using the pipe coupler.
- Cover the base with fur fabric, securing it in place with a staple gun.
- Your cat scratching post is now ready for use!
Remember to make sure your post is sturdy and at least 30 inches high to provide enough space for your cat to stretch and scratch. With these simple steps, you can create a durable and attractive scratching post for your beloved pet.
DIY Cat Scratching Pad

Create a homemade scratching pad for your feline friend with just a few simple materials. To start, gather three large or five medium cardboard boxes, duct or masking tape, fabric, and a box cutter. Cut the cardboard box sides to an appropriate size, leaving enough space for your cat’s paws to scratch. Roll up the cardboard tightly until you reach your desired size. Cover the sides of the cardboard with a piece of fabric. This will not only give your scratching pad a finished look, but it will also make it more comfortable for your cat to use. With this DIY project, you can customize the size to fit all sizes of cats. In under an hour, you’ll have a new scratching pad for your furry friend to enjoy.
Cheap DIY Cat Scratcher
Keep your cat entertained with this easy and affordable DIY cat scratcher. To make this project, you’ll need glue and scrap wood that you can find around your home. This budget-friendly project allows for customization, so feel free to add different cardstock shapes and paint the borders. For extra fun, attach a haystack and a bell to the top of the scratcher to give your cat something else to play with. By providing your cat with a designated scratching area, you’ll be saving your furniture and keeping your furry friend happy.
DIY Modern Cat Scratching Post
If you’re tired of your cat scratching up your furniture, try making a DIY modern cat scratching post. It’s easy to assemble with modular components. Simply drill holes in the wooden pieces and wrap the rope around it to create a scratching post that slides over the arm of your couch. This protects your furniture from heavy claws by providing a more attractive surface. Fit the modular wooden parts together, drill holes or tie in rope as needed, then wrap it up to the top of your couch and secure it with a rope that’s drilled into the wood. Your cat will love it and your furniture will thank you.
How to Make a Self-Scratcher for Cats
If you want to provide your cat with a satisfying scratching sensation, you can create your own DIY self-scratching toy. All you need is a marker, screws, hinges, double-sided tape, brushes, and a table leg. Here are the steps to follow:
- Screw the hinges to the edges of both brushes.
- Attach the double-sided tape to the brushes.
- Finally, attach the brushes to the table leg.
Your scratcher is complete! If you do not have any brushes, you can easily order some on Amazon. This DIY project is a fun and cost-effective way to provide your cat with a natural scratching experience. Plus, you can customize the scratcher to match your home’s decor. Your cat will love it!
DIY Cat Scratching Post
Looking for a fun and creative project to make for your furry friend? Look no further than this DIY Cat Scratching Post! With a little time and effort, you can create a functional and stylish scratching post that your cat will love.
To make this scratching post, you’ll need a basin for the base and cardboard boxes for the top portion. Stack the boxes using an 8mm rod to create a sturdy structure. The end result is a piece of art that doubles as a cat-scratching post. Get creative with your design and make it unique to your home.
Materials needed:
- Basin
- Cardboard boxes
- 8mm rod
Instructions:
- Cut the cardboard boxes to the desired size and stack them on top of each other.
- Insert the 8mm rod through the center of the stacked boxes.
- Place the rod into the basin and secure it in place.
- Let your cat enjoy their new scratching post!
This DIY project is a great way to save money and create a personalized scratching post for your cat. Give it a try and see how much your furry friend loves it!
DIY Cat Scratch Post
Looking for a fun and easy DIY project for your feline friend? Look no further than this recycled tire cat scratch post! With its sturdy and heavy base, your cat can scratch away to their heart’s content without worrying about the post toppling over. Plus, the sisal rope wrapped around the tire provides the perfect texture for your cat’s scratching needs. And as a bonus, you’ll receive a free catnip-infused kneading pad to keep your cat entertained for hours. Follow these simple instructions to assemble your own cat scratch post:
- Gather materials: recycled tire, sisal rope, sand, catnip-infused kneading pad
- Fill tire with sand for stability
- Wrap sisal rope around tire and secure with tension to second tire
- Leave space at the top for scratching
- Place catnip-infused kneading pad on top for added enjoyment
Cat Scratching Post DIY
Creating a DIY cat scratching post is an easy and fun project that you and your feline friend will love. To start, place the base where you want it to go and make sure to measure twice before drilling. If you don’t have a drill press, a hand drill or power screwdriver will work just fine. Measure the height of the post and add a couple of inches to account for the cap mounting screws. Once you have located the center point of where you want to mount your cat’s new post, attach it directly to the base and drill pilot holes through both pieces of wood. Screw in one screw on each side just enough to keep them tight together while drilling into them with your brad nailer.
DIY Cat Scratching Pad

To make your own DIY cat scratching pad, you’ll need to gather some materials. You’ll need wood for the base, top rim, and sides. Additionally, you’ll need twine or wire to wrap around the pieces of wood to create a scratch pad design. Once you’ve assembled the scratching post, secure it by screwing the pieces together with wood screws. Hang the wood on a door knob or window to let your cat go crazy. This homemade scratching pad is made from quality materials and will last longer than a cardboard scratcher. Your cat will love it, and you’ll love the money you save by making it yourself.
Summary
Creating a DIY cat scratching post can be a fun and rewarding project for you and your furry friend. By using materials such as sisal rope, wood, and carpet, you can make a sturdy and attractive scratching post that will save your furniture from damage. Remember to provide your cat with a variety of scratching surfaces and to place the post in a location that is easily accessible and appealing to your cat. With a little effort and creativity, you can make a scratching post that your cat will love.